Just now I came upstairs because I got that feeling in my hands and my heart like I ought to be doing something creative. It’s Friday night. The possibilities ticked through my head – I could do some research into 19th century knitting mills, or I could draw something, or start a sewing project. Or you could make some masks – that’s a sewing project. My brain dutifully reminds me that I could be sewing and making money at the same time if I worked on some face masks. It’s a hard offer to turn up. Sewing face masks has made up a solid portion of my income for the past year and it’s the only sort of paid work that’s even vaguely fun at 7:00pm on a Friday. On top of that, it’s surprisingly hard to find the energy for other projects. This is one of the most pronounced ways I’ve felt the drain of the pandemic – I struggle to feel creative in ways that used to feel second nature.
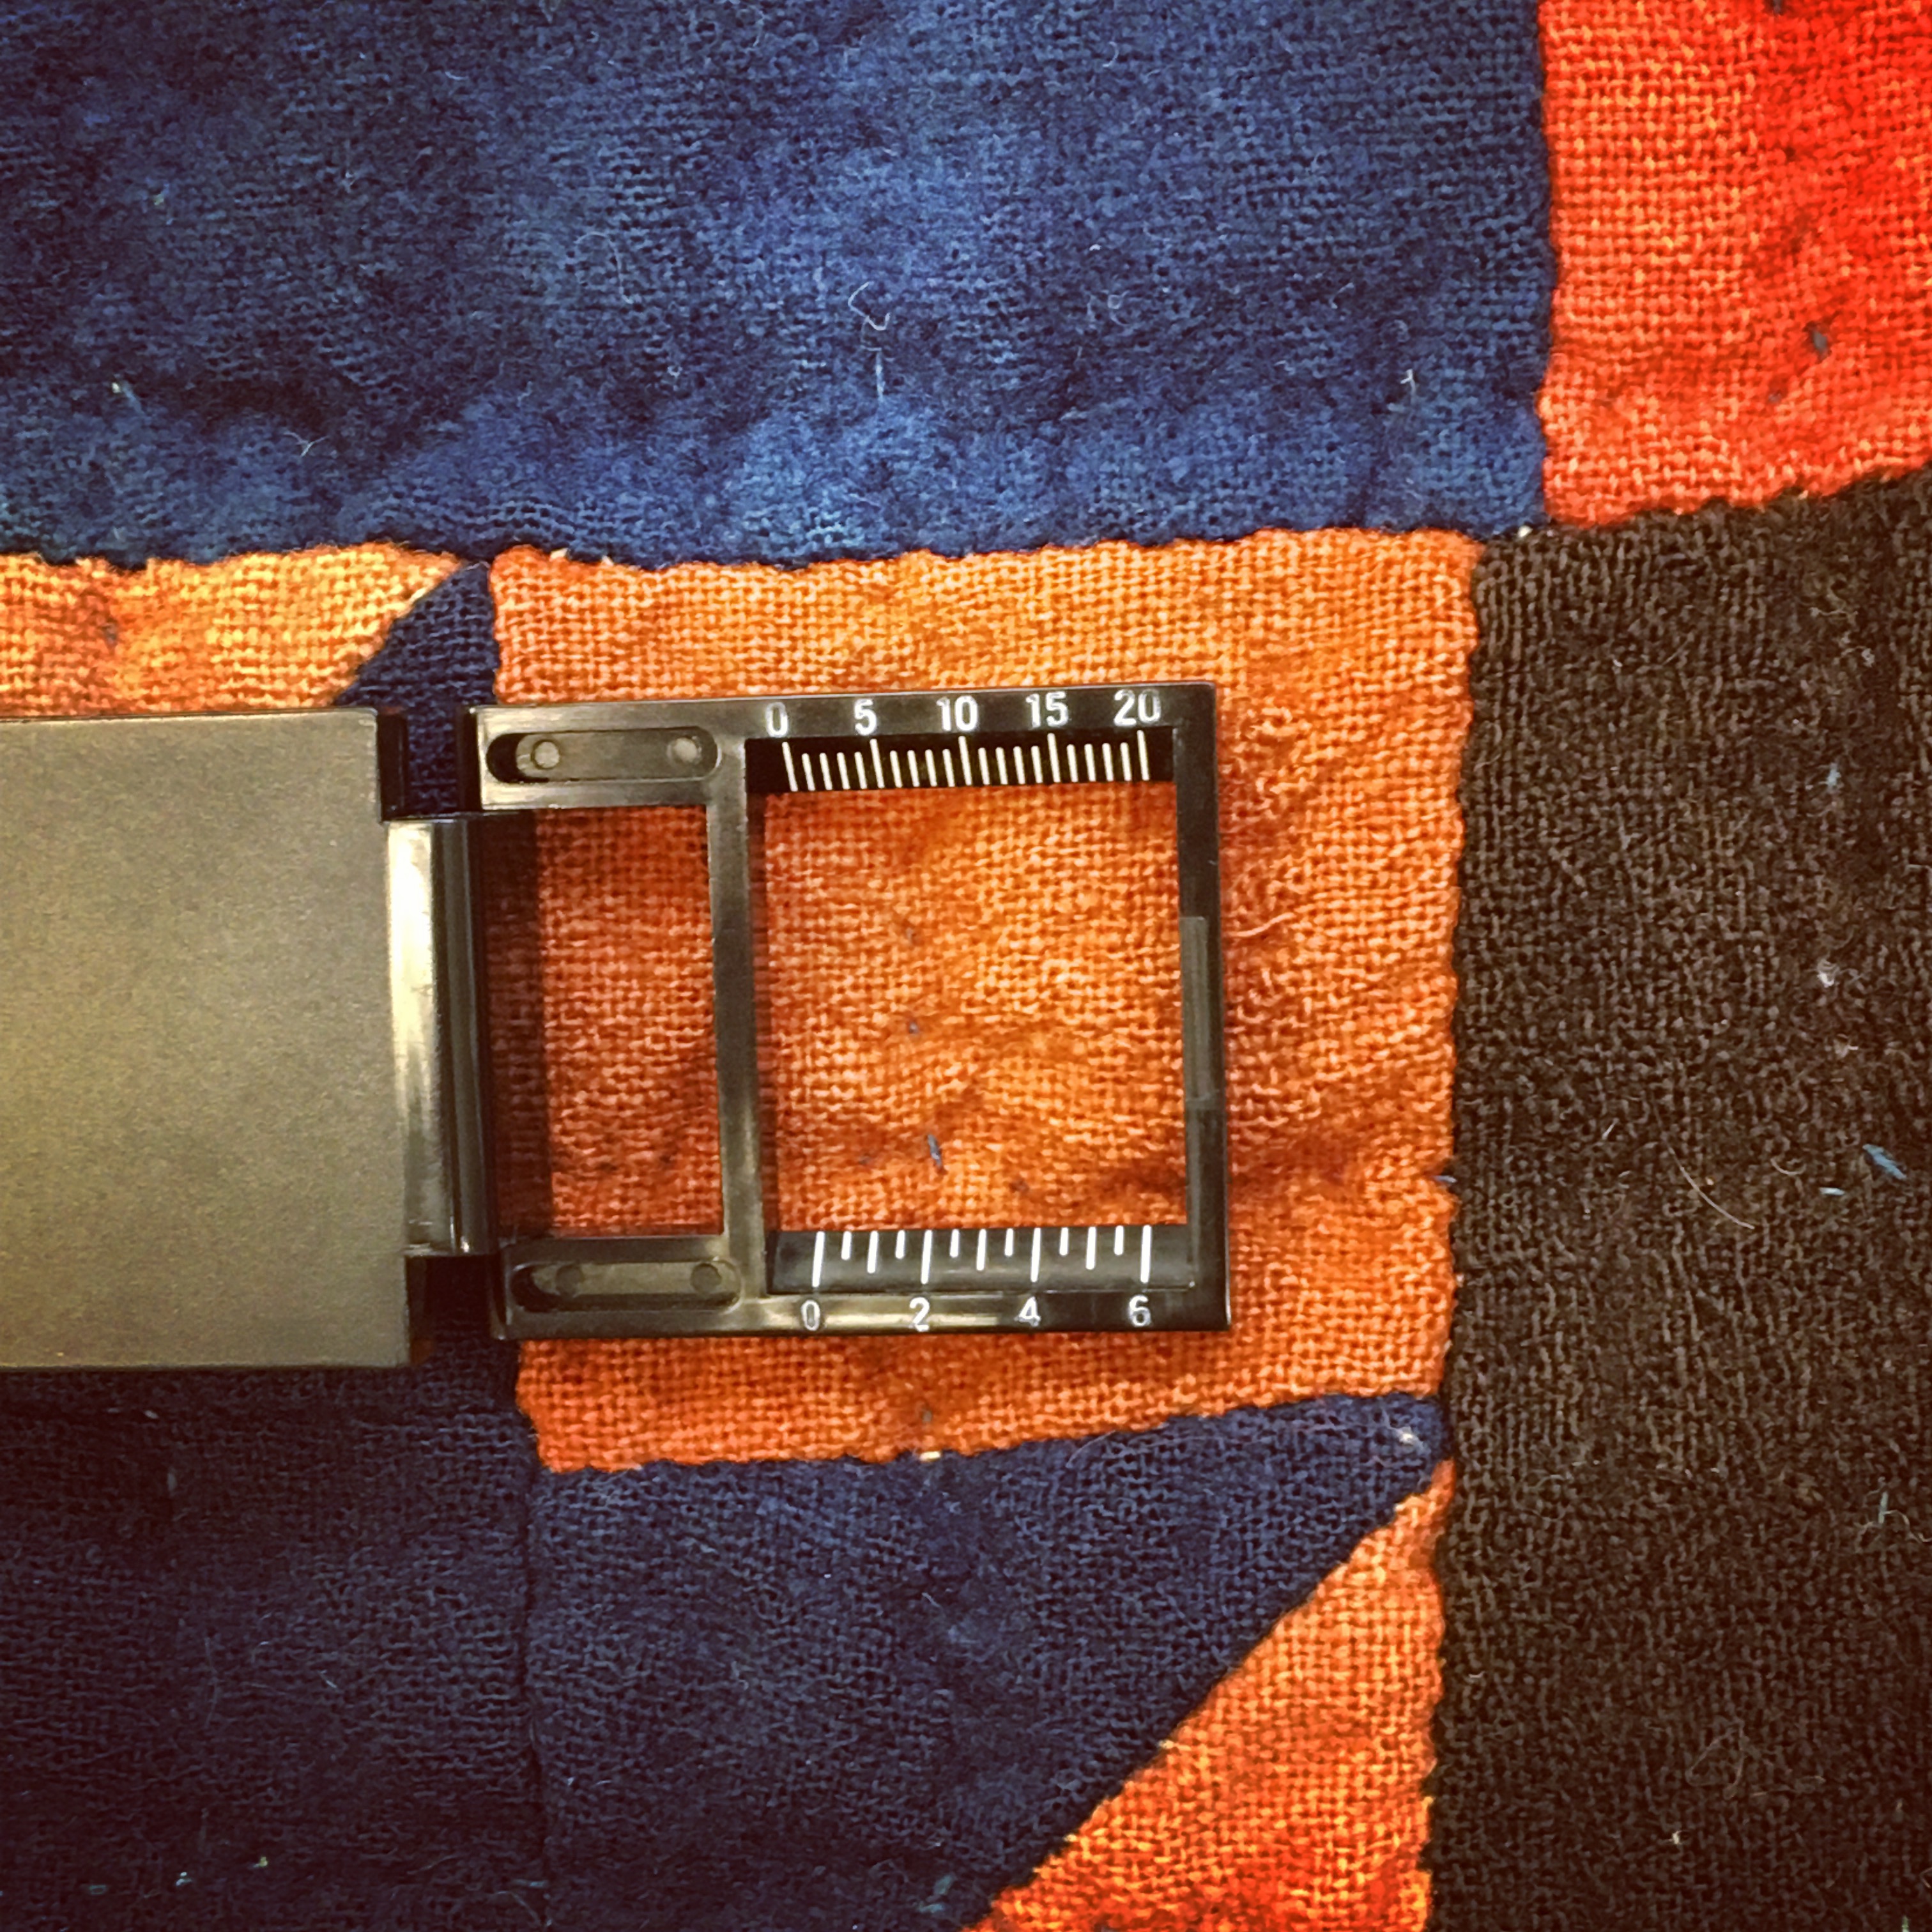
Fabric just arrived for a custom mask order.
I’ve got a custom mask order to work on tonight. Someone from Instagram has sent me a scrap of lovely block printed cotton and asked if I would sew it up into one of my Face Space Masks. The background is white, which is good news, because I can make it as part of a batch of other primarily white masks and I won’t have to change thread colors.
Making masks isn’t truly creative work, it’s really more like repetitious manufacturing. But for someone who takes pride in expert handling of materials, it’s still satisfying – soothing even. I also can’t help but think of it as a learning opportunity (research!). For someone who studies craft work, it’s hard to resist analysing what I’m doing as I do it.
It’s been a long year and as I’ve stitched, I’ve thought about mask making from a staggering number of perspectives. Last March I saw women sewers of all stripes recruited to help handle a national emergency with their sewing machines and fabric stashes. There was not, at first, any money for this labor. It was sewing: a skill learned in Home Economics; part of the Western world’s ongoing love affair with divorcing women’s “home” labor from economic value. There was an expectation that we would just help. This was the first thing I considered: mask making was a gendered thing. Gendering effects perceived economic value.
Posing with a bandolier of masks connected by their sewing threads last April.
At first I sewed a few masks for a local effort but was frustrated by the poor choice of materials and the terrible fit of the design. I stayed home, read every article I could find on fabric masks, and worked up my own pattern. Friends started asking for masks and I started selling them. First for five, then seven, then ten, then twelve dollars a piece. I intended to fully compensate myself* for my time, but at first I didn’t think to include the time it took to sell and ship masks. Here was the second thing I thought about: what my time is worth and the difference between just sewing masks and running business.
By this time I was making dozens of masks at once. I was confident in my design, but I was discovering bottlenecks and pain points in my manufacturing process. I re-thought things: it turned out there were steps I could skip without compromising quality and times when I could make many pieces at once. I’d never done this type of repetitive production work before and I spent a lot of time at my sewing machine thinking about the generations of textile laborers who have done similar through the ages. What does it mean to be “efficient” by doing the same thing 50 times in a row? It took a toll on my body and I ached more for their aching bodies. I thought about being part of this long chain of makers and where my own work fell on the spectrum which starts with craft and ends with manufacturing.
A dear friend skiing in her Face Space Mask. Numerous customers told me that my design was the best they’d found for exercise.
Fall came. I got bored of making masks but not of making money. I offered to make custom masks for folks and a friend asked if I could design a singer’s mask. The idea was a mask with more space and a structure that prevented it from being sucked into your mouth on the inhale. There were already designs out there for this type of thing, but I’d been making masks for half a year at this point and I wanted a design that I would enjoy sewing, so I came up with a pattern that replaced seaming with pleats and in so doing eliminated all but one trip to the iron. It is a good design, and not just for singers. It gave you more space for your face. I called it a “Face Space Mask.” I thought: innovation feels good. Making people’s lives easier feels even better.
It’s late April 2021. I’ve been making face masks for a year. One of the truly wonderful things about sewing work, especially the repetitive and not particularly creative kind, is that it gives you time to think. I am not glad that we’ve been living through a pandemic, and there are lots of things I would have rather spent the past year making than face masks, but I am glad to have found in that experience an opportunity to think about craft knowledge, gender, and labor. I am glad to have learned about running my own business and to have had an opportunity to make many, many people’s lives easier in one small way.
And tonight I’ve let my sewing machine rest in favor of the keyboard and this long-neglected (but not un-thought-of) blog. I am looking forward to the return of people’s smiles. I hope the creative itch that drew me to write tonight is a foreshadowing of a near future with fewer masks in it.
In the mean time, I’d hardly be the business woman I’ve grown to be if I didn’t suggest you go buy one of my masks.
—
*A few months into the pandemic a young woman I am friends with asked me about selling face masks. She was sewing masks for neighbors and she wasn’t sure how much to charge. We talked about the value of her skilled labor and the other expenses she ought to consider. I told her how much I pay myself, because I think it’s good for people to have a sense of what others earn. I’ve got many years of training and experience in sewing work. I pay myself $35 an hour, knowing that I will give 30% of that back to the government in self-employment taxes and that I do not have an employer covering the cost of health insurance. Your skill has value, friends. We live in a world that requires money. Don’t underpay yourself.
Last year I wrote a master’s thesis. I thought it was a pretty good piece of research and others agreed. Because of the breed of nerd I happen to be, that research was mostly about an activity (the craft process of fulling) and not about a particular group of people (fullers, for example); it was easy for me to do good work while not thinking too much about who exactly was doing the activity I was researching. I came across evidence of the occasional white woman or black man involved in the fulling business and I noted those instances but did not elaborate on them significantly. As it is wont to do, the written historical record mostly talked about white dudes. I knew that there was more research that could and should be done into fullers who were not male or white, but it didn’t feel directly relevant to my already overwhelming research into craft process, and my institution didn’t provide a specific incentive to look into it, so I didn’t dig very deep. I was and still am frustrated with myself for this, and I think there’s a way to encourage others to do better.
A note on the last page of Calvin Cooper’s fulling mill account book, recording the hiring of “Philip (Blackman)” to work for him for 7 months starting in March of 1809. This is the only specific reference to a presumably black worker in my ~150-page thesis. Calvin Cooper’s account books live in the collection of the Chester County Historical Society, in West Chester, PA.
While I chose to write a moderately unconventional thesis (with an entire chapter devoted to a glorified craft project I carried out in my parents’s laundry room), I am definitely a millennial, and I love nothing more than being praised for my work. It’s not that I wrote my thesis with the objective of winning a prize, but I was very much aware of the standard of excellence my institution was expecting me to meet. And that standard didn’t require the inclusion of non-white-male narratives. Rule-follower that I am, if that had been a requirement, I would have met it enthusiastically. My shame is that even though I knew it should have been a priority of mine, it wasn’t, simply because I wasn’t graded on it. The fact that my thesis failed to fully explore the stories of actors other than white men has been on my mind for at least two years. I suspect you know why I chose this moment to put it into writing.
History written by, for, and about white people makes white stories the default, and in doing so it disenfranchises BIPOC Americans by making it harder for them to locate themselves in our national narratives. (A lot of that White People History is also just plain old racist. I am not the best person to explain to you how/why this is the case but if you’re currently have a “what is she talking about?” moment, I recommend Scene On Radio’s “Seeing White” series as an excellent place to begin educating yourself.) Along with many of my museum professional/historian colleagues (as well as the current Winterthur fellows) I aspire to do better; to shape historical narratives that more accurately reflect America’s past by including and highlighting the stories of the BIPOC Americans who have not been treated fairly in the history books. As a material culturalist, I feel this mandate even more strongly. For many populations which are poorly represented in written records, material objects are some of the richest historical sources we have, and it is on us to explore and share the stories they embody. Historians have a responsibility not to perpetuate past biases. It is anti-racist to write balanced, honest history that tells EVERYONE’S story. This is something I should be doing, but I’m not as good at is as I’d like to be.
One of the projects I participated in while I was in the Winterthur Program in American Material Culture was an exhibit centered around a mahogany cabinet labeled with names of ports involved in the 18th century Atlantic slave trade. The exhibit, titled Truths of the Trade, teased out the connections between objects in Winterthur’s collection and the lives of enslaved people. This project was a fantastic example of how material culture can be used to tell a wide range of narratives.
In grad school, I understood tacitly that it would be a good thing if my work highlighted a more diverse range of voices, but I also realized that I was not risking my grades by failing to do so (privilege at its finest…). I think the fact I was not penalized for that was a mistake. I would have benefited tremendously from a column on the grading rubric for how well I explored my subject from a range of perspectives. If the one of the tenets on which the thesis prize was awarded had to do with the inclusion of non-white stories, I promise you would have found the time to prioritize that research.
While I hope that all future Winterthur fellows are more noble than I, I rather suspect that some will share my failings. To that end, I want to encourage the program administration and faculty to consider revising the standards on which academic work is graded to incentivize the inclusion of non-white voices in the student’s academic work. Help us [force us] to build the skills we need to effectively research the stories of BIPOC Americans. Foster the creation of a body of material culture literature which better expresses the historical realities of our country. And don’t feel bad for docking points on papers that fail to meet this standard. Let’s live in a world where being a historian or material culturalist means that you don’t get to skip over the history that is hard to research.
I first came across this garment while reading Carrie Brown’s wonderful book, Rosie’s Mom, on female industrial workers during the first world war. Brown’s text is peppered with fantastic images, and while most show women at work in factories in skirts or dresses, some also illustrate women in knickers, overalls, or coverall-like garments – especially when those women are working dangerous jobs where skirts might catch in machinery or knock over dangerous chemicals. Brown uses the term “womanalls” to describe the full body version of this garment, and while “overalls” or “boiler suit” actually appear to be more common, womanalls certainly does show up in period sources and has the advantage of being an entirely unique term.
From page 104 of Rosies’s Mom, by Carrie Brown, 2002.
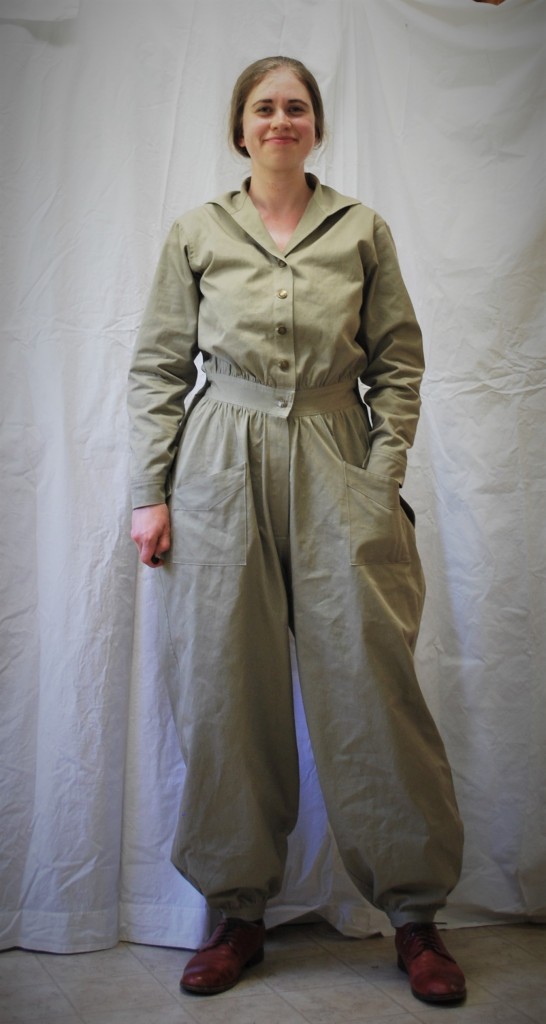
The image from “Rosie’s Mom” that captured my imagination showed two women dressed in womanalls, one of whom was standing on a ladder, her back to the camera. The wide legs of the womanalls nipped in to a thin waist, and the bodice had that simple, wide collar that is so quintessential to the 10s and early 20s. This was no auto mechanic’s coverall – this was something way cooler, and I wanted one.
The womanalls worn in that photo were wonderfully feminine, but they also embodied an ideal of practical clothing for hard-working women that I love. I read Brown’s book while doing research for my Mill Girl project, and building this garment seemed like a logical addition to that wardrobe of working women’s clothing of the early 20th century. (Though in addition to making an historically accurate version, I’m also daydreaming about a “womanall” for modern wear.)
Once I had decided I was going to make myself some womanalls, I had to do a little more research. I was able to find a single extant garment being sold by a vintage dealer. I’m very grateful for the series of detailed photographs that were included in the listing. It was a slightly different style from the garment I wanted to make, but I was able to figure out much of the construction from the photos provided. A combination of advertising images and drafting instructions in tailoring trade journals, along with my growing understanding of standard bodice block shapes for the time period, allowed me to assemble a plan for the garment’s patterning and construction.
Note: there is a reprint of a period pattern for WWI-era overalls and coveralls available for sale here. I haven’t had a chance to look at the full pattern, but if you’re interested in making your own womanalls and don’t want to draft a pattern, it would be worth looking into.
Patterning the Bodice
To create the bodice for this pattern, I adapted the shirtwaist pattern I had drafted for my mill girl outfit. It has the characteristic pigeon-breasted look of most early 20th century shirt waists: the fullness in the pattern is pushed to the front of the waist, eliminating the need for darts. (For more on period patterning, see my blog post on early 20th-C dressmaking resources. To create this look from a modern bodice block you can rotate the bust dart to the center front area of the waistline and then simply gather the fullness into the waistband.) One of the advantages of recycling the shirtwaist pattern was that I had already spent a good deal of time fussing with that pattern to create a sleeve with a wide range of motion: for both the shirtwaist and the womanalls, I needed to be able to reach my hands over my head without the sleeve pulling up the waistline.
The front bodice shape (lower left) shows the dramatic pigeon-breasted shape typical of this era
Even reaching far overhead, the womanalls don’t ride up significantly because of the loose cut of the sleeves and the relatively high armscye.
Though I knew I would likely wear this garment with the sleeves permanently rolled up, I patterned long sleeves with simple cuffs. Instead of separate cuff plackets, I left open the bottom three inches of the sleeve seam, reasoning that these garments were work wear, constructed using basic utilitarian techniques, and that a separate sleeve placket would have been deemed unnecessary.
Patterning the Legs
As I planned out how I would draft the trouser portion of the garment, I drew on my own understanding of the relationship between different parts of a pants pattern, developed through years of making my own pants and through patterning many many pairs of men’s breeches while working at Fort Ticonderoga.
This image of workers at the Gorham Manufacturing Company in Providence, RI, in 1918 shows womanalls with a very baggy seat to the right. Image from page 59 of Rosies’s Mom, by Carrie Brown, 2002.
The legs on these garments (and other women’s bifurcated legwear of this era) tend to be very full. My assumption is that this was a compromise between the practicality of trousers and the need to obscure women’s legs and bums. With a coverall, however, the other challenge is to create a garment in which the wearer has a full range of motion. (You don’t want to get a wedgie every time you squat, for example.) This means including a lot of material in the seat. However, it isn’t always necessary to have the same amount of material in the front of the crotch. The seam from waist to crotch is called the “rise” and if the front rise is significantly shorter, the extra material in the seat tends to pouch out, whereas if they front and back rise are closer to the same length (the back rise will always need to be a little longer, so this is definitely relative) the crotch of the pants will drop lower and the bum will be less obvious. There are period photographs showing womanalls with both a pouchy seat and a dropped seat. Curious about what a fuller seat and shorter front rise would look like, I drafted my garment along those lines, and the result was a great range of motion and a noticeably baggy bum. When I make this pattern again, I will lengthen the front rise to experiment with that variation.
Construction Details
For me, the most interesting detail on this garment was the butt flap. The whole back of the trousers unbuttons, allowing the wearer to go to the bathroom without fully disrobing. This means that while the waistband goes all the way around the bodice of the garment, only the front of the trousers is sewn to it. The back portion of the trousers is sewn to a separate waistband, with plackets set into each side seam. The drop is 11” on the sides, and that is plenty of room for me to easily go to the bathroom without having to disrobe. Bonus points for the fact that I can wear it over my union suit, which also has a built-in crotch opening to facilitate going to the bathroom.
I also love the pocket styling on these garments. One particular style of pocket showed up on multiple examples and was easy to emulate.
At the ankle/knee, the womanalls are gathered to a band and can be buttoned at two different sizes. (The original showed three buttons here, but I simply sized mine for the two sizes I knew I needed). The legs can either fit snuggly below the knee, at which point the trousers blouse out like knickers, or be fastened on the tighter button around the ankle.
Finally, the pair of vintage “womanalls” had metal buttons like those you might seen on blue jeans. These buttons come with a small rivet tack and are attached by means of either a hammer or a hand press. The presses are useful for setting all sorts of hardware, and so this project became my excuse to finally get one. There are a total of 18 buttons on the coverall, as well as two snaps on the center-front fly, which I presume were used because a button fly would look too masculine.
What’s Underneath?
When I first started planning this garment, I knew I would wear it over my union suit (there was something very pleasing about the idea of an outfit consisting of two full body garments in which you could still to the bathroom), but I admit that I haven’t quite figured out what else ought to be going on under there. The womanalls are a bit… drafty, with just modern undergarments. They feel great with just the union suit underneath, but that certain doesn’t provide all that much support in the bust. They also feel pretty good with my corset and a corset cover on, and so far that hasn’t seemed to impede my activity or had a negative effect on my physical comfort, though I admit I have yet to work a shift on the munitions factory floor in this getup. There is period commentary on why one should not wear a corset in this context, and to me that suggests that some women did, and others did not. Sometimes habits like that are hard to break. If you have any sources which might shed more light on what you could be expected to wear for undergarments with an outfit like this, I would love to see them.
The back fall fully unbuttoned, showing the lower half of my corset beneath. I wonder if women who chose to wear corsets under these work garments wore yet another layer (drawers – on top of them to protect their corset from the rough works garments.
A note on foot/legwear: I’ve seen images of women in leather boots, as well as leather boots with kid or canvas tops, heeled shoes, and canvas shoes that we would call tennis shoes or keds today. In general, they seem to also be wearing black stockings. I’m still on the hunt for the perfect footwear for this impression and the shoes I’m wearing in the photos are very much a stand-in.
The first piece of clothing I ever sewed myself was a shirt made out of knit fabric. I must have been seven or eight, and when I told my parents I wanted to sew something to wear, my mother told me I needed to get a pattern. I told her that no, I didn’t. She was dubious, but my father was game, and we just went ahead and figured it out. As I recall it had raglan sleeves and we accidentally sewed one of them on inside out. For my twelfth birthday, I got pattern drafting lessons from a local designer. I am not sure I’ve ever sewn myself a garment from a commercial sewing pattern.
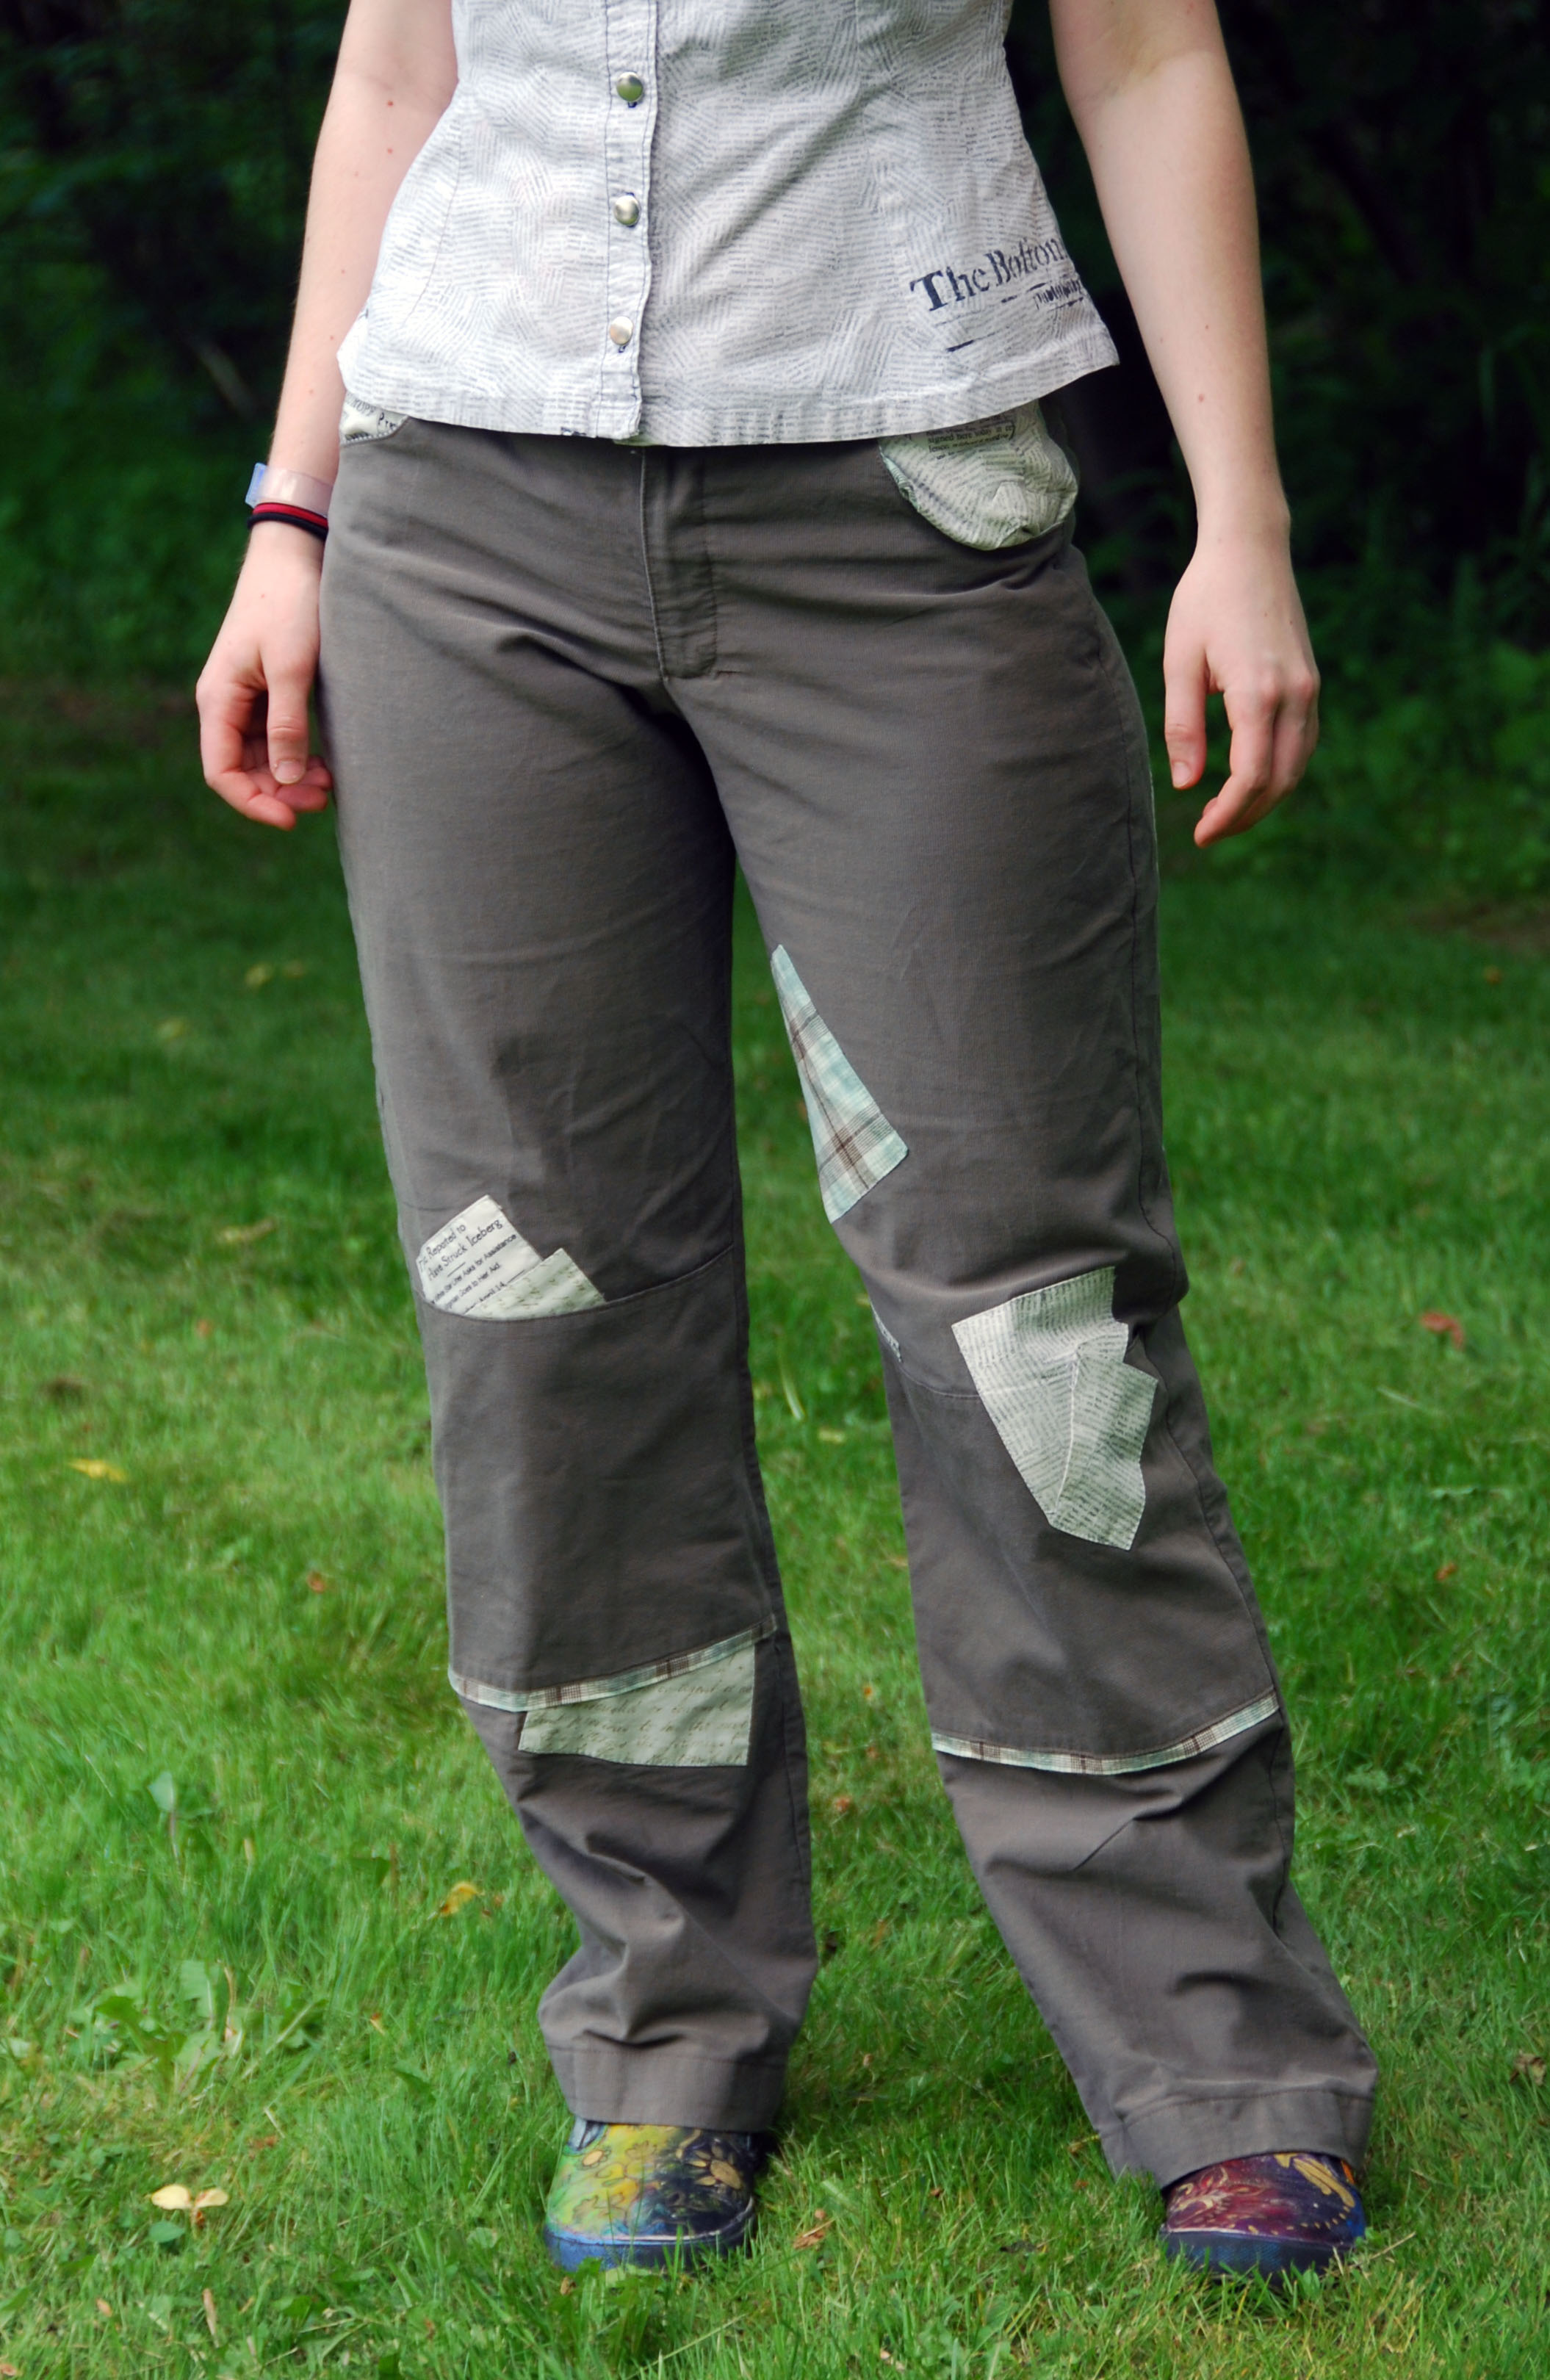
I made these pants in my teens, after finding three separate fabrics with printed text on them – two of which looked like newspaper. The idea was that it would look like bits of paper were poking out of the seams. I donated these pants to the local thrift shop a couple of years ago. Much to my amusement and delight they were deemed worthy of the window display!
By the time I was in 9th grade, I was making a significant portion of my own clothing from my own patterns – including an impressive range of comfortable but unflattering pants. Always, my patterns started one way, and then changed. Each successive garment off the same model allowed me to refine the fit. One of the two pants patterns I still use today started as a pair of pants made from four rectangles and a crotch gusset. Slowly, I refined the shapes and added curves, darts, pockets, a fitted waistband and a fly. Eventually, in college, I took courses in drafting and draping, but I was already mostly wearing clothes I’d made myself. Today, I still modify old pattern into new styles or to fit my 29-year-old body, which isn’t quite the same shape it was when I was 15.
Earlier this week I finished a dress made from a pattern which I’d originally drafted back in 2008 (when I was a junior in high school). Back then I labeled the pattern “Basic Sleeved Summer Dress.” My goal had been an uncomplicated, comfortable dress with a relaxed fit that still made a point about the wearer having a waist.
To date, I’ve made four dresses using variations on this pattern. The first at the time that I drafted the pattern (pink and orange floral), then another, with only minor changes to the neckline and sleeves, in 2009 (blue with orange belt).
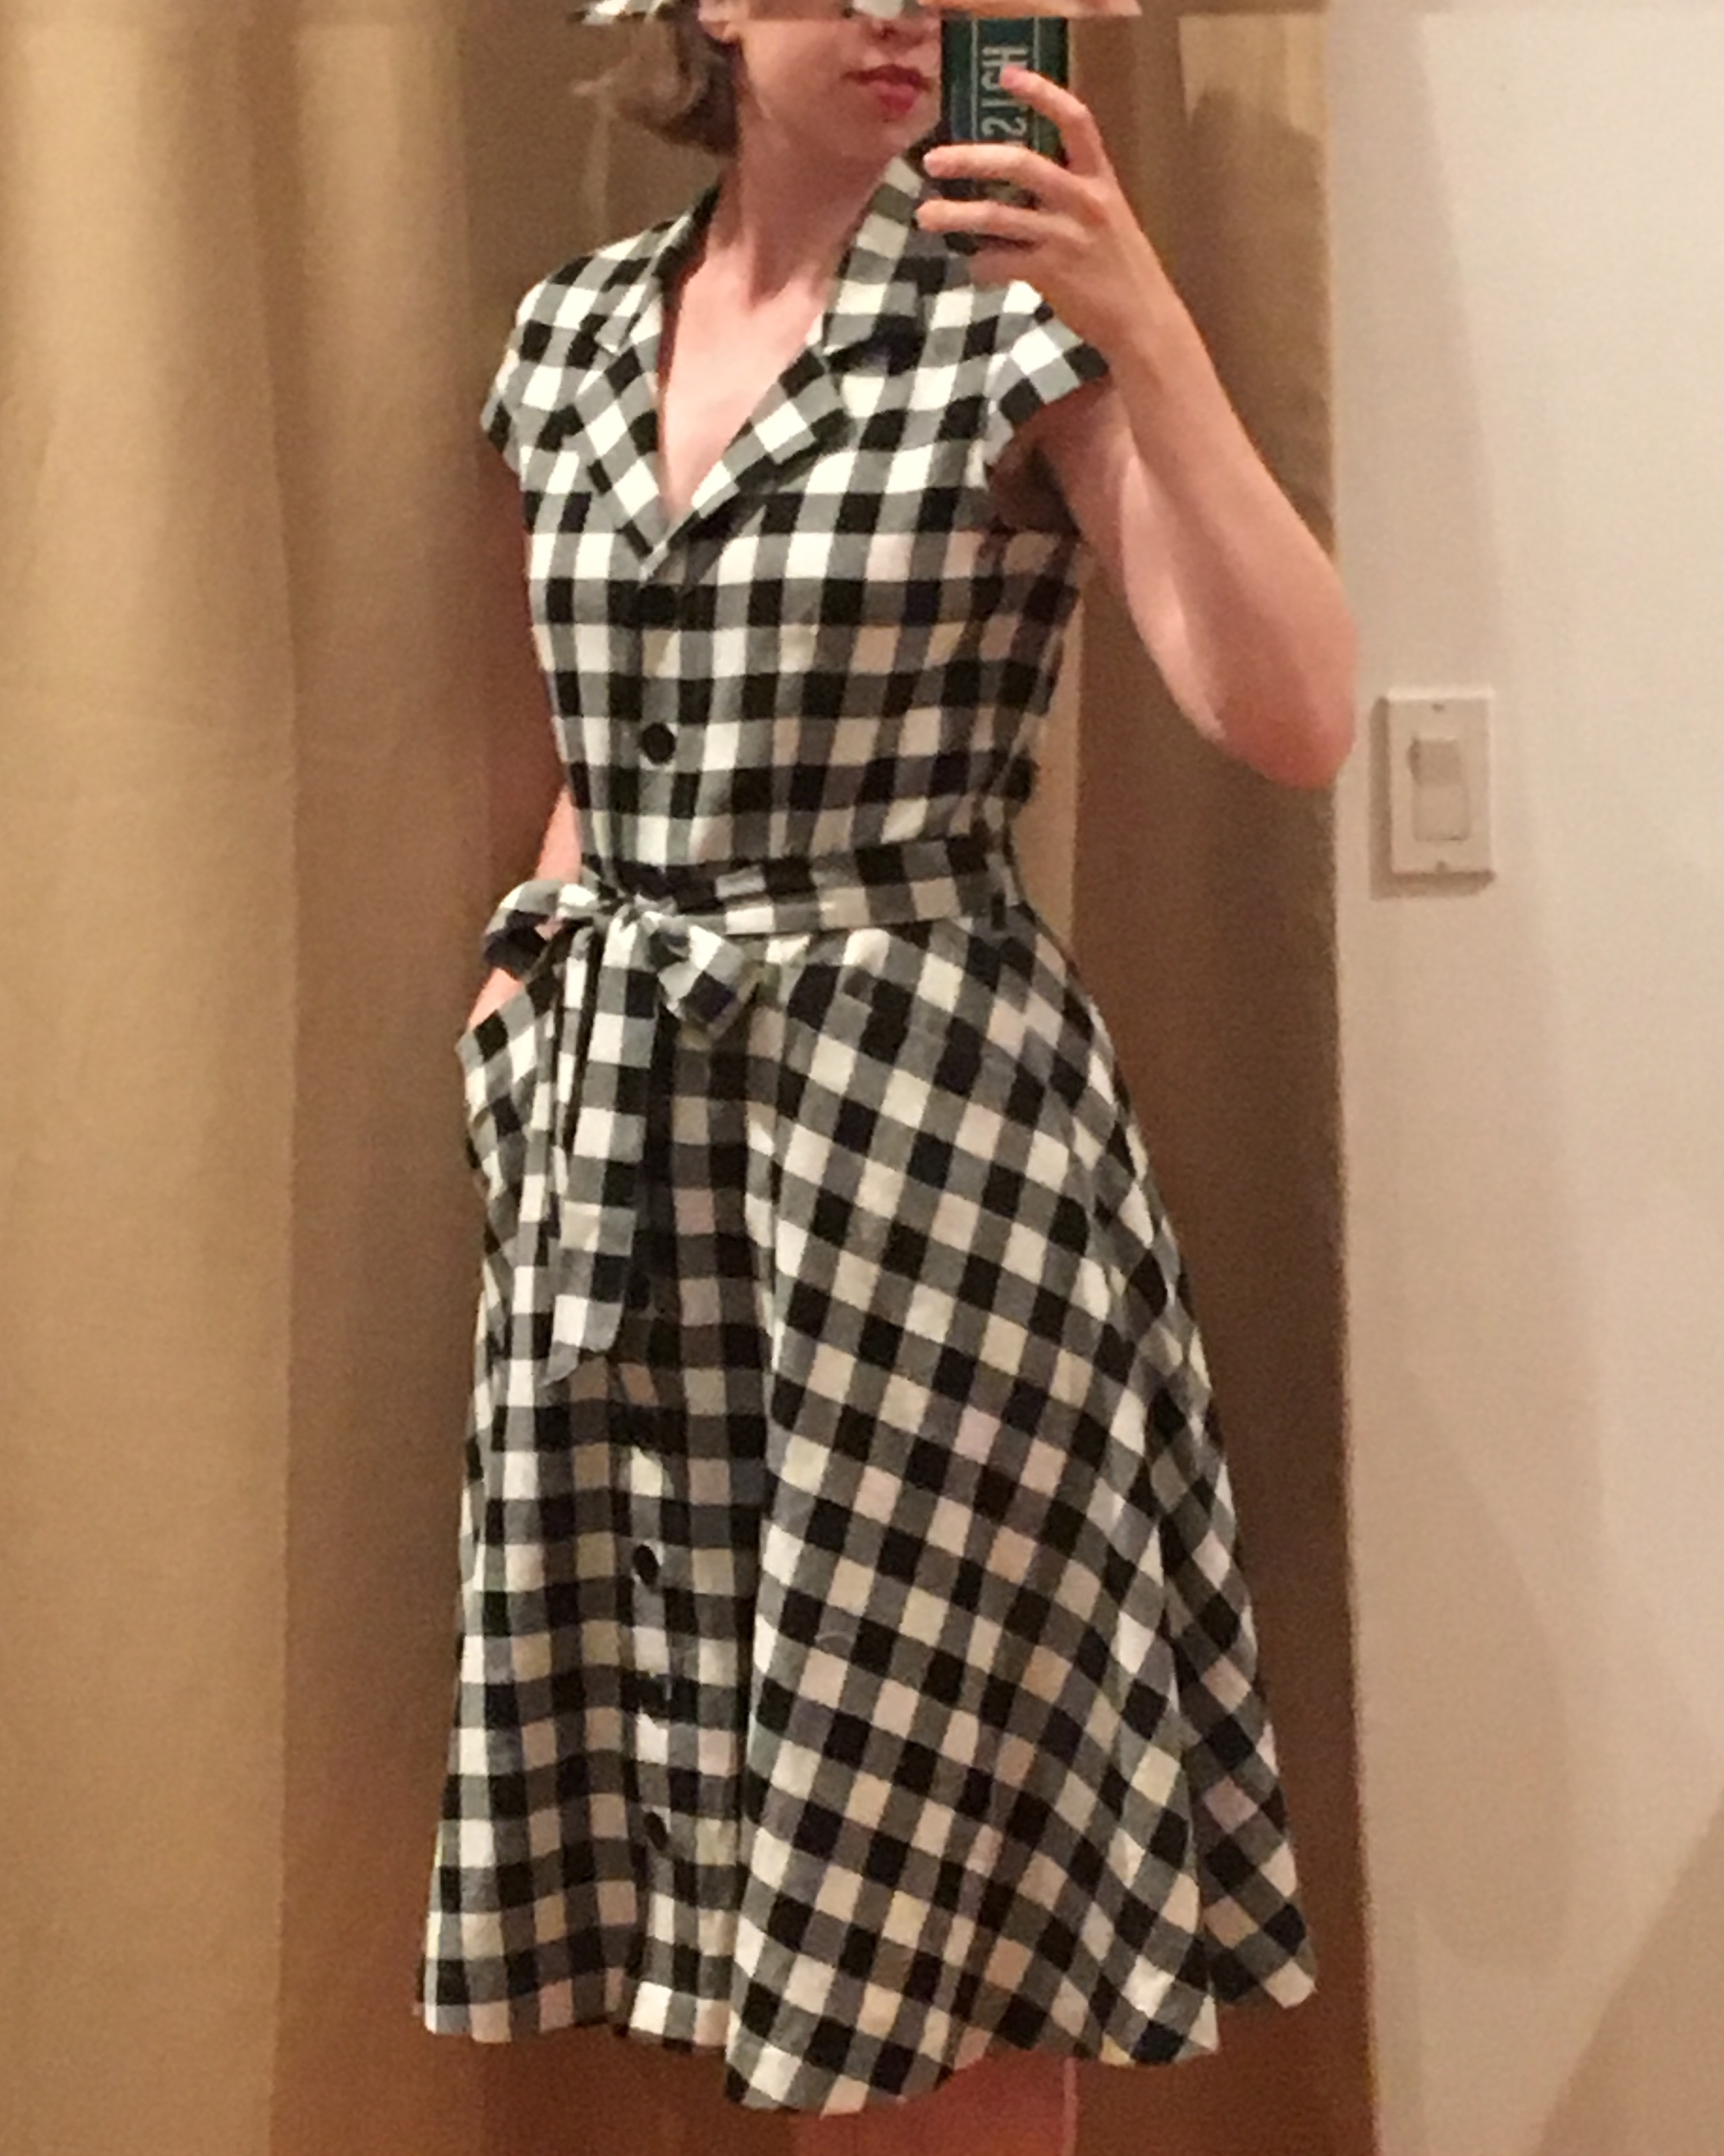
Version 3 – 2018
Two years ago I happened across the pattern again while looking for something to do with a nice piece of black and white rayon gingham which my mother had found at a garage sale. The Basic Sleeved Summer Dress had the bones of what I was looking for, so I used it as a starting place, but made a number of modifications, repairing some of the “rookie mistakes” I’d made as a teen: poorly placed darts, a wonky shoulder line, and a too-high waist. I also added a collar, made a new sleeve, and made a pattern for the skirt – the original dress had simply had a diagram for how to cut a half-circle skirt from a 60” wide piece of fabric. This time I wanted pockets*, and I also wanted to carefully pattern match-the checks, both of which required a skirt with side seams.
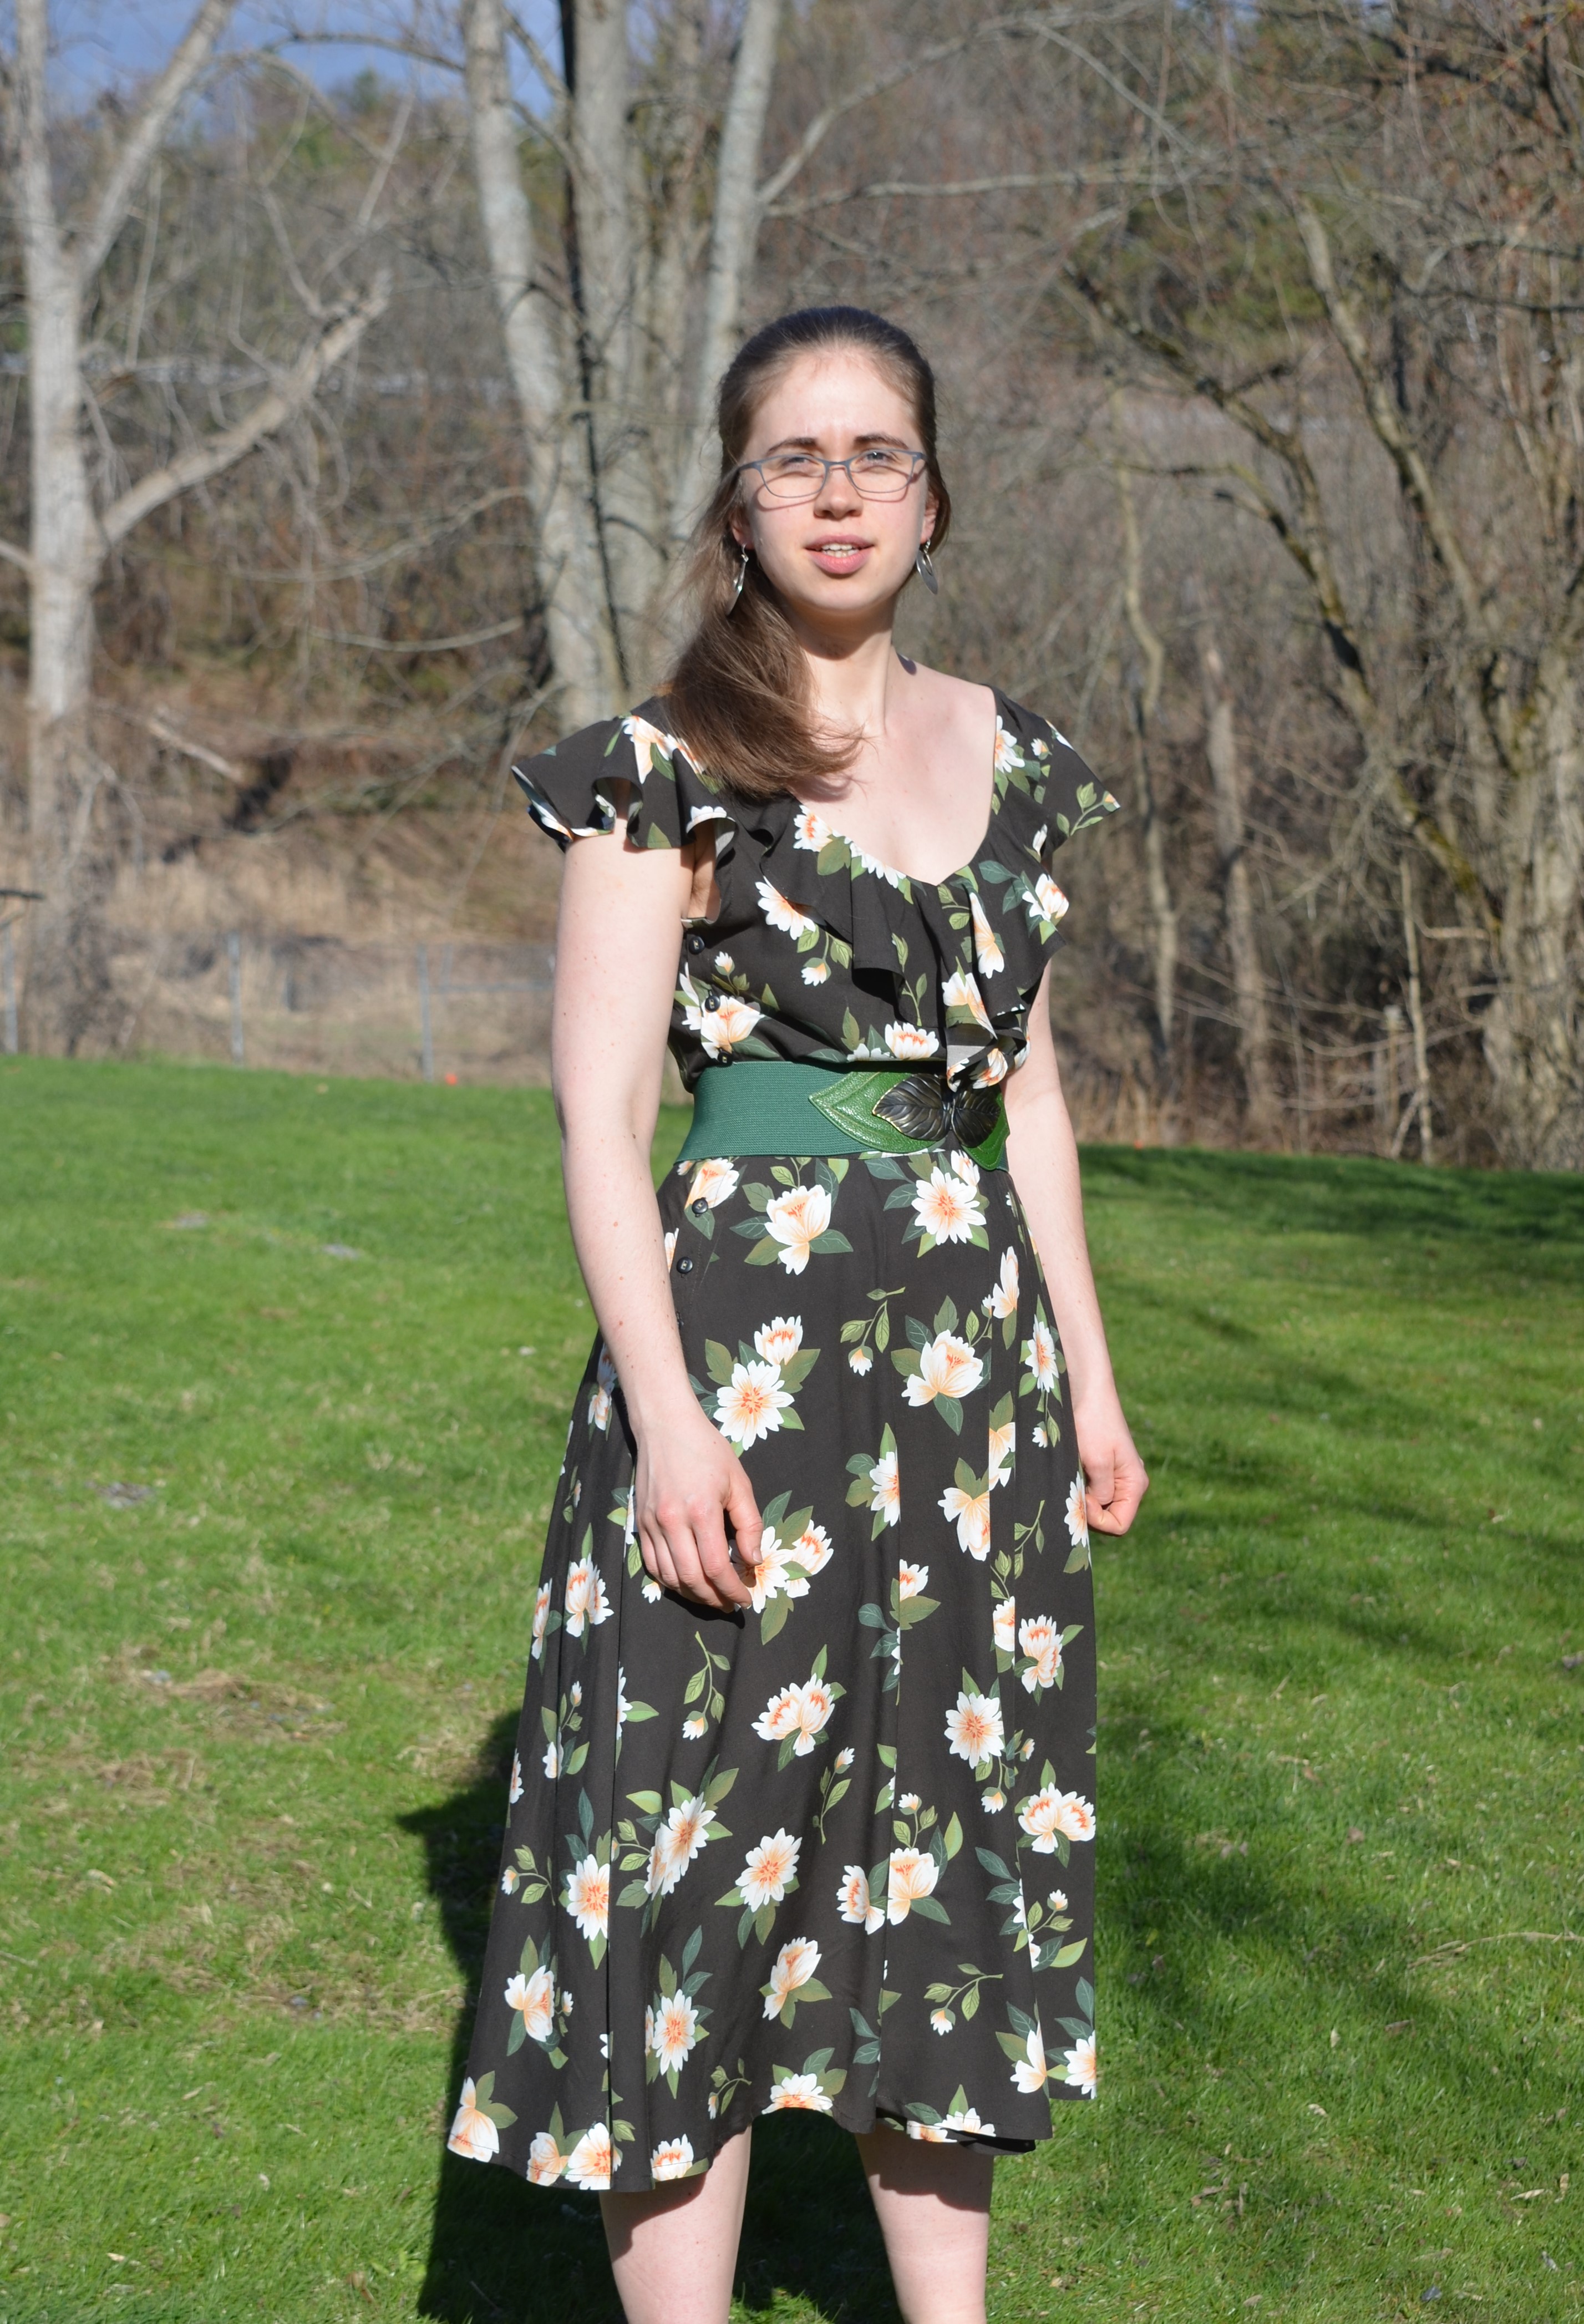
This fall, I bought a few yards of a dark brown rayon printed with large white flowers from Notion, the new independent fabric store in Montpelier. It was the type of fabric where it would be a sin not to take advantage of its natural drape, but I couldn’t decide quite what I wanted to do with it. When my sketches finally resolved into a design for a flowing dress with ruffled caps sleeve and neckline, I realized that I could adapt the pattern for the gingham dress once again. Fundamentally, I still want the same things from my summer dresses: a comfortable fit, flattering line, and a little sun protection for my shoulders.
Variation 4 – 2020
I changed the neckline and sleeves, moved the closure from center front to the side, and added a waistband. When I laid it out on my fabric, I lengthened the skirt simply by eyeballing a few additional inches of length beyond the edge of the pattern when I cut it out. I finished the dress a few days before my birthday only to realize that the very first iteration of this pattern has also been completed just in time for a birthday picnic.
The thing I love most about making my own garments (after the fact that they actually fit, that is), is the threads of connection that run between them: each one represents a stage in my own skill, or sense of style. I almost never forget where I bought apiece of fabric, or the idea which inspired a particular garment. What I like about this series of four dresses is how it illustrates this ongoing narrative of craftspersonship I am constantly having with myself as I create, refine, and make again.
*Today my philosophy is that there is no such thing as a successful garment design that doesn’t have pockets. I don’t care if it looks nice, if there’s no where for my lip balm, five dollars, and a cell phone, it doesn’t work.
I was hoping that at this time this spring I’d be taking my mill girl presentation to libraries around the state, but alas! Instead I am confined to the types of work I can do at home as we all wait out the coronavirus pandemic. However, this does mean that I have time for another project I’d been meaning to do: putting together a list of the online costuming resources I gathered while working on my working-class mill girl impression circa 1920.
I’ve gathered a number of dress making manuals and catalogs from the teens and twenties which are available free online. These will be useful to historical costumers, as well as dress researchers, or anyone interested in the clothing trades, or even women’s general or vocational education of the early 20th century.
Catalogs of the Sears Roebuck and Company:
Page 339 from the Spring, 1922 Sears Roebuck Company Catalog
I consulted Sears Roebuck and Company catalogs extensively during my research because of the amazing detail and variety they illustrate. These catalogs are also great for looking at more than just dress styles. They allow you to compare the relative cost of buying the same garment in different styles and materials. You can also get a sense of exactly how many different choices were available for something such as, say, women’s undergarments. You will also find sections covering shoes, hats, knitwear, jewelry, furs, etc. I found it interesting to look at the yard goods section as I was determining what fabrics might be suitable for different garments.
The one drawback of using these catalogs is that they are not organized for efficient online searches. Often north of 1000 pages, you will need to spend a good deal of time “flipping” through pages to find what you are looking for. Once you find the section you are looking for, note down the page numbers to save yourself time next time. (Note: If you know of other digitized mail-order or dress catalogs from this era, please let me know, as I’d be glad to add them to this list.)
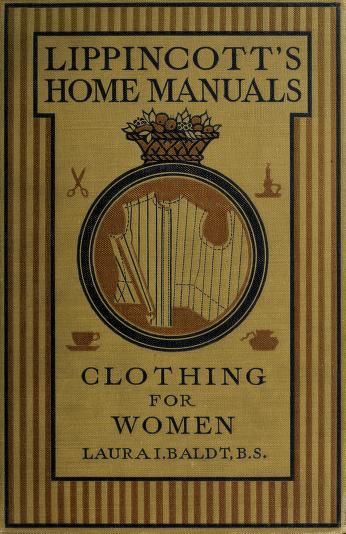
A comprehensive manual for women’s clothing. It includes wardrobe budgeting; information on design and color; basics of pattern drafting (the standards of this era being patterns for shirtwaists, skirts, and underthings. These are found in most books of this type); basic sewing instructions; instructions on how to do lace insets. It also includes detailed instructions for the construction of corset covers and petticoats, blouses, shirtwaists, and skirts. A wide variety of specific techniques for things like pockets, hems, plackets, and collars are described and illustrated, as are decorative techniques such as tucks, piping, and embroidery.
In-depth instruction into dress patterning and construction. This book illustrates many different 1920s styles, cuts, and construction methods. It also has a section on making ribbon flowers.
By Mary Brooks Picken. Woman’s Institute of Domestic Arts and Sciences. 1923.
This volume is set up to walk you through making tailored women’s garments. Each of the topics mentioned in the title is handled in its own section. “Miscellaneous Garments” includes things such as the wedding trousseau, sports and bathing costume, and some basics of men and boy’s clothing, including shirts and, inexplicably, santa suits.
This book really is a textbook. It is divided into two sections: one on the home and the second on clothing. The latter discusses textiles, dress history, how to use a sewing machine, patterning, sewing, how to budget your wardrobe, and the care and maintenance of clothes. If you are looking for information on what a young woman ought to know about clothing in the mid-1910s, this would be a good place to start.
By Martha Van Rensselaer, Flora Rose, and Helen Canon. 1919.
A manual specific designed for rural homemakers. This book covers household management, and includes a pretty significant cookbook section, in addition to the section on clothing construction and maintenance.
—————————————————————————-
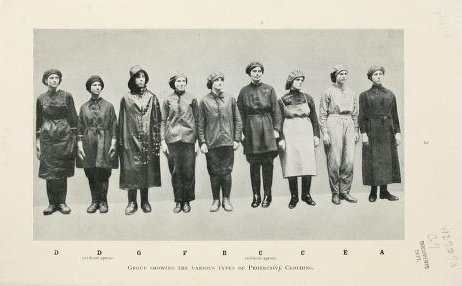
Bonus Content! Since the project I did this research for was about working-class women’s clothing, including work-specific garments, here is a British pamphlet describing various types of protective clothing for women – from waterproof aprons to boiler suits. It includes a table for which types of work require which types of gear. Illustrated with photographs:
As a kid, I’d have told you that homeschooling could solve a lot of the world’s problems, but I admit I never imagined a pandemic would be one of them. However, it looks like a whole lot of people are now embarking on the adventure of educating their children at home as part of a global effort to halt COVID-19 in its tracks. As someone who thrived being homeschooled as a child, I want to share a few words of, if not wisdom, then at least encouragement.
First of all – and you’re going to have to trust me on this – it doesn’t really matter what you learn, or how you learn it. There are many ways of homeschooling. Not interested in forcing your kids to do stuff? Neither was my dad – google unschooling and see what you think. There also many different ways to learn. Just because the school does it one way, doesn’t mean you have to. And just because they were planning on covering the multiplication tables, how volcanos work, and the revolutionary war in the next 3 weeks, doesn’t mean you’re going to succeed in covering those topics at home with your kid. So maybe don’t even try.
Me wearing 18th century stays I made for American History credit my sophomore or junior year of high school.
The objective here, really, is to keep everyone sane while locked up in the house together, right? That’s going to be a lot more likely to happen if everyone is engaged in a project. The key word here is engaged – make it a project which springs forth from some predisposition or prior interest. Do you know what I did instead of taking a history class in high school? I researched and sewed a pair of eighteenth-century stays. (I have, in fact, never taken a comprehensive U.S. History course, and I’m a historian!) Skip math and physics in favor of an afternoon around the dining room table, jointly re-designing your current house to be better suited to the needs of your family in self-insolation. Take a pass on the essays and write a story, a poem, an op-ed for the local paper, or skip the writing entirely and draw something. It might be harder than usual to get physical exercise while cooped up in the house, but you have a unique opportunity to exercise parts of your brain that don’t usually get to stretch at school.
If someone in the family has a question, turn it into a research project. Where is Iran on a map anyway? How do vaccines work? What did people do during the bubonic plague?
Start off by getting really, really bored. Many families who are transitioning out of traditional school and into homeschooling or unschooling take time off – often months – to not do any school at all. Without anything you have to get done, life can get kind of boring, and that’s the point. After being really bored, learning stuff starts to feel appealing again. So make the response to “I’m bored” be “Ok, what do you want to learn about?” and go from there.
Let kids teach themselves. One of the most common comments about young adults who were homeschooled is that they are really good self-motivators. That comes from taking responsibility for our own learning. If, like me, you discover at age ten that you have a really keen interest in colonial American dress, which is not shared by your parents, you get really good at finding and investigating your own sources. Trust me, this is a skill which is many times more valuable than whatever the fifth-grade class was going to cover next week while preparing for a standardized test.
My brother and I building an igloo, circa 2002 – learning about physics, weather, and other cultures!
You may find that it is not helpful to draw definite boundaries between work, play, and school. Work around the house and the yard can be schoolwork/ Gardening becomes plant biology; cooking becomes chemistry; and laundry a chance to talk about history and women’s studies. Play can also be schoolwork. Think dress-up as theater or social studies; sports as physics; card games as math (when else, after all is your child going to learn to count cards and cheat a blackjack?). Without firm boundaries between these activities, it becomes apparent that we learn from everything we do. Also, it’s a win-win for everyone when kids get school credit for doing chores.
With all of that in mind, I’ve got a suggestion for your first unit of study: collectively, design your ideal education. Everyone (parents, kids, anyone else you live with, the dog) gets to describe/discuss/draw/write about their ideal education. What would they learn? How would it be assessed? What would it enable them to do?
Maybe the perfect education looks like never having to take another test. Maybe it looks like lots of discussion and no homework. Maybe it looks like super-hero school, where the classes are all in things like “emergency first aid” or “secret-hideout construction, 101.” Maybe it looks like 4 hours a day where the kids are empowered (and required) to find answers or solutions to all their own questions or problems. This last possibility means that parents have some time to themselves, but also have to respect the solutions arrived at by the kids.
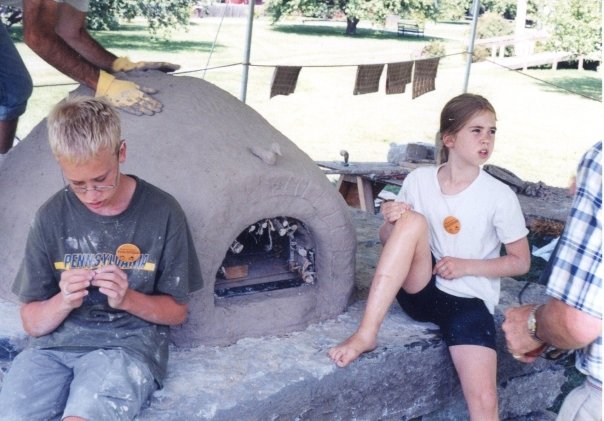
Volunteering to help build a bake oven at Shelburne Museum. (My first big museum experience, and one which launched me into a career of museum work.)
I think you will find that there is an element in everybody’s concept of ideal education that can be incorporated into your homeschooling. The act of designing school together will also give everyone a sense of ownership and responsibility over what they learn. That is perhaps the most valuable thing that can be learned while homeschooling.
I’m excited to announce that I’ll be teaching a class on how to conduct research about historic textiles at the Marshfield School of Weaving, in Marshfield, Vermont, between Friday May 8th and Sunday May 10th. This is a great opportunity for craftspeople looking to gain the skills they need to research historic textiles or textile processes, for historians seeking to branch out into material culture, and for museum professions who want to brush up on their knowledge of historic textiles.
You can find more details about the class from the MSW’s online course listings. Be sure to check out the other amazing classes on offer while you are there!
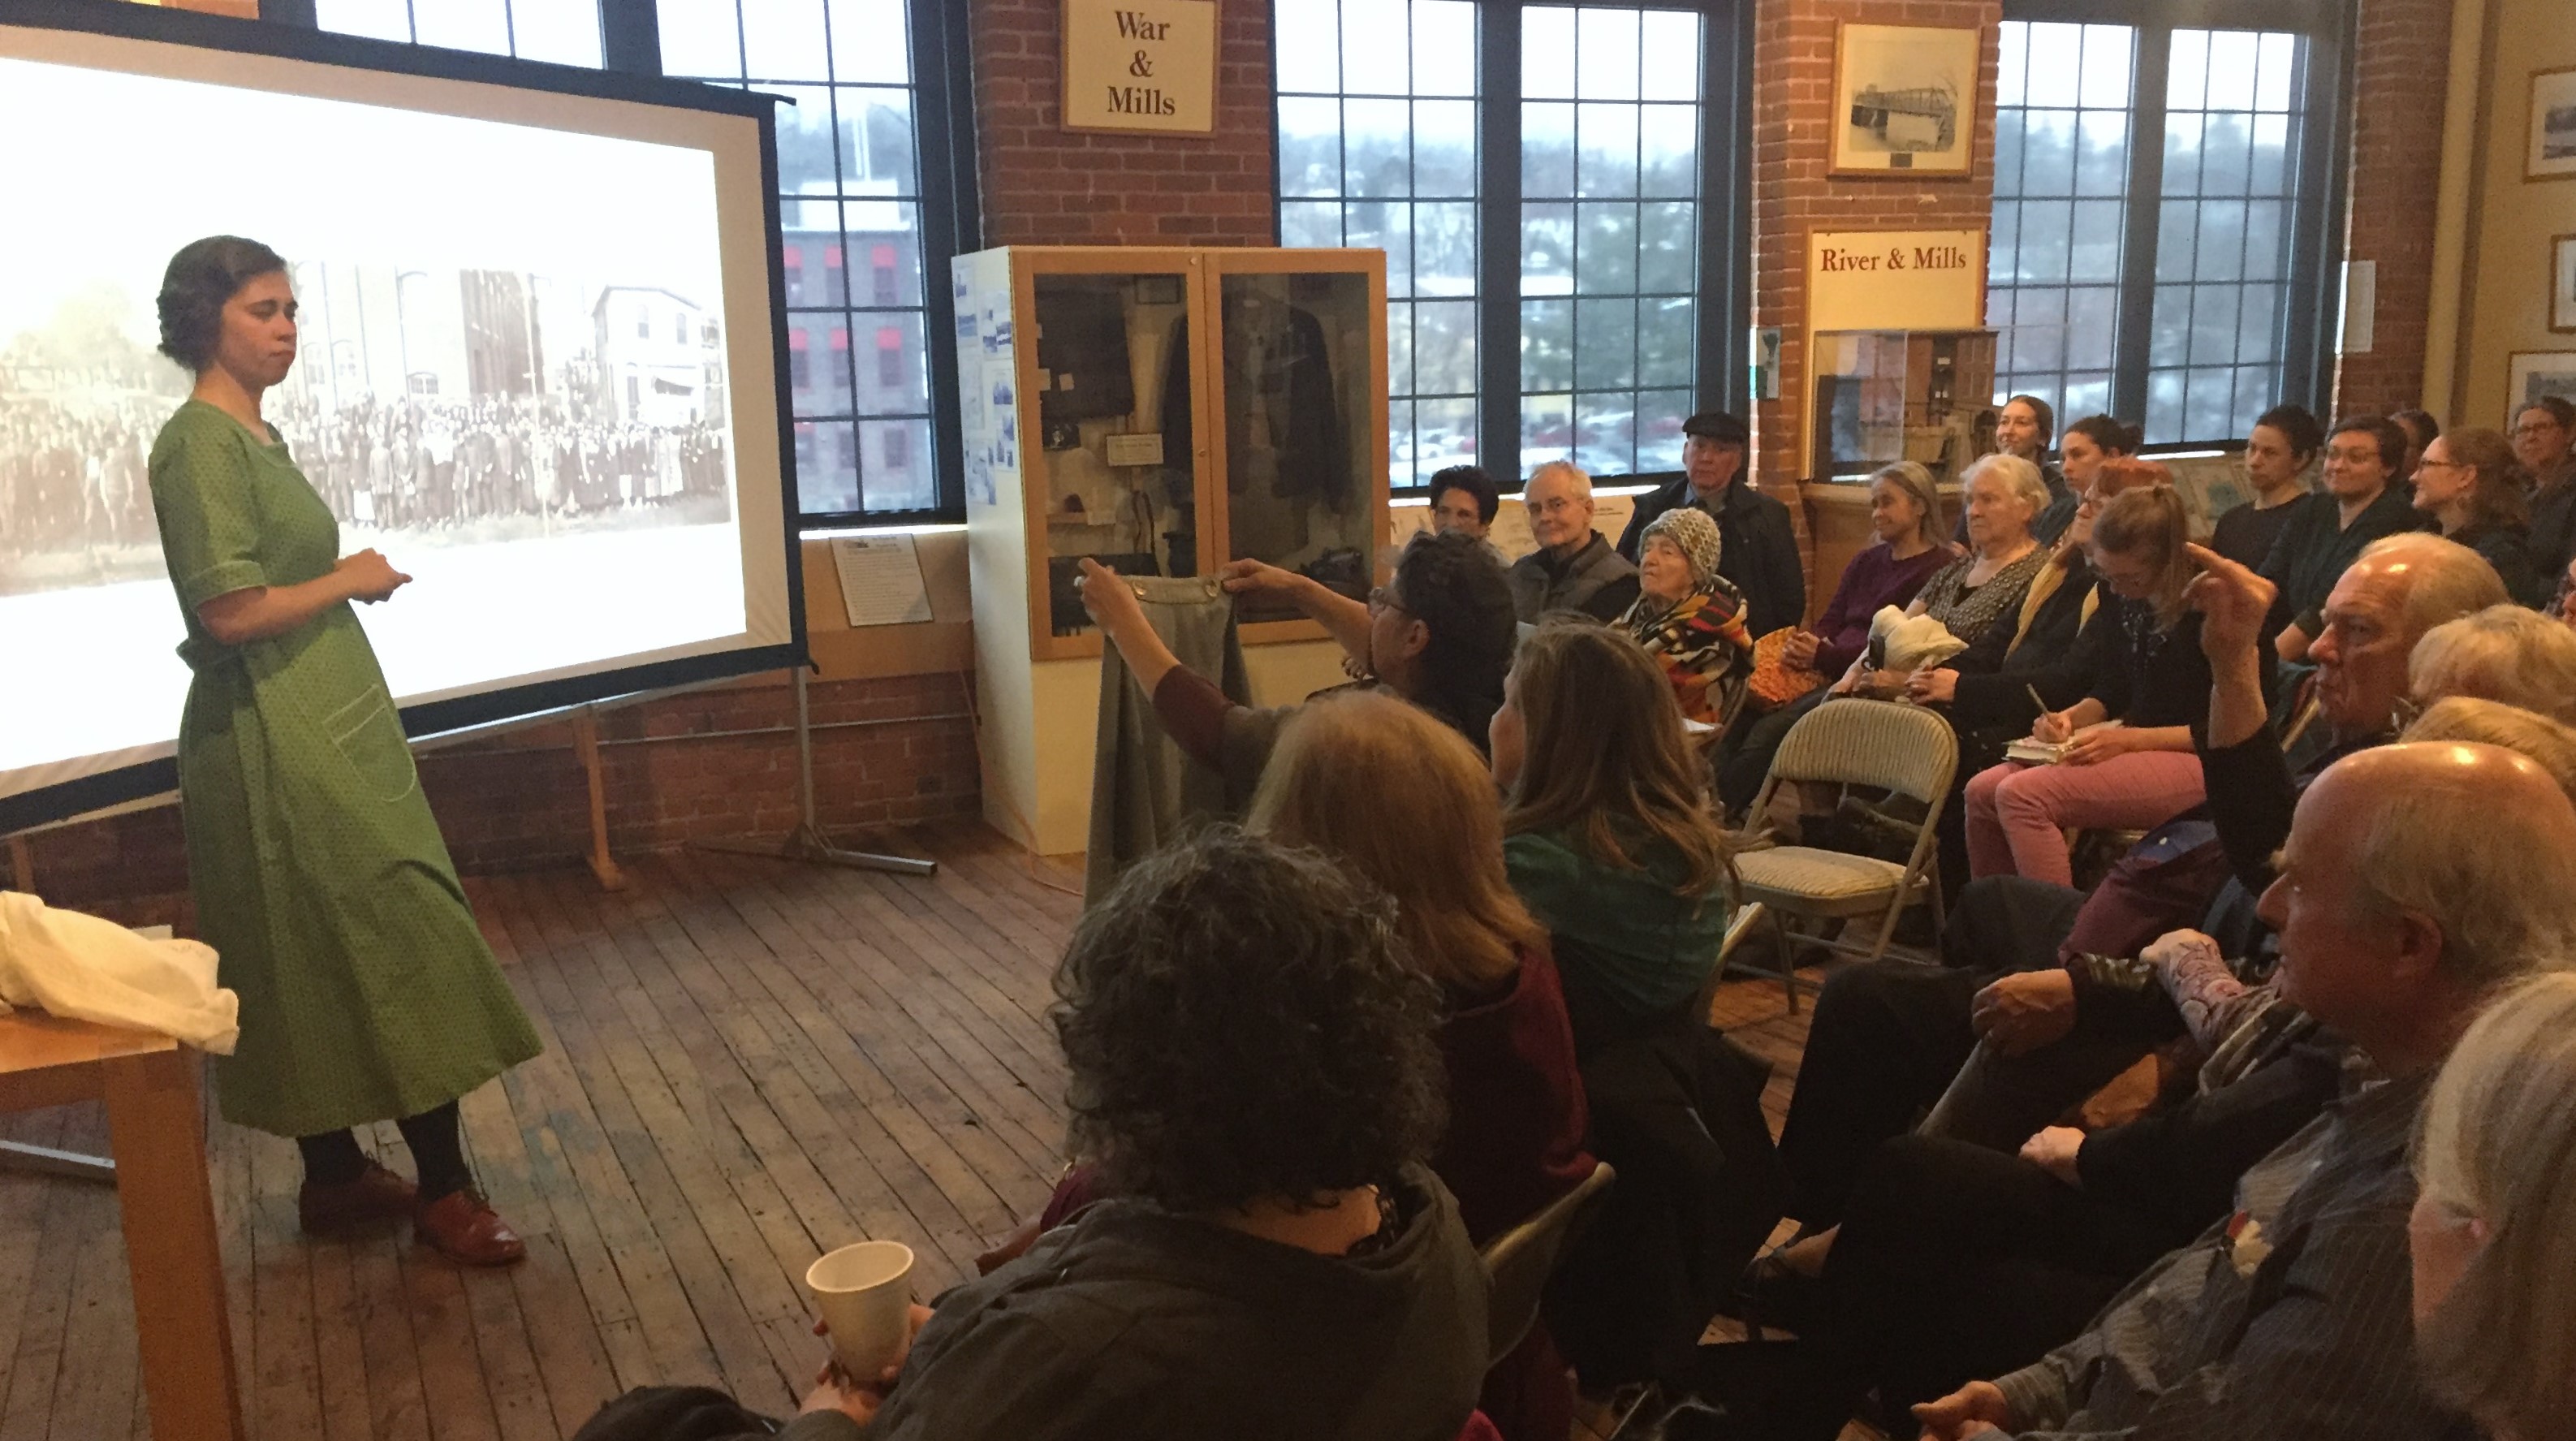
On the last Sunday in January, I put on a presentation in the crowded exhibit gallery of the Heritage Winooski Mill Museum*. The talked was titled “The 1920s Style of Vermont’s Mill Girls,” and was part history lecture, part show-and-tell. In it, I used reproduction garments I had made to teach the audience about a historical moment in early 20th-century Vermont.
As I mentioned in a recent post, this was a project which had come out of a conversation a few months previously, and for which I researched and sewed an outfit of reproduction garments. My goal was to explore two topics: first, how the type outfit I had recreated was practical clothing for workers in a textile mill; and second, to illustrate how even working-class women participated in broader style trends. These two themes would allow me to pass on some of the practical realities of what it was like to live and work 100 years ago, but also to give the audience a sense of the larger cultural forces at play in 1920, and how they effected the material lives of people at all levels of society. To borrow a phrase from striking textile mill workers from Lawrence, Mass., in 1912, I would talk about both bread AND roses.
In total I made eight different garments for this outfit and I found that each garment encompassed part of the story that I wanted to tell. To a small degree, I chose to reproduce certain garments or styles because they helped me to build a more comprehensive narrative, but really it was simply that a complete outfit equaled a complete story. I began the presentation fully dressed and over the course of 45 minutes, I removed layers of my outfit one at a time and explained the significance of each newly revealed garment. Below is a list of each garment along with the story it told.
Layer One: Protective Garments
This layer of clothing was based directly off of images of women working in the Queen City Cotton Mill, and supported by oral histories of workers from the Champlain Mill, which discussed the wearing of protective clothing.
The work apron – this simple apron was the one part of the outfit which was based purely on images of textile workers. It featured large pockets, seemingly for the carrying of maintenance tools, and was black to keep machine grease from showing. This garment let me talk about working conditions in a mill’s spinning or weaving room. The machinery which packed these industrial spaces was loud and could also be dirty and dangerous. Weavers at this time often oversaw as many as eight looms, and their work consisted of keeping this automated power machinery running smoothly.
The coverall apron – beneath their work aprons, the women of the Queen City Cotton Mill (as well as women depicted in many other early 20th-century industrial contexts) wore smock-like garments described in the pages of the Sears & Roebuck’s catalog as coverall aprons. As the name implies, this garment was designed to cover the wearer and protect the rest of her clothing from wear and tear. Though advertised to housewives as practical clothing to be worn while doing chores around the house, it was clearly also a logical choice for working women. These aprons were loose, comfortable clothing which kept whatever was worn beneath free from grime.
The particular apron which I chose to reconstruct (and which I talk more about in another post) had one other interesting aspect: the style was described in a contemporary dressmaking text as a “kimono apron.” These days that’s dressmaker’s lingo for a garment where the sleeve and body are cut as one piece, but the choice of the word kimono to describe that style is an interesting one – garments have been made in this way for millennium, so naming it, in the 1920s, after a Japanese garment had more to do with the style trend of “Japanism” than with the way kimonos are constructed. For mill workers, the coverall apron was the epitome of practicality, but this particular style of apron also spoke to what was going on in the broader world of fashion.
Layer Two: Separates
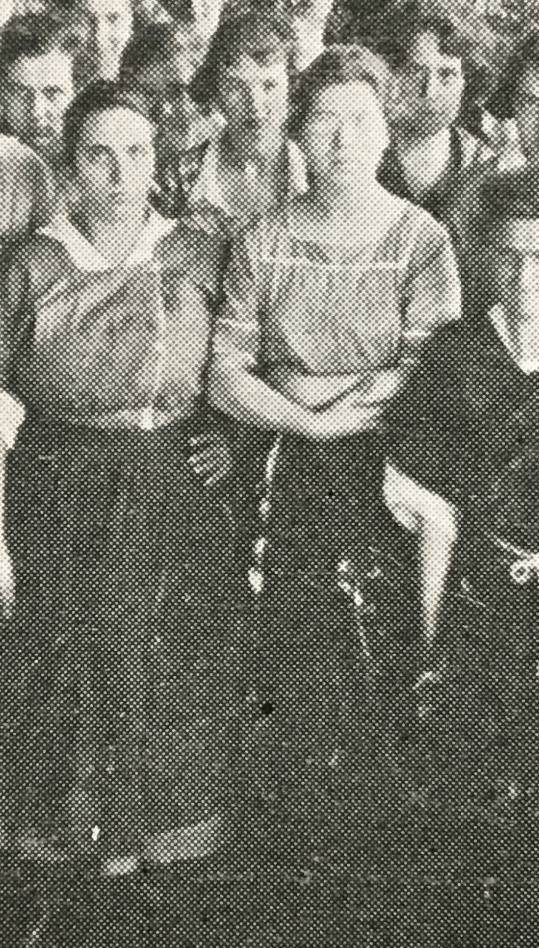
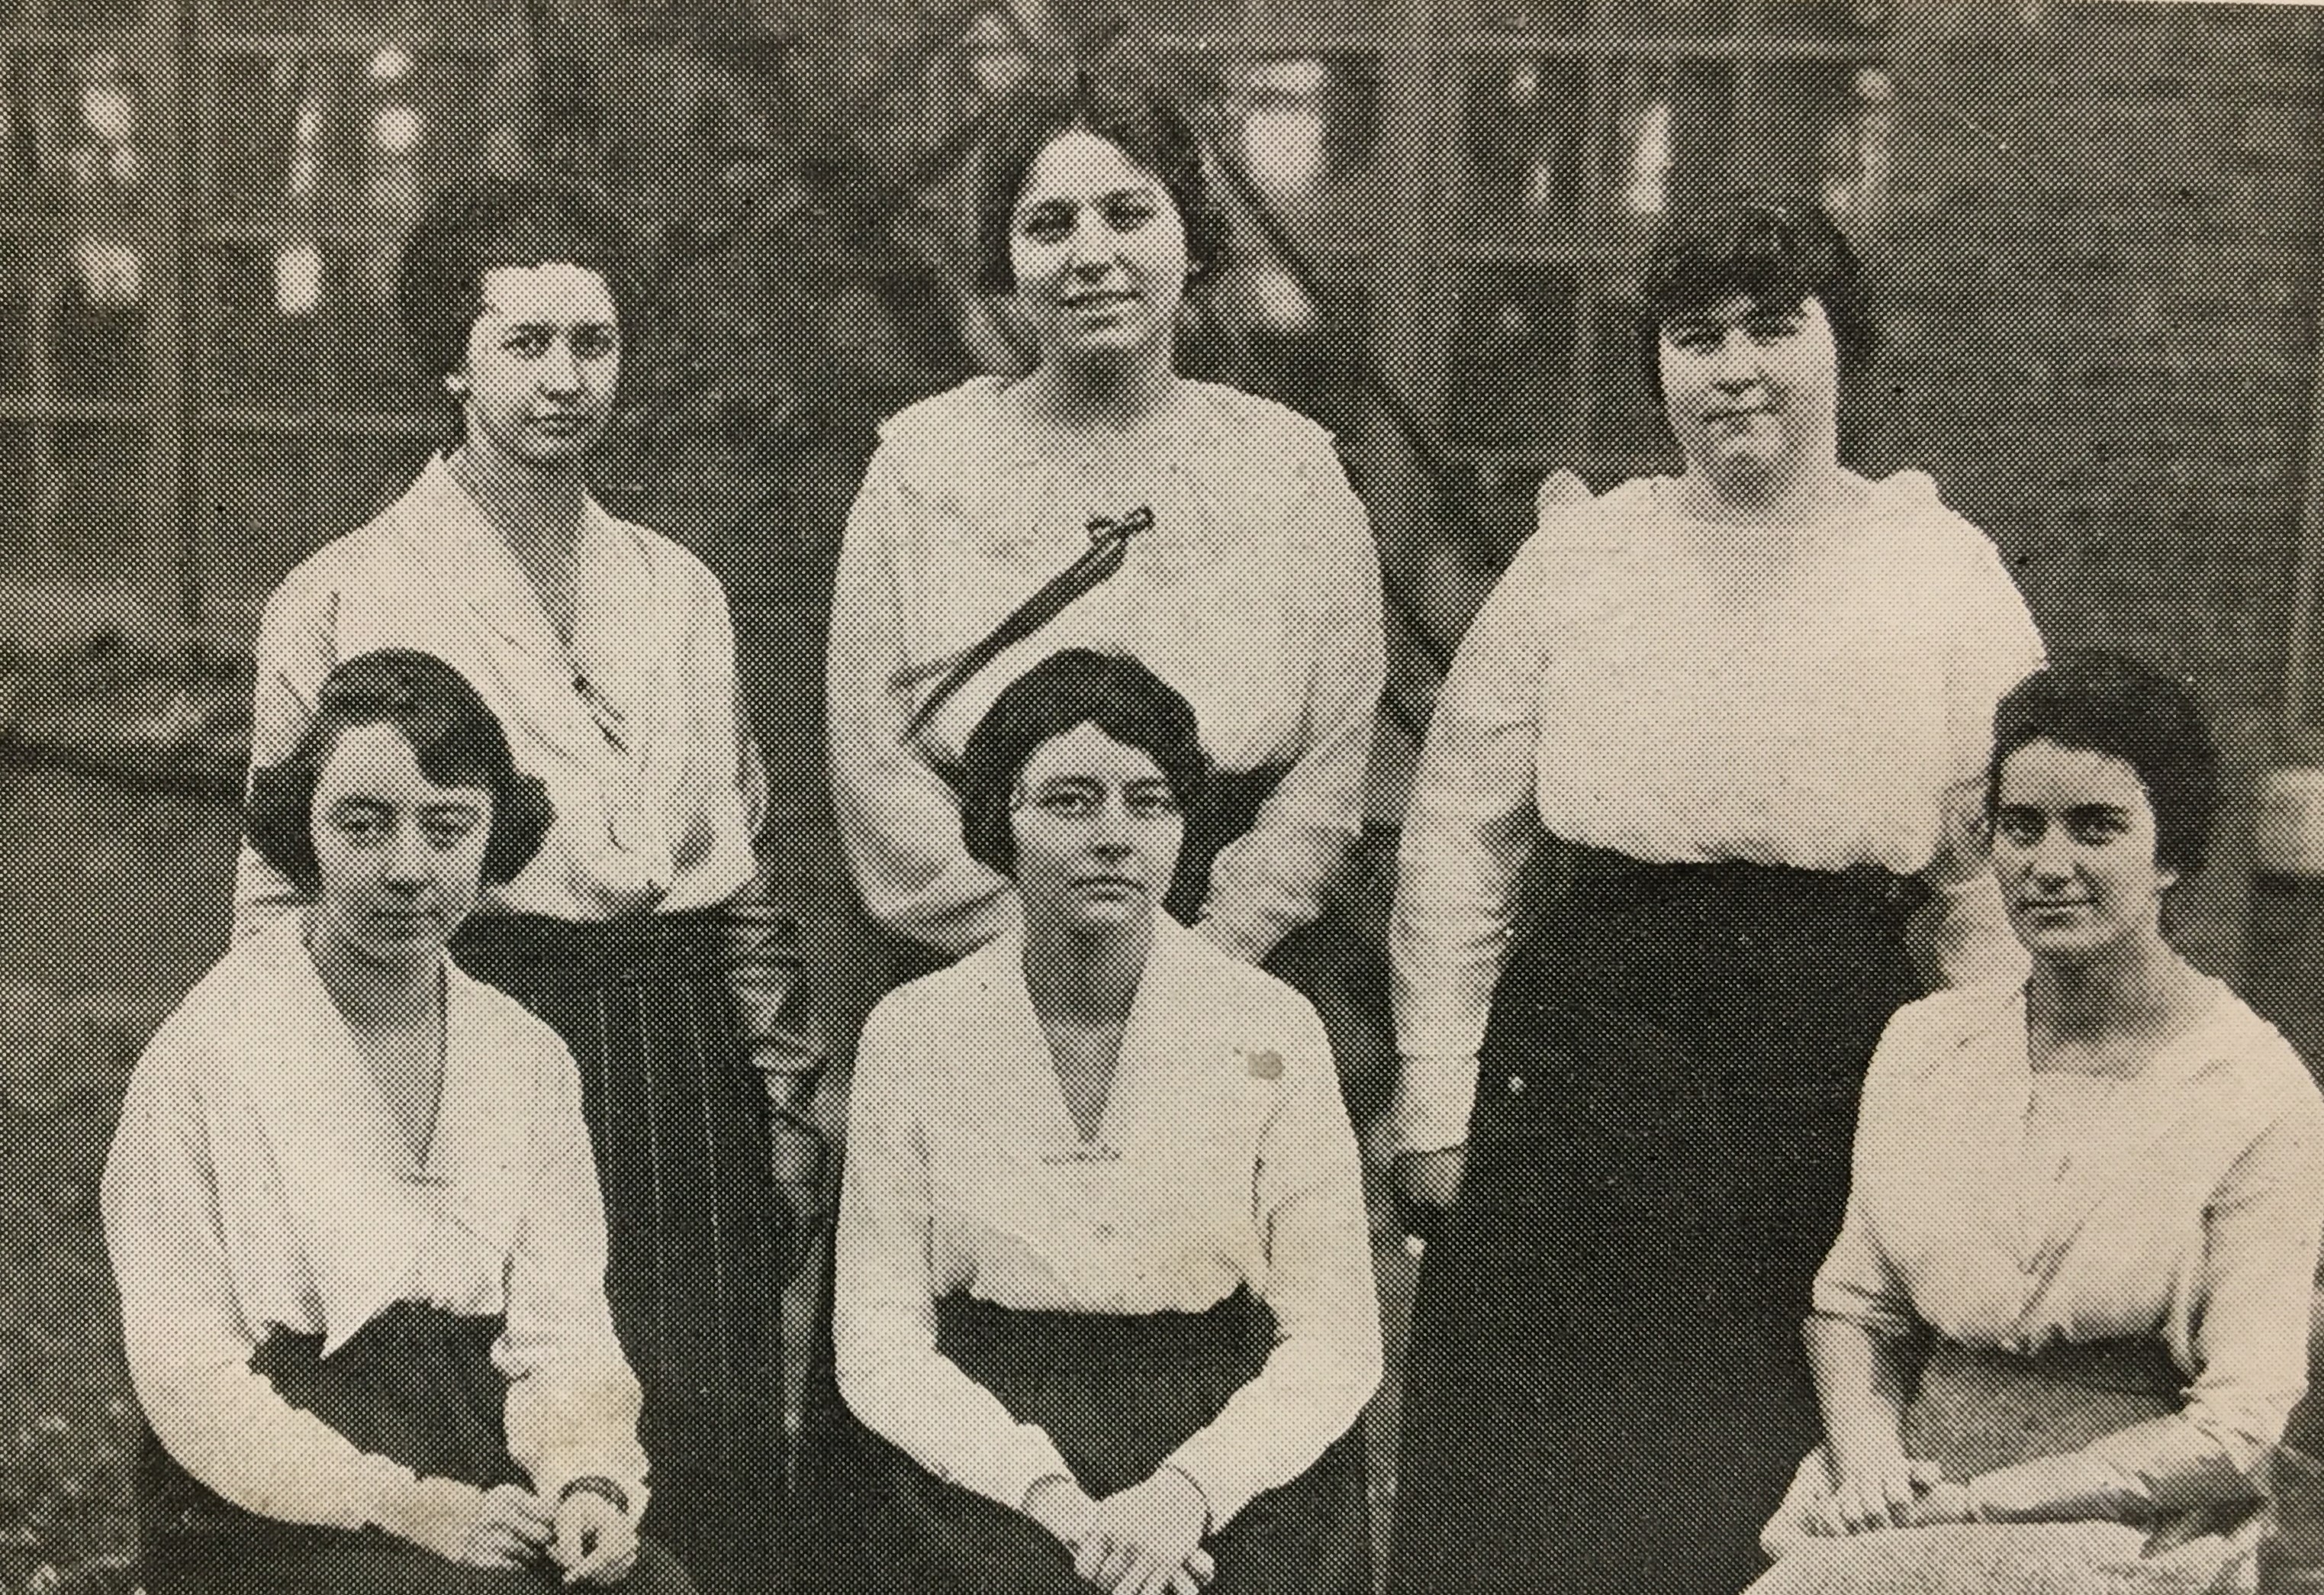
The office staff of the Queen City Cotton Mill.
Underneath the protective out layer, my outfit consisted of the types of garments which were wore by women in slightly cleaner jobs around the mill, such as working to inspect the cloth for defects after weaving, or doing administrative work in the mill office. Probably, some of the female weavers and spinning room staff also wore garments like these under their coverall aprons, or changed out of their protective aprons and into clothes like these after their work days.
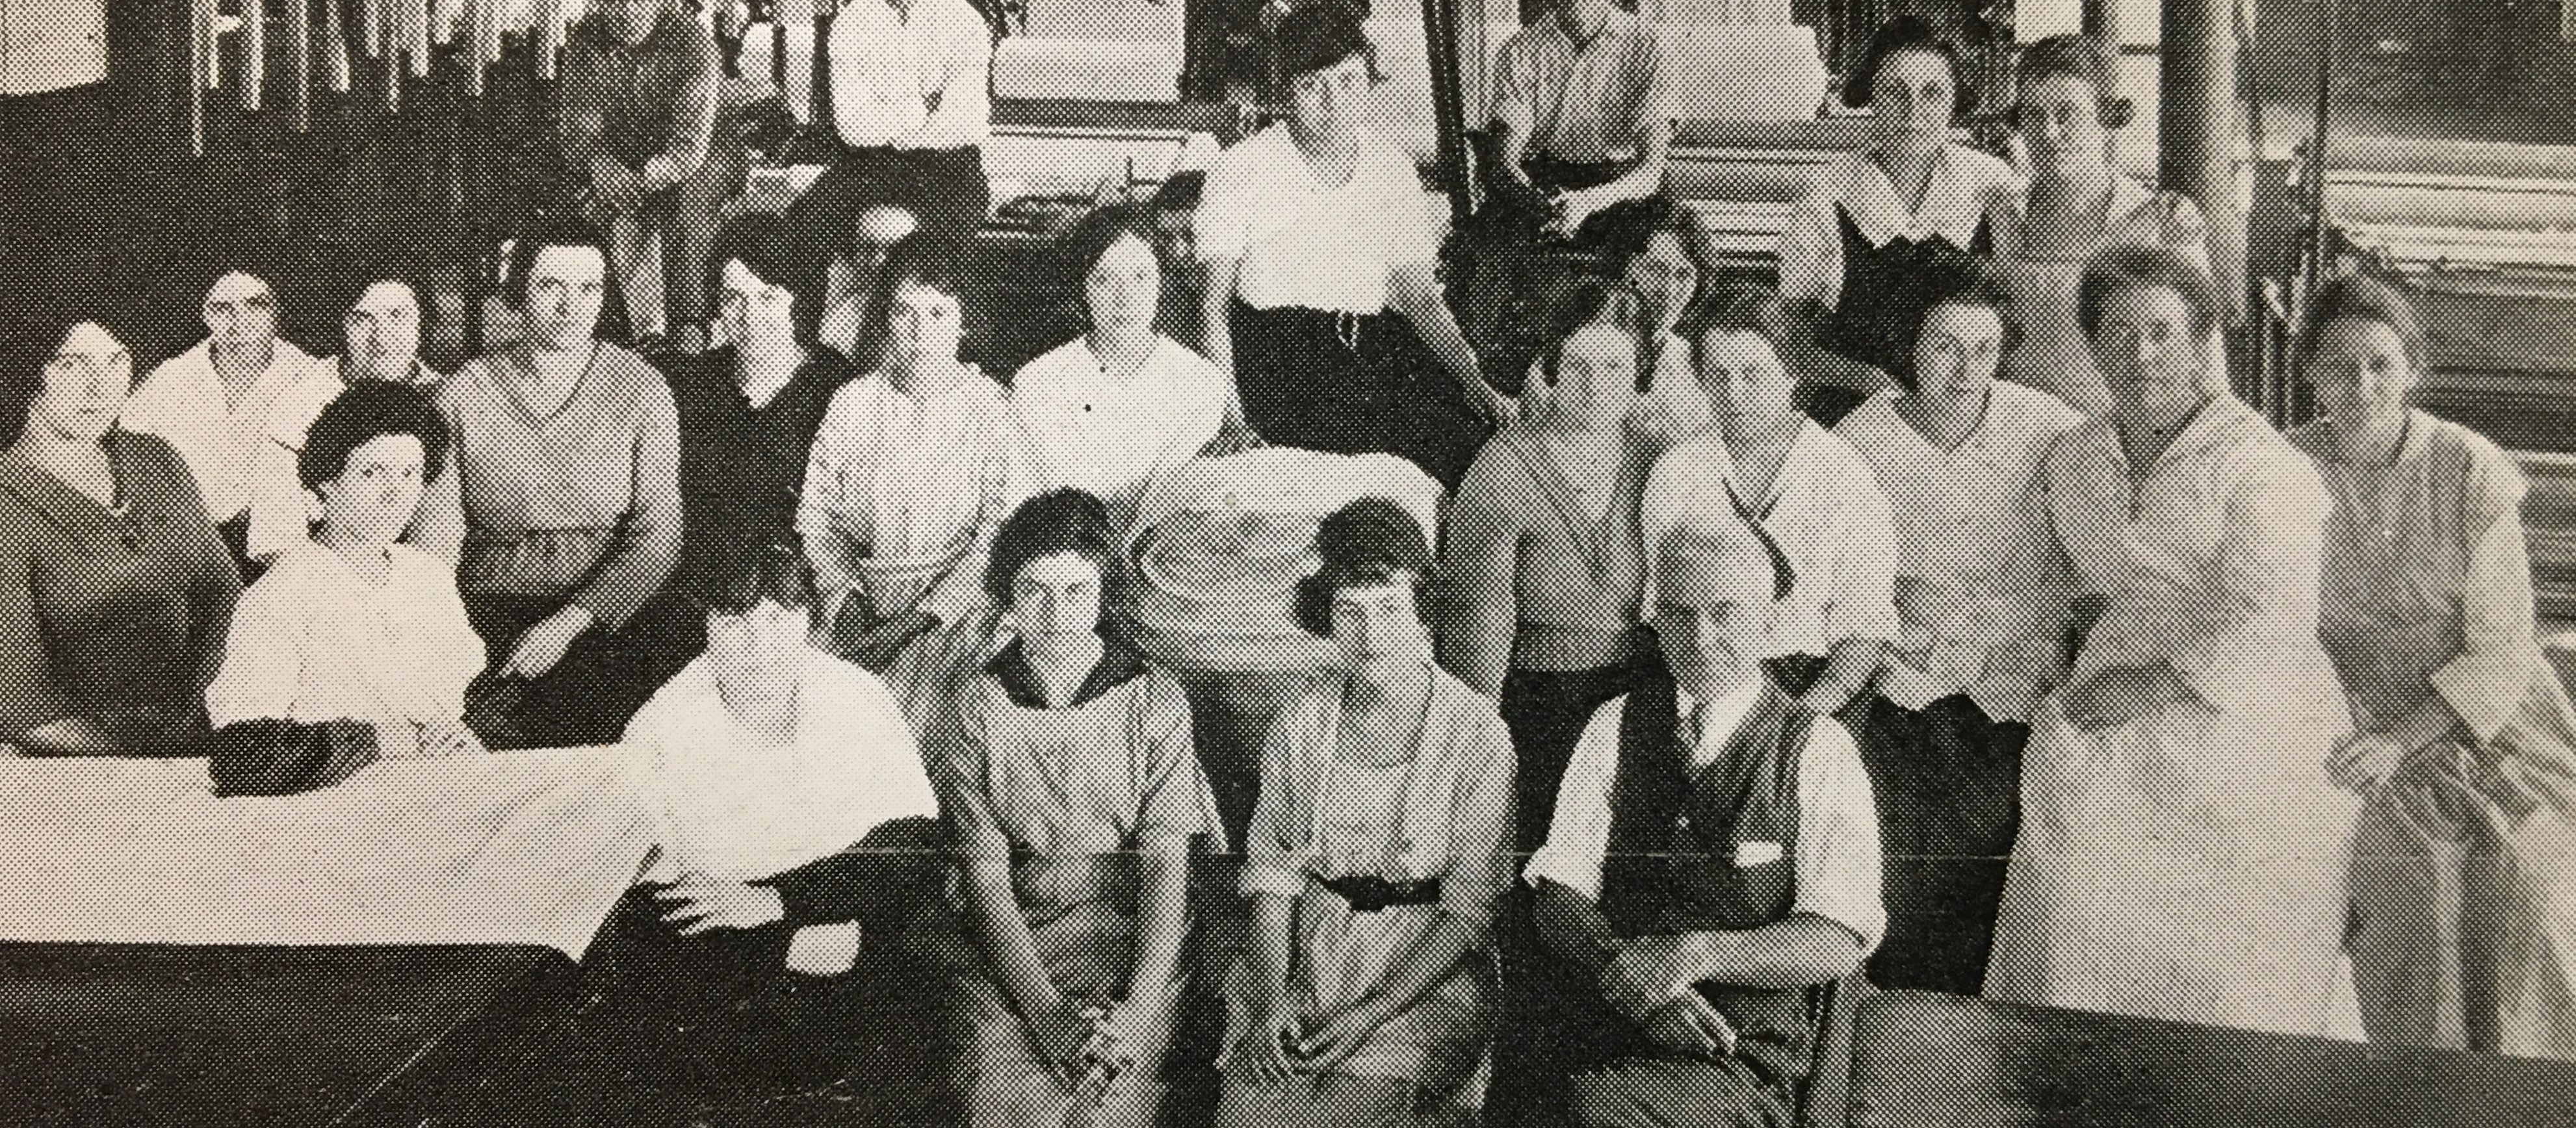
The cloth room staff from the Queen City Cotton Mill, who were responsible for inspection the mill’s textiles for defects.
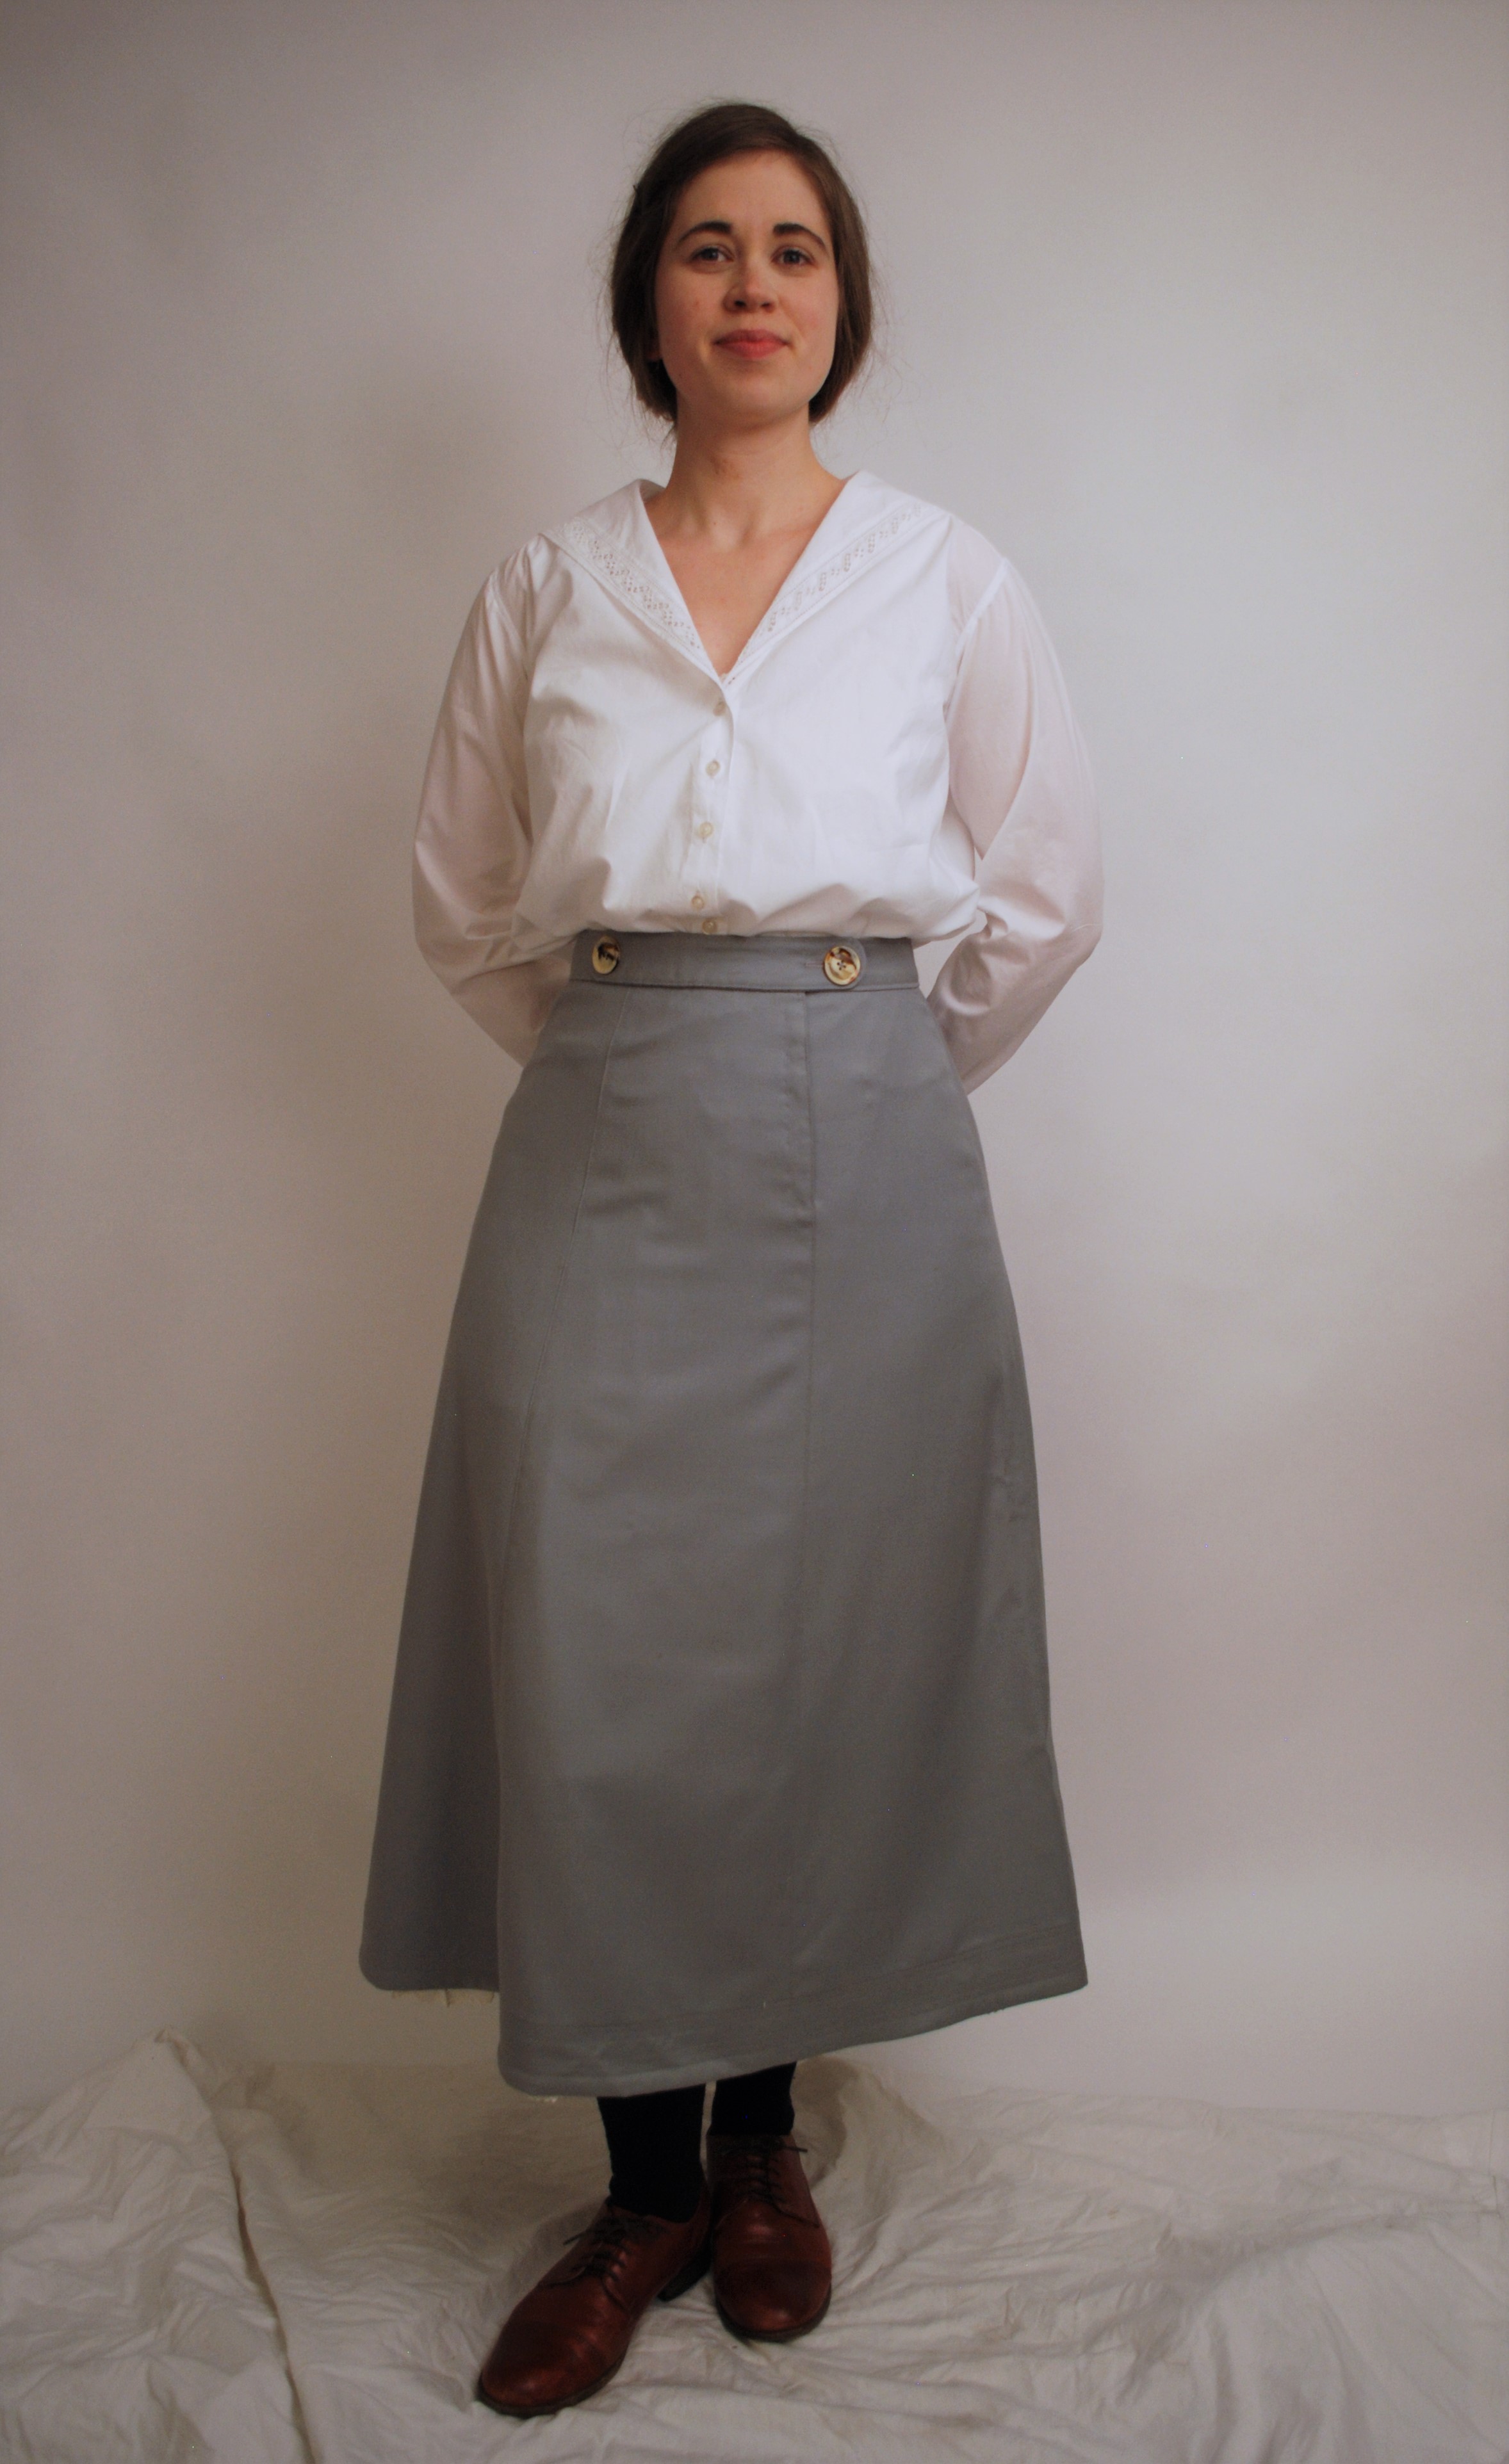
The shirtwaist – One of the themes I wanted to draw out with this layer was the impact that World War One was still having on fashion in 1920. There were plenty of choices of “shirtwaist” styles I could have gone with, but I chose to go with a sailor-style collar, in order to highlight the impact of military dress on women’s fashions.
The skirt – This garment’s waistband detail was also meant to evoke the military styles that had prevailed during the Great War (if I’d had time, I might have added pockets, which would have furthered this look). The skirt’s short length let me talk about the idea of raised hemlines and the related wartime saving in textiles. This garment was also the only part of this outfit not made of cotton. Made rather of worsted wool, it allowed me to bring up the types of textiles produced by the Champlain Mill – the building in which my presentation was taking place – which at that time produced piece dyed worsteds, among other things.
Perhaps the most significant aspect of this layer, however, was its simplicity. These garments look (and, for the most part, are) comfortable, practical, and easy to wear. The trend toward simple, relaxed clothing which began during the war continued into the twenties, where it illustrated the urge to let loose that reigned in the Roaring 20s. I think that the simplicity of this layer also felt deeply relatable to my audience during the presentation. Everyone in the room was comfortable with the idea of an outfit made up of what was essentially a shirt and a bottom – a skirt in this case, but it wasn’t impossible to envision pants in its place. One woman even interrupted to tell me that she’d happily wear “a skirt like that” today. However, the apparent simplicity of the outfit was quickly dispelled as I went on to show additional layers of my wardrobe:
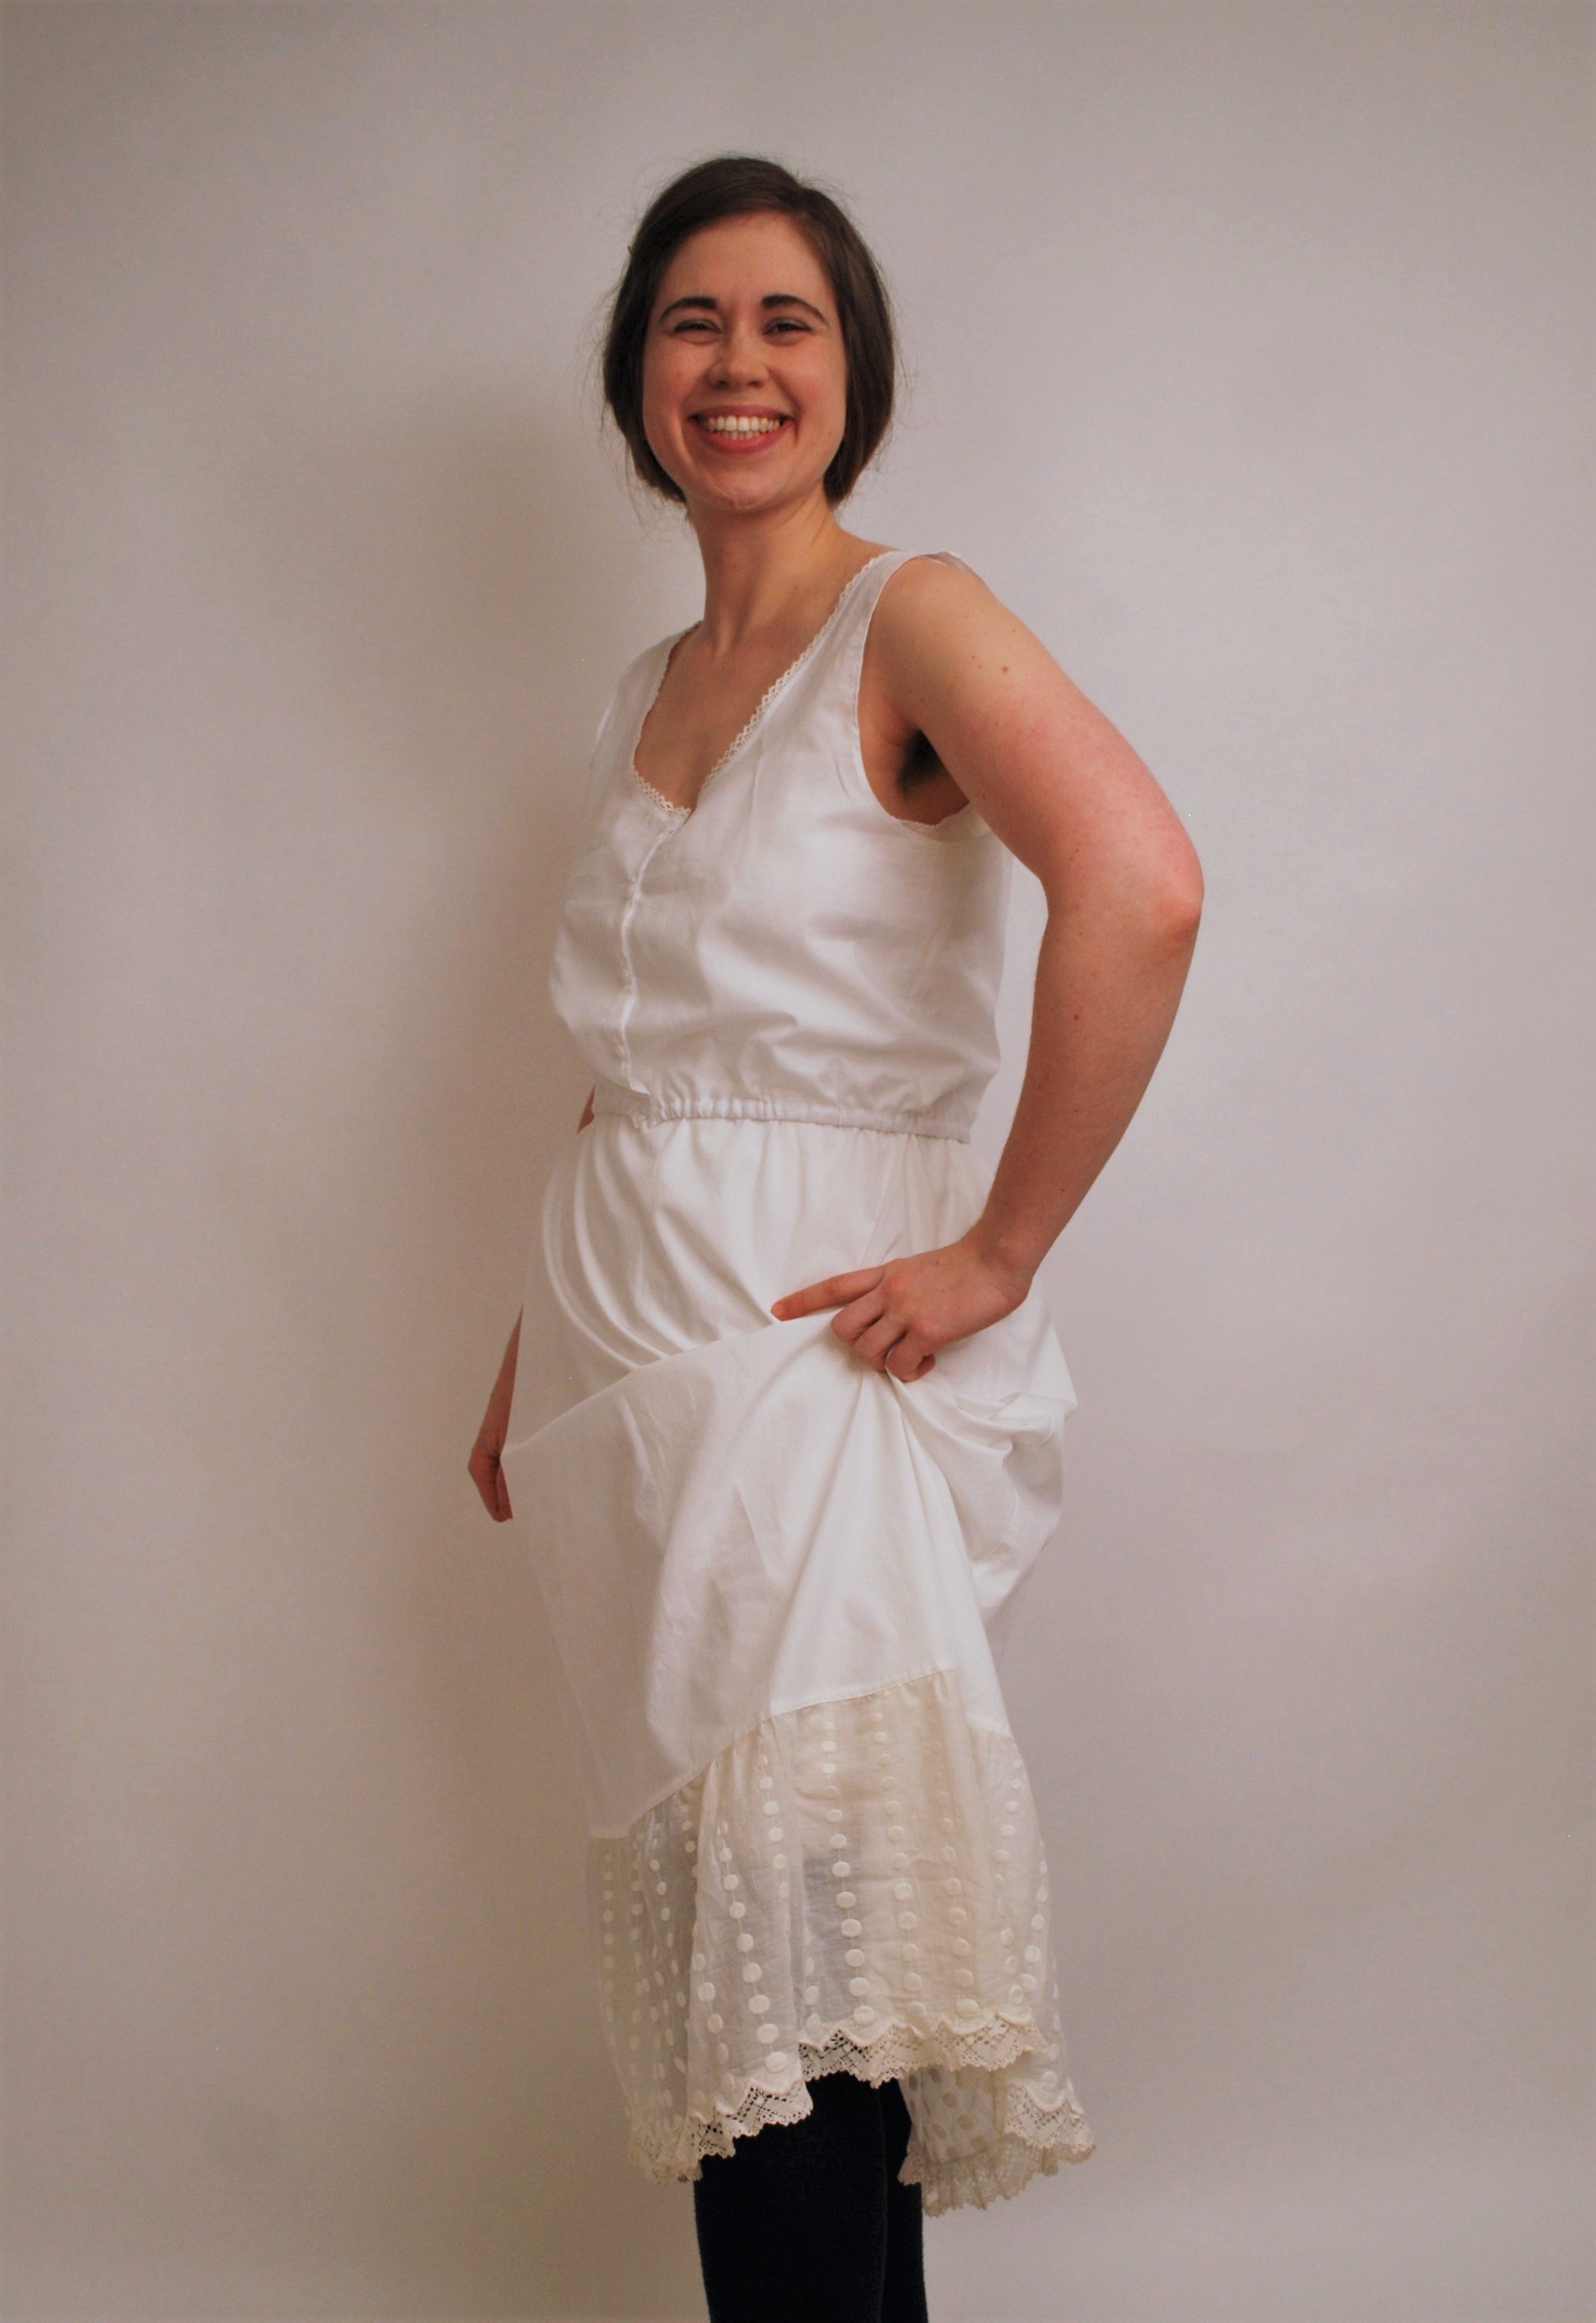
Layer Three: Frilly Under Things
This intermediate layer interfaced between outer garments and those which unquestionably fell into the category of underwear. In that capacity, they both maintained a level of modesty and helped to prevent outer garments (which were likely washed only where necessary) from sitting next to the skin. Just as the aprons protected the garments beneath them from the filth of the mill, so to this layer kept prevented sweat from reaching those nicer, less-frequently laundered outer layers.
The corset cover – A modern viewer might well choose to use the word camisole for this garment, but the period term corset cover handily describe’s this garment’s intended use. First, it tells us that, in 1920, plenty of women still wore corsets – more on that shortly. Additionally, it highlights that a corset needed some kind over cover to prevent it’s lines – or the lines of the female form beneath it – from being too readily visible to the outside world. My cotton batiste shirtwaist, for example, was a little too shear to be worn without some sort of additional layer underneath.
The petticoat – As the corset cover is to the upper body, so the petticoat is below the waist – it adds one more layer of fabric between the distinct lines of corset bones and the outer surface of the skirt (we wouldn’t, after all, want anyone to have a reason to think about a lady’s underwear). Traditionally, petticoats can also add volume to a silhouette. In this case, the slender styles coming into vogue around 1920 meant that my petticoat was relatively narrow.
Layer Four: Undergarments
As someone who likes to understand how things work, the internal structure on which an outfit is built always holds a special fascination for me. In the case of this project, which was, by my standards, a bit of a rush, I at first contemplated cutting some corners with the undergarments. After all, I could have simply stopped undressing at the lacy underthings layer and no one would have been any the wiser (and a few people might have been a tad less scandalized) but honestly, where’s the fun in that? In the end, I’m very glad I constructed, and showed off, this layer, since underwear can be a particularly effective tool for thinking about physicality, comfort, and body standards in any given era.
The corset – I hadn’t originally thought I’d need to make a corset for this outfit– the 20’s was when women had started wearing bras, right? This, I figured, would save me time. But further research on the subject made me re-think my assumptions about the fashions of 1920. It is always best to be a little conservative when building a wardrobe for a historical character of a lower socio-economic class, and while corsets may have begin dropping out of favor in the 1920s, they were still a feature of most women’s wardrobes in the 1910s. If the mill worker I was portraying was my own age (28), then she would have been wearing adult women’s fashions for at least a decade, meaning she was probably used to wearing a corset as part of her daily attire.
Additionally, it was pretty clear to me that my own physic would work better in the styles of 1920 with a little help from some shapewear. My body does not conform to the slender, boy-like ideal that was just coming to the fore at this time. To achieve an approximation of that look, I, like many women then and now, would need to choose garments that helped my cause. This long and low style of corset does nothing to support the bust except to hold the layer beneath it secure around my rib cage (which did, indeed, have a bra-like effect). This was intentional in an era when a small, flat bust was considered the ideal. At the same time, it smooths waist and hips, eliminating any unsightly bulges and downplaying curves.
The union suit – There were lots of different choices for the garment that would make up the inner-most layer of this outfit – one piece or two? Batiste, or jersey? Sleek and practical or covered in lace? This was the layer that would sit next to my skill and which I would sweat into. For women working in textile mills, in needed to be comfortable and practical. I decided I would make a cotton jersey union suit – essentially, one-piece underwear with a split crotch, so that the wearer can go to the bathroom without getting fully undressed. For the sake of the narrative I was telling, I liked the choice of the union suit because it allowed me to talk about the popularity of female athleticism in the early 20th century. This type of comfortable, stretchy underwear was perfect for a new generation of active women, engaged in sport. That same focus on exercise also had a lot to do with the fashionable fit and slender silhouette of the decade, and so the union suit allowed me once again to draw connections between the practical clothing of mill workers and the broader style trends of the era.
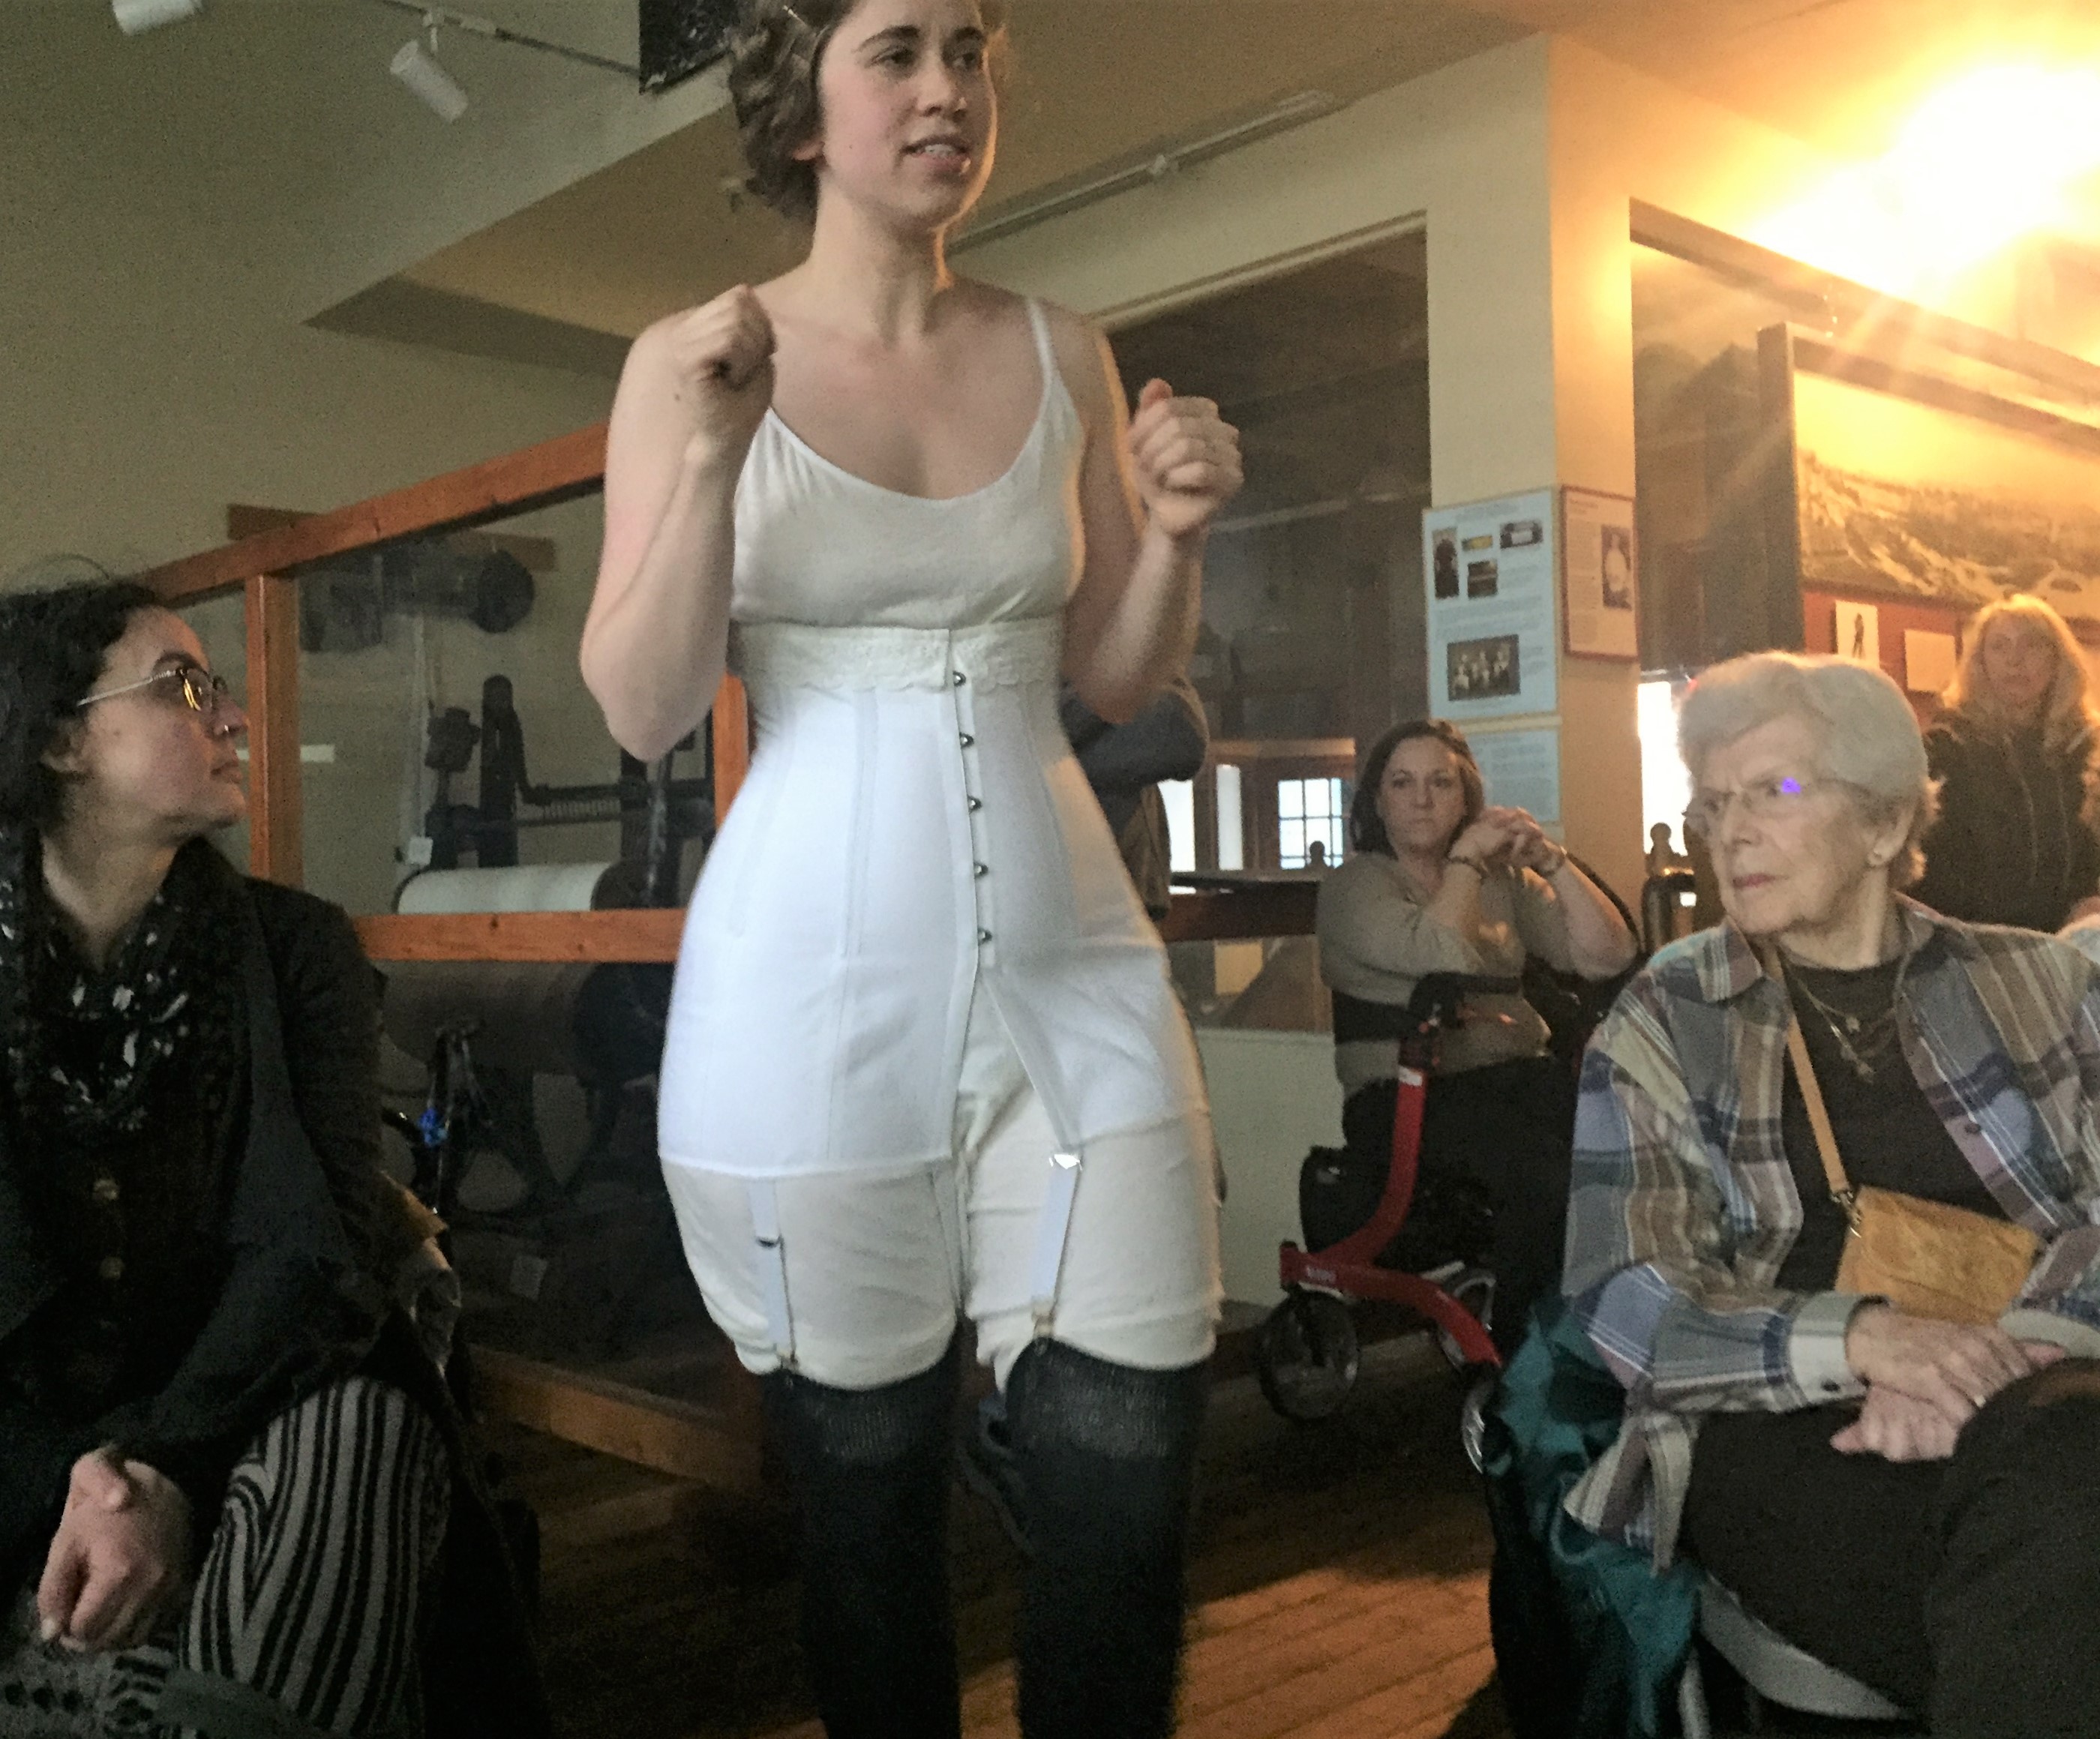
Showing the audience the inner-most layer of my wardrobe.
During my talk, I undressed as far as my corset, union suit, and stockings, because I felt it was important that the audience understand the foundation of the outfit, and because I still felt reasonably “dressed” by 21st-century standards in that layer (I did wear a very minimal modern bra under the union suit to minimize having my nipples show through the union suit, which seemed a bridge too far by contemporary standards of dress, and would have made both me and the audience uncomfortable, I think.) Throughout the presentation, I handed some of the garments around the audience, allowing them the opportunity to look not only at the shape of the garments, but also at their construction.
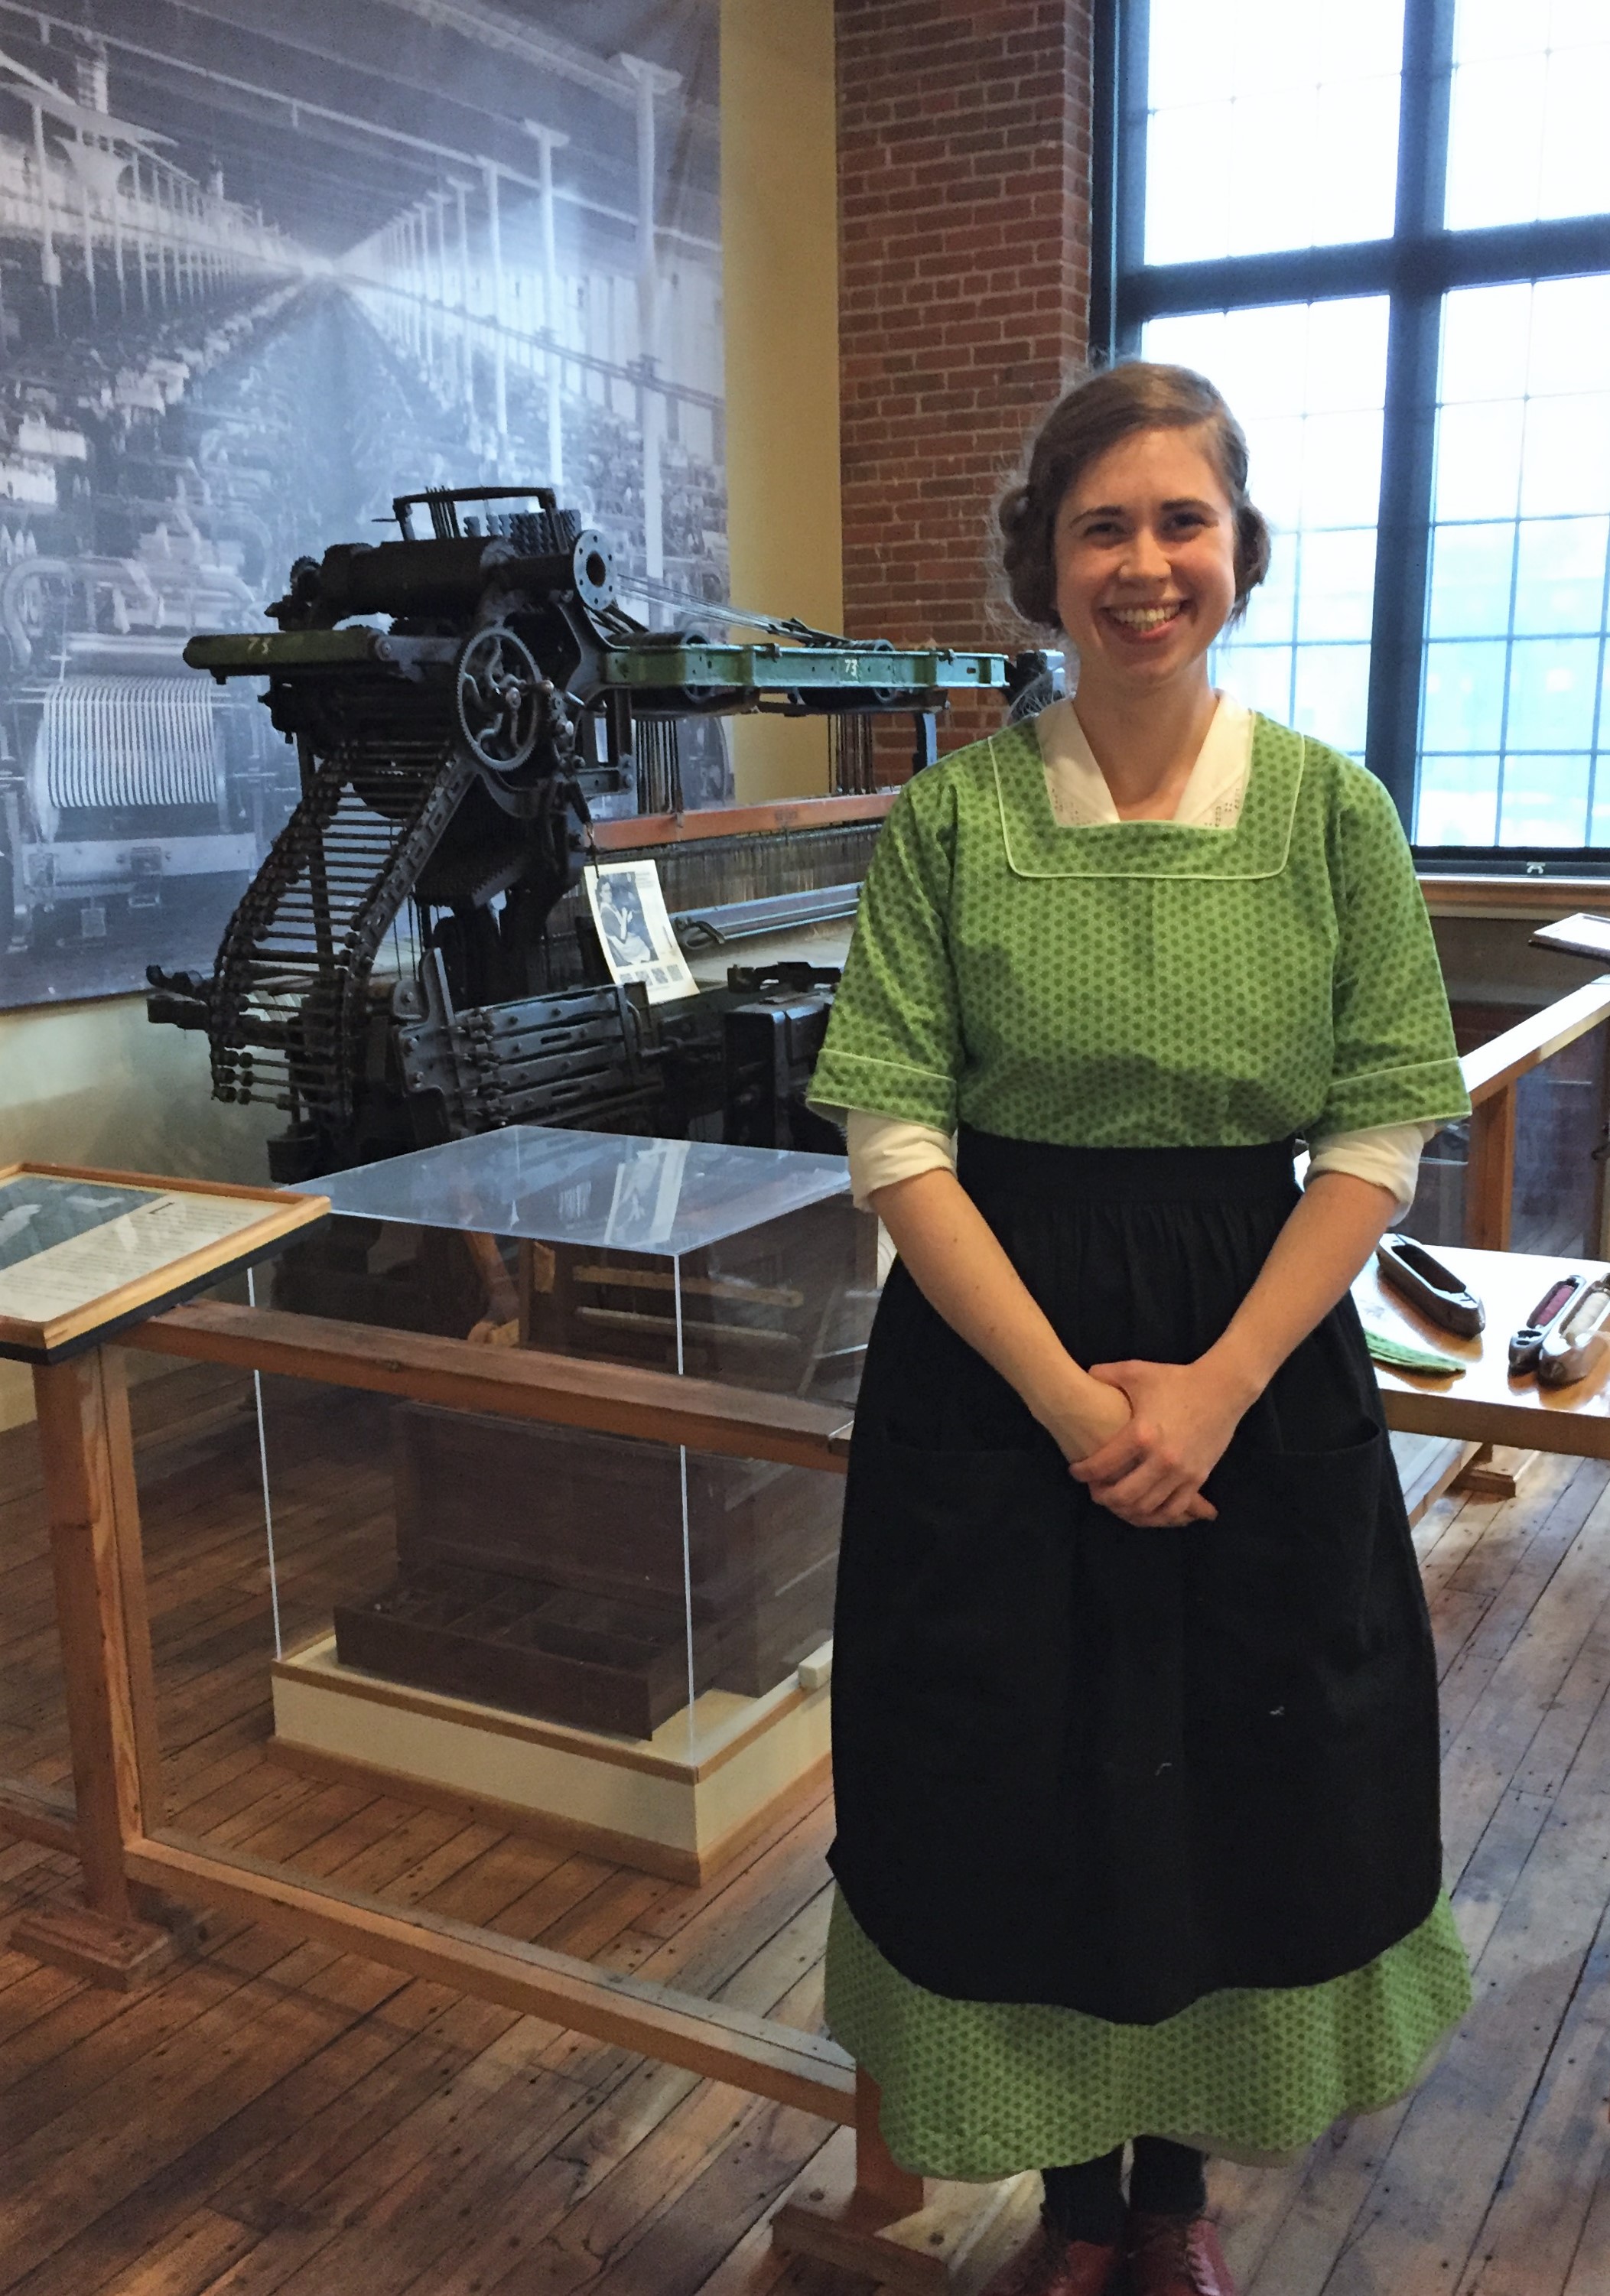
Standing in front of a loom on display at the Heritage Winooski Mill Museum
After I had finished talking about all of the pieces of the outfit, I re-dressed in the easy-to-put-on house apron and fielded further questions from the audience. Their enthusiasm proved to me what I already knew: that clothing is a uniquely accessible entry-point to thinking about history and material culture. Not only is clothing something that everyone understands, when we “step into the shoes” of someone from another era, we find ourselves several steps closer to imagining their lived experience. We get a chance to see what they needed to feel comfortable when working and beautiful when they looked in their mirrors.
*If you missed my presentation in Winooski, I will be presenting my talk again at the Richmond Free Library in Richmond, Vermont, at 6:30 PM on Wednesday, March 25th, and hopefully at other dates and locations soon as well!
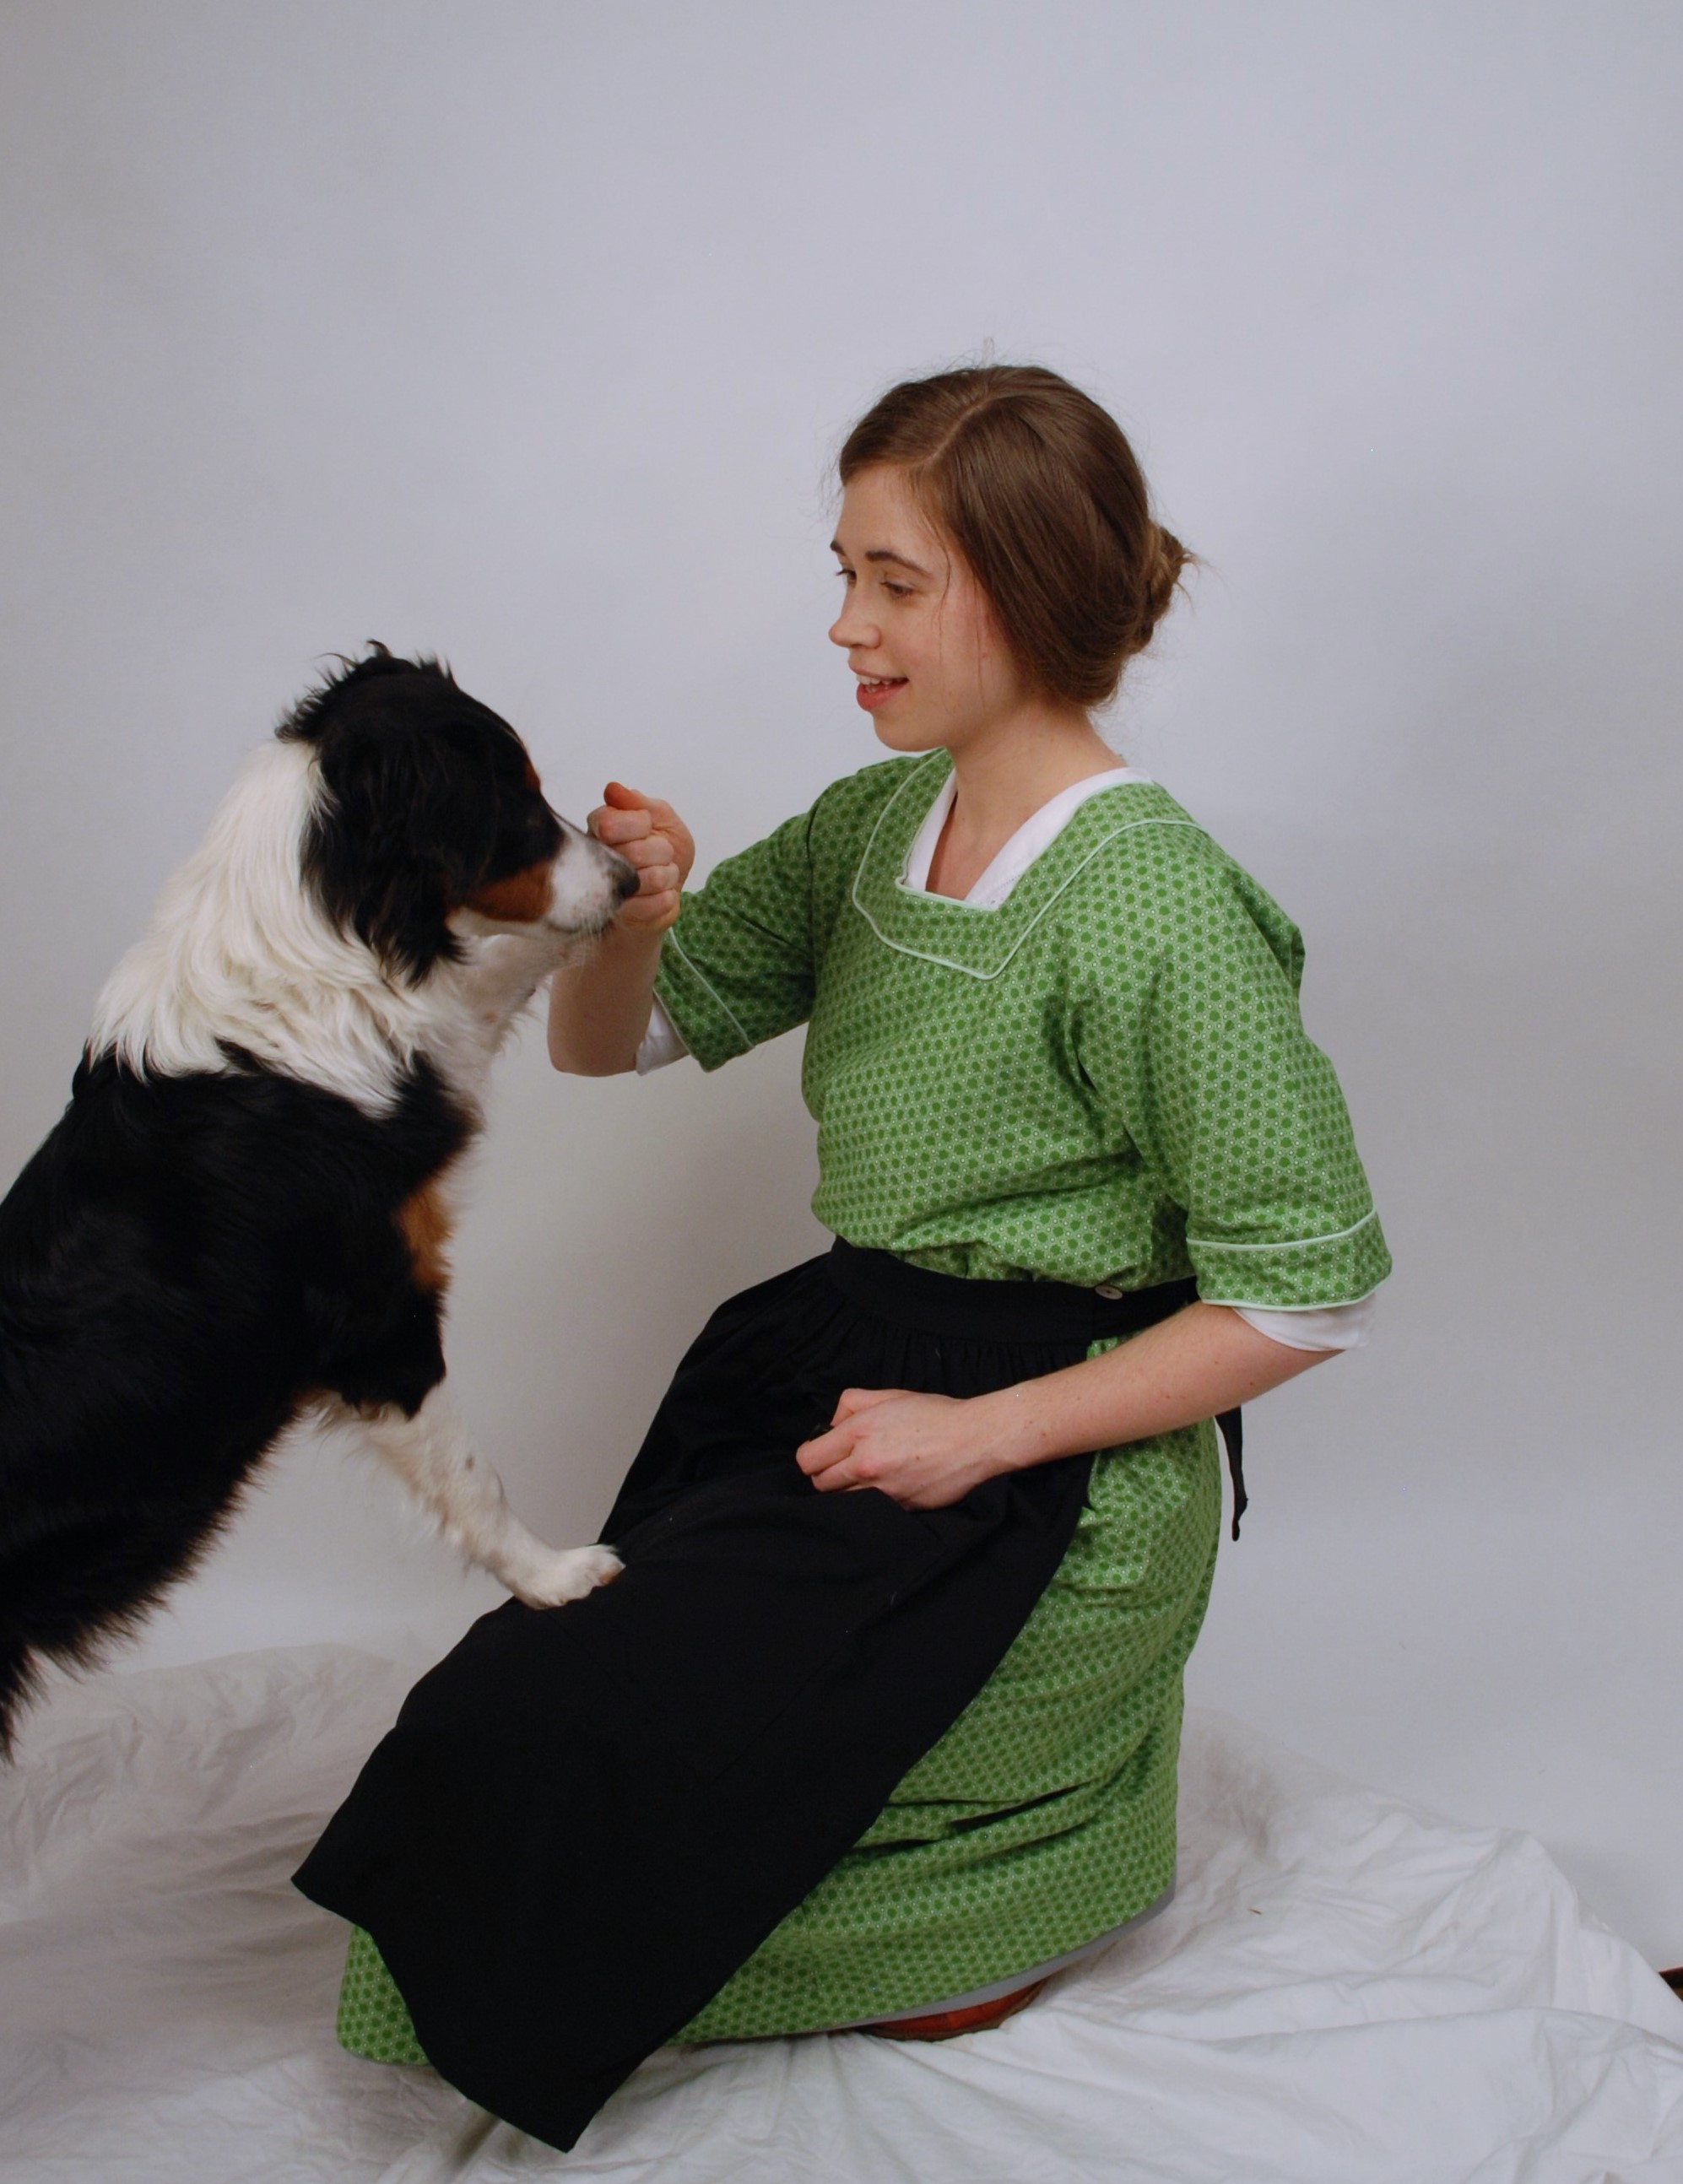
What’s better than a picture of someone in historical clothing? A picture with Maddie the puppy!
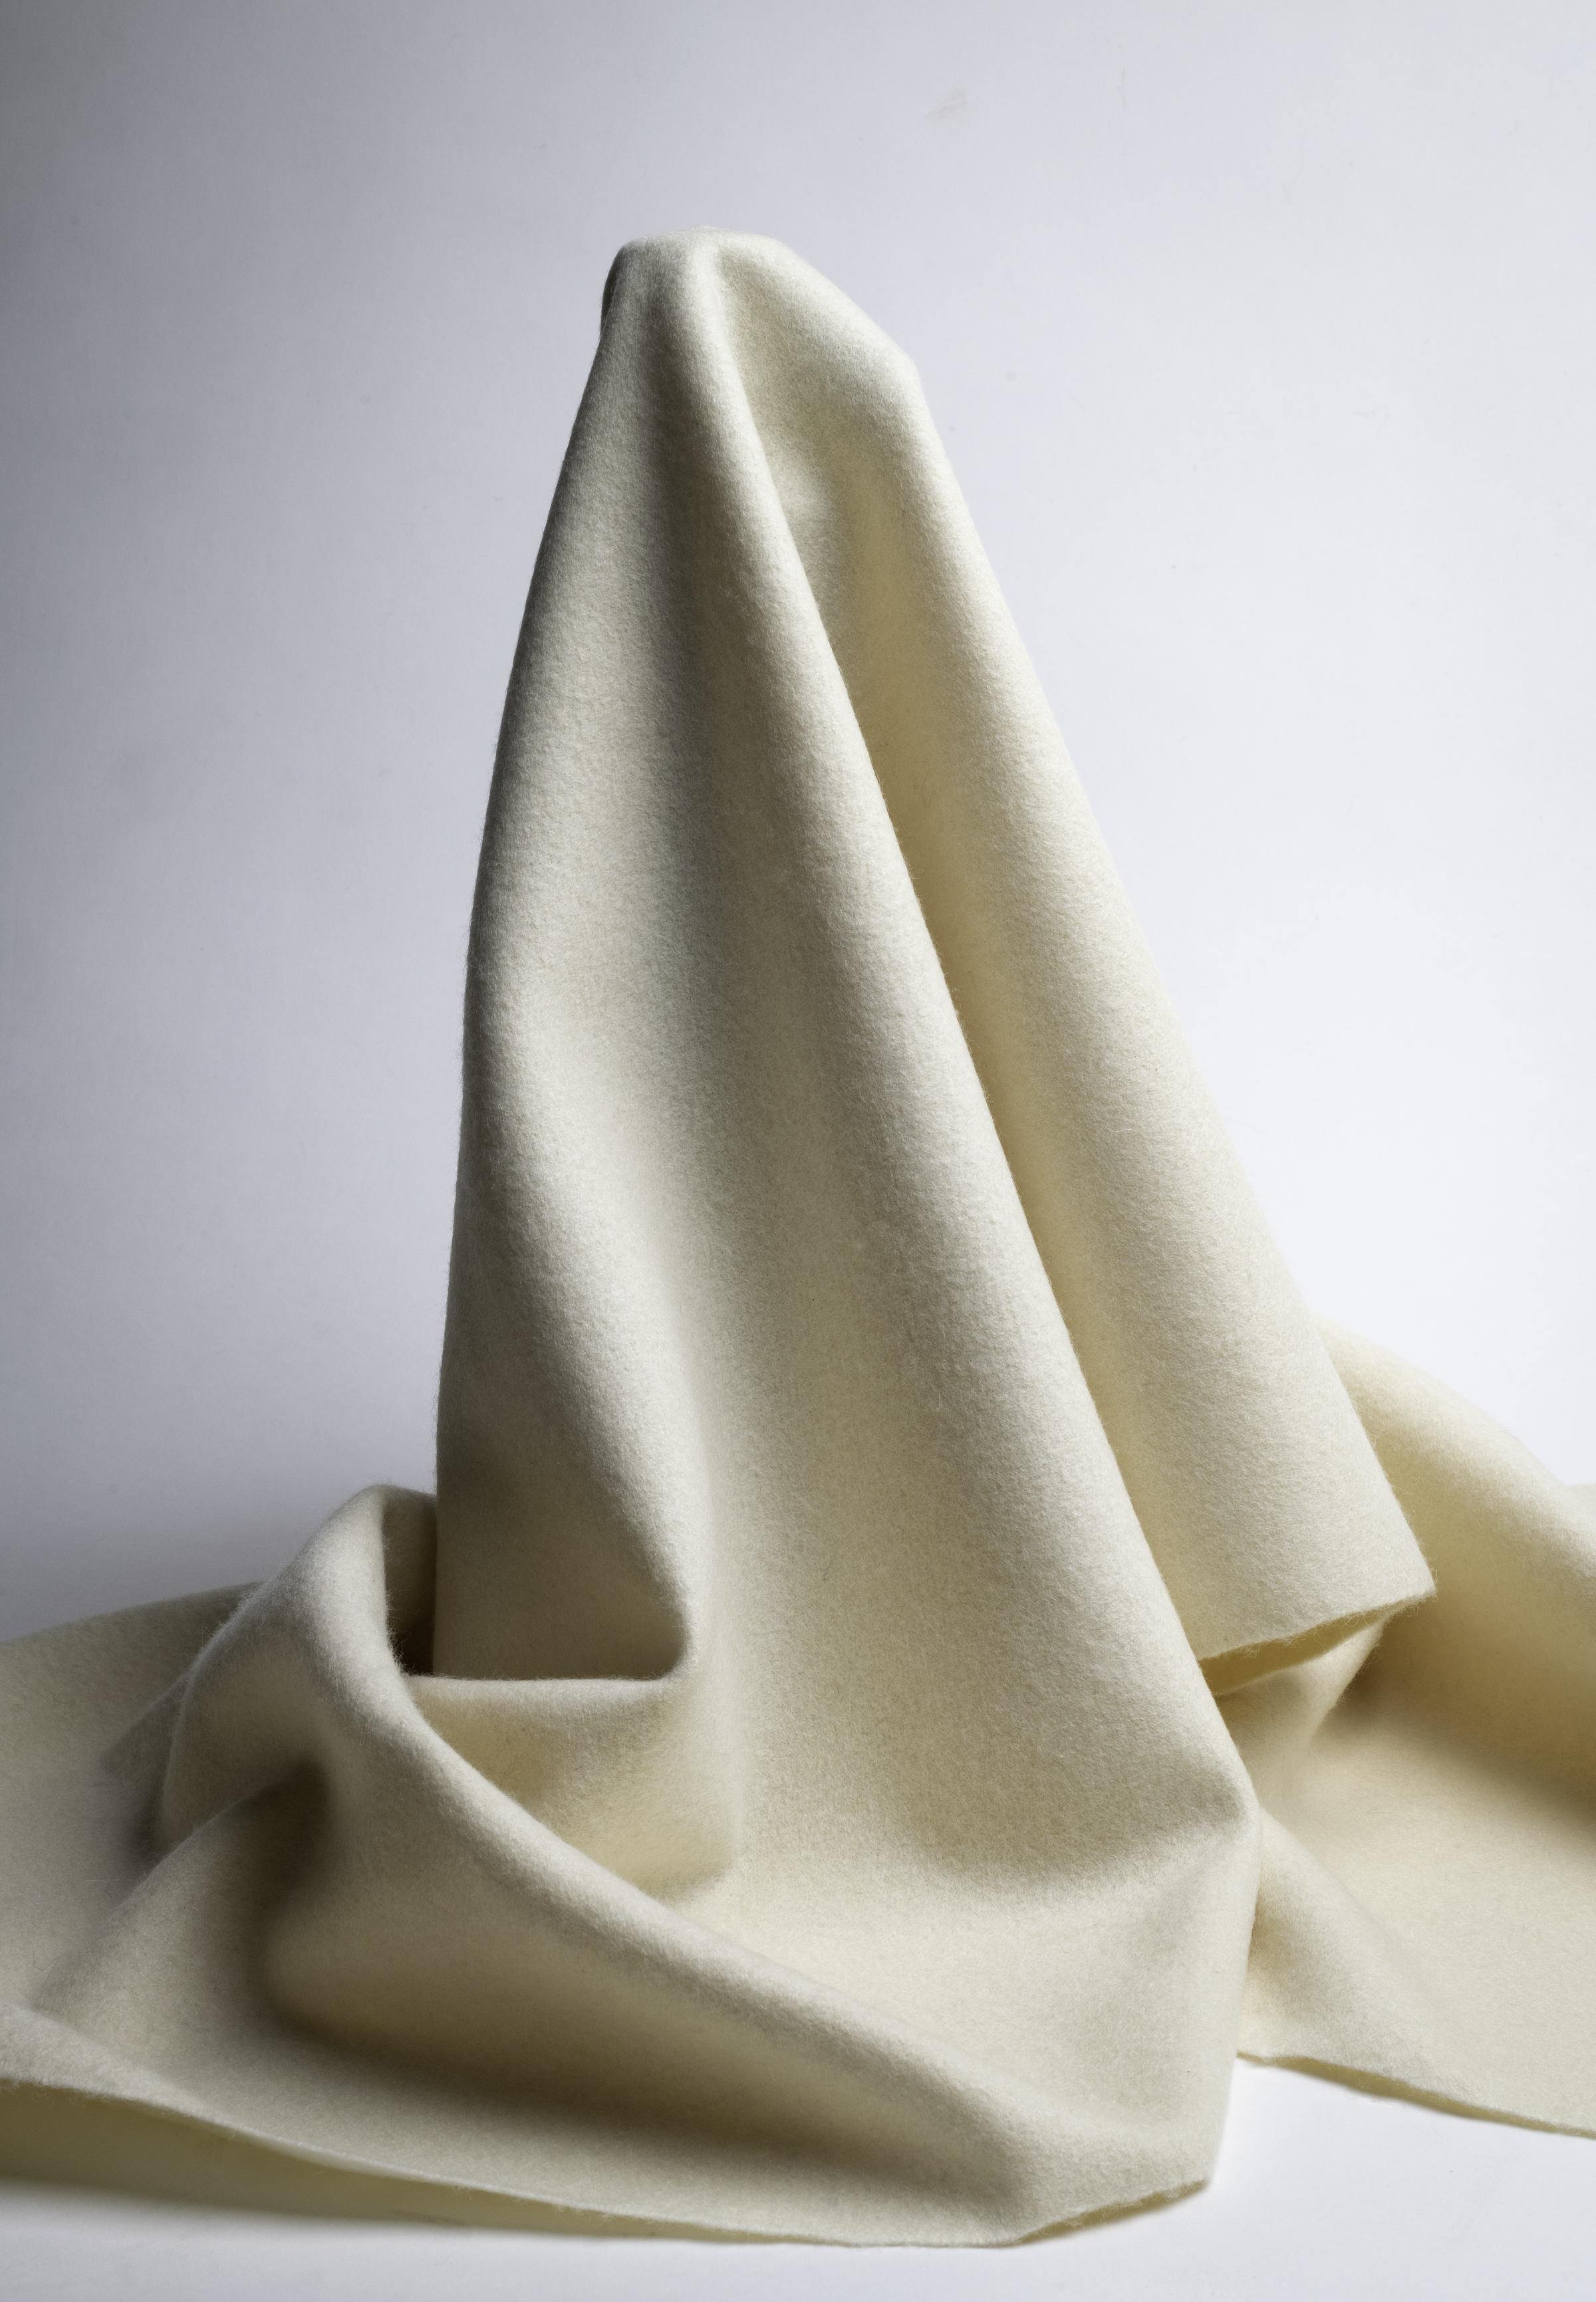
Fulled cloth, photographed by the amazing Jim Schneck at Winterthur.
A year ago at this time I was just wrapping up my experiments in fulling in the wilds of Vermont. Now, at long-ish last, my Master’s thesis, “‘Milled Fit for Trowsers’: Toward a Fuller[‘s] Understanding of Cloth Finishing in the Mid-Atlantic from 1790 to 1830,” is not only done (that was true last April) but up online! and accessible to you! for free! through the University of Delaware’s online portal:
My 1920 undies, with my cotton jersey union suit worn beneath my corset.
I posted recently about the outer-most layer of my 1920 mill worker outfit. Here’s a post about the inner-most layer. I’ve gotten a lot of questions about this garment and how I made it; hopefully this will address them.
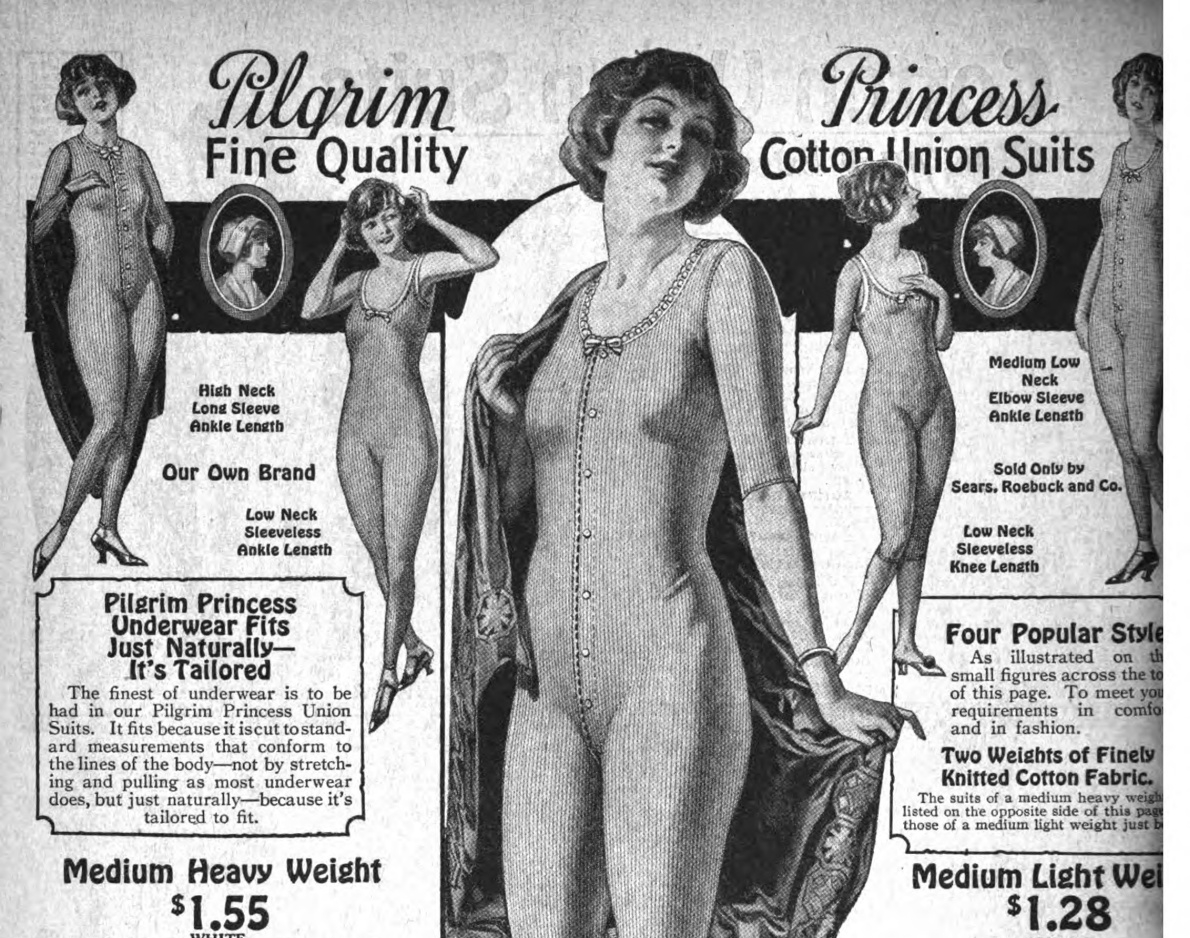
As I started my research for this project, I spent some time digitally flipping through old Sears and Roebuck catalogs (1918, 1922, 1923). Among other things, I was hoping that activity would help me get a better handle on all of the various undergarments which composed the base layers of women’s wardrobes at the time and which I frankly find to be fairly overwhelming. In doing so, I stumbled upon advertisements for Pilgrim brand union suits for women (“Pilgrim Princess” being by far my favorite heading in the entire catalog). It appeared that a one-piece wool or cotton jersey suit was one of the many options for women’s underwear at that time. As I scoured the internet for extant examples of such a garment, I became intrigued by the engineering that went into these suits and decided that I wanted to try my hand at making one.
Knit union suits were recommended by Mark Brooks Picken in her wardrobe advice for college girls. While co-eds certainly represent a different socio-economic demographic than mill workers, many female mill workers would have been around the same age as college girls, and would have benefited from comfortable underwear which didn’t hinder their movement. Plus, the union suits weren’t that expensive, so I thought it seemed like a reasonable choice of undergarment for the impression I was building.
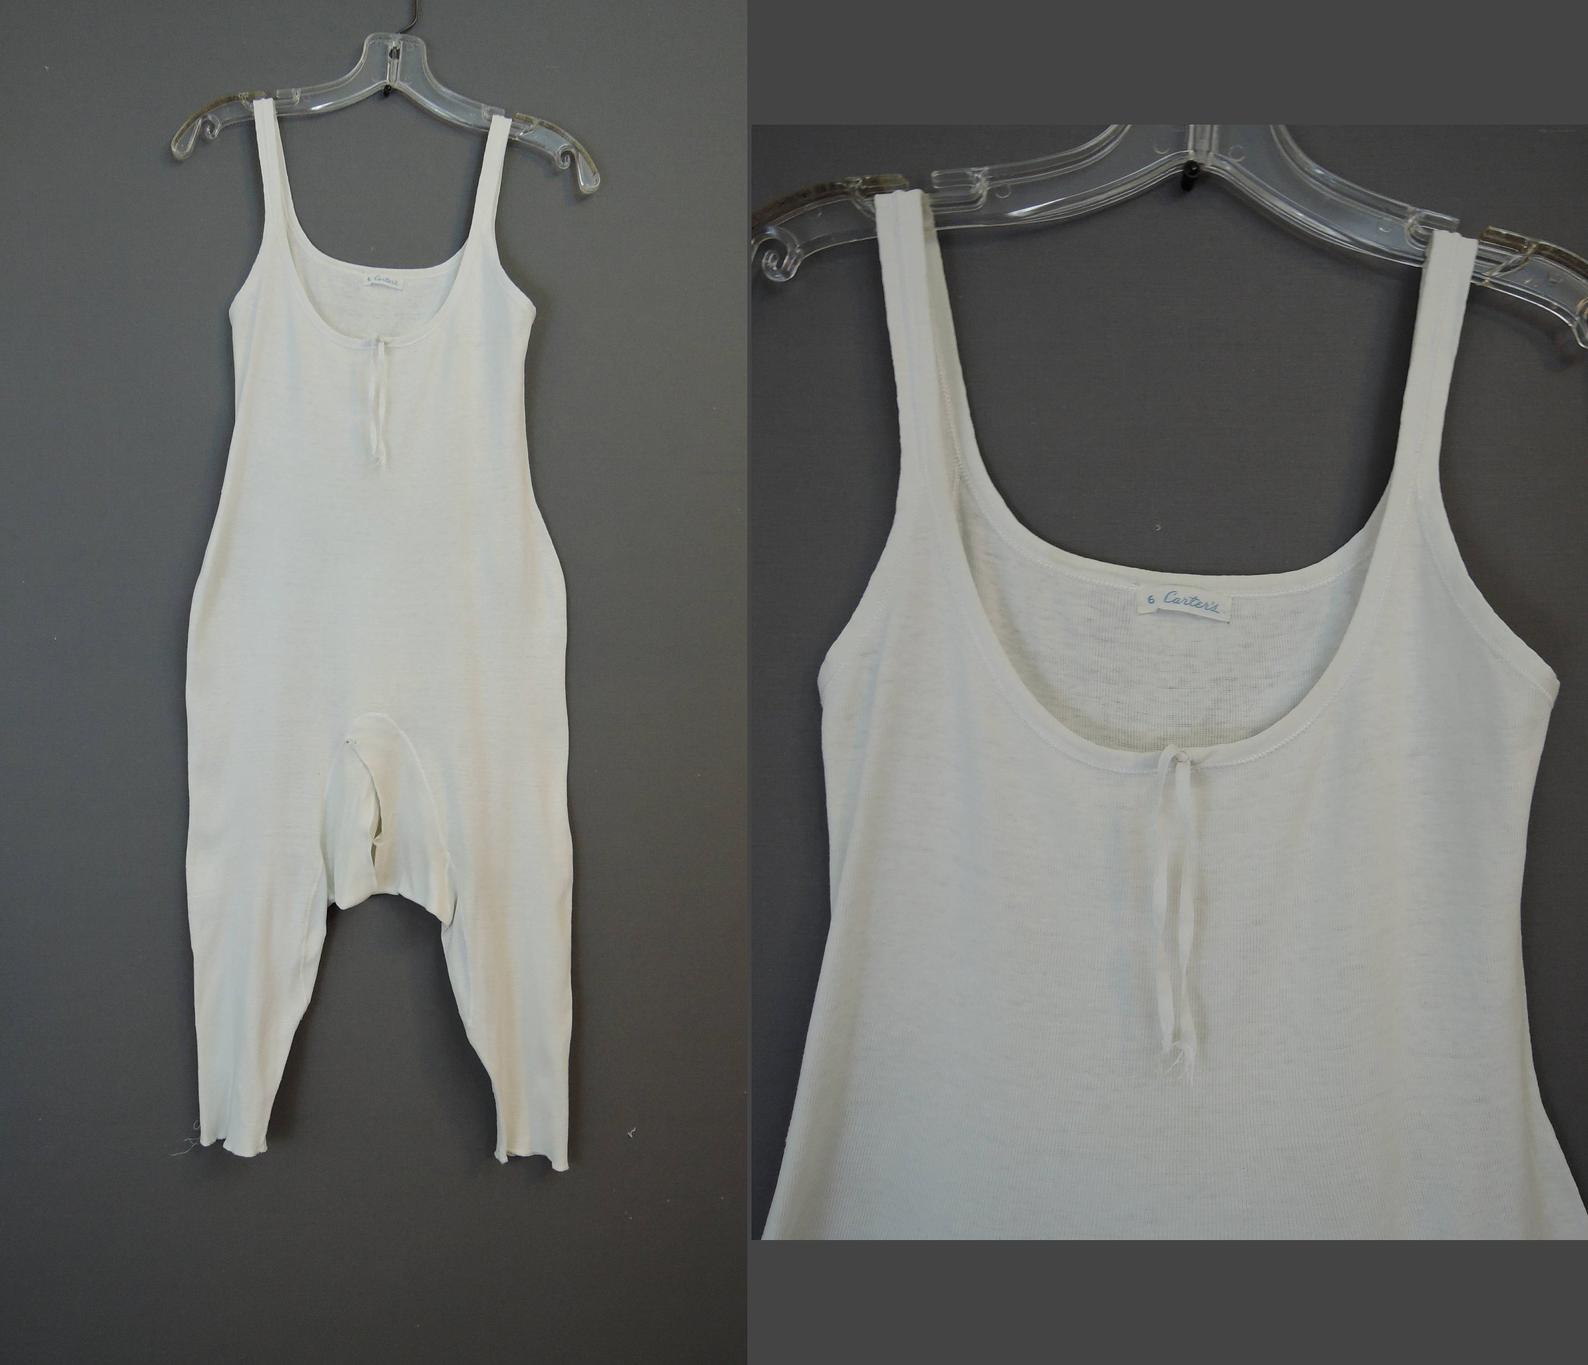
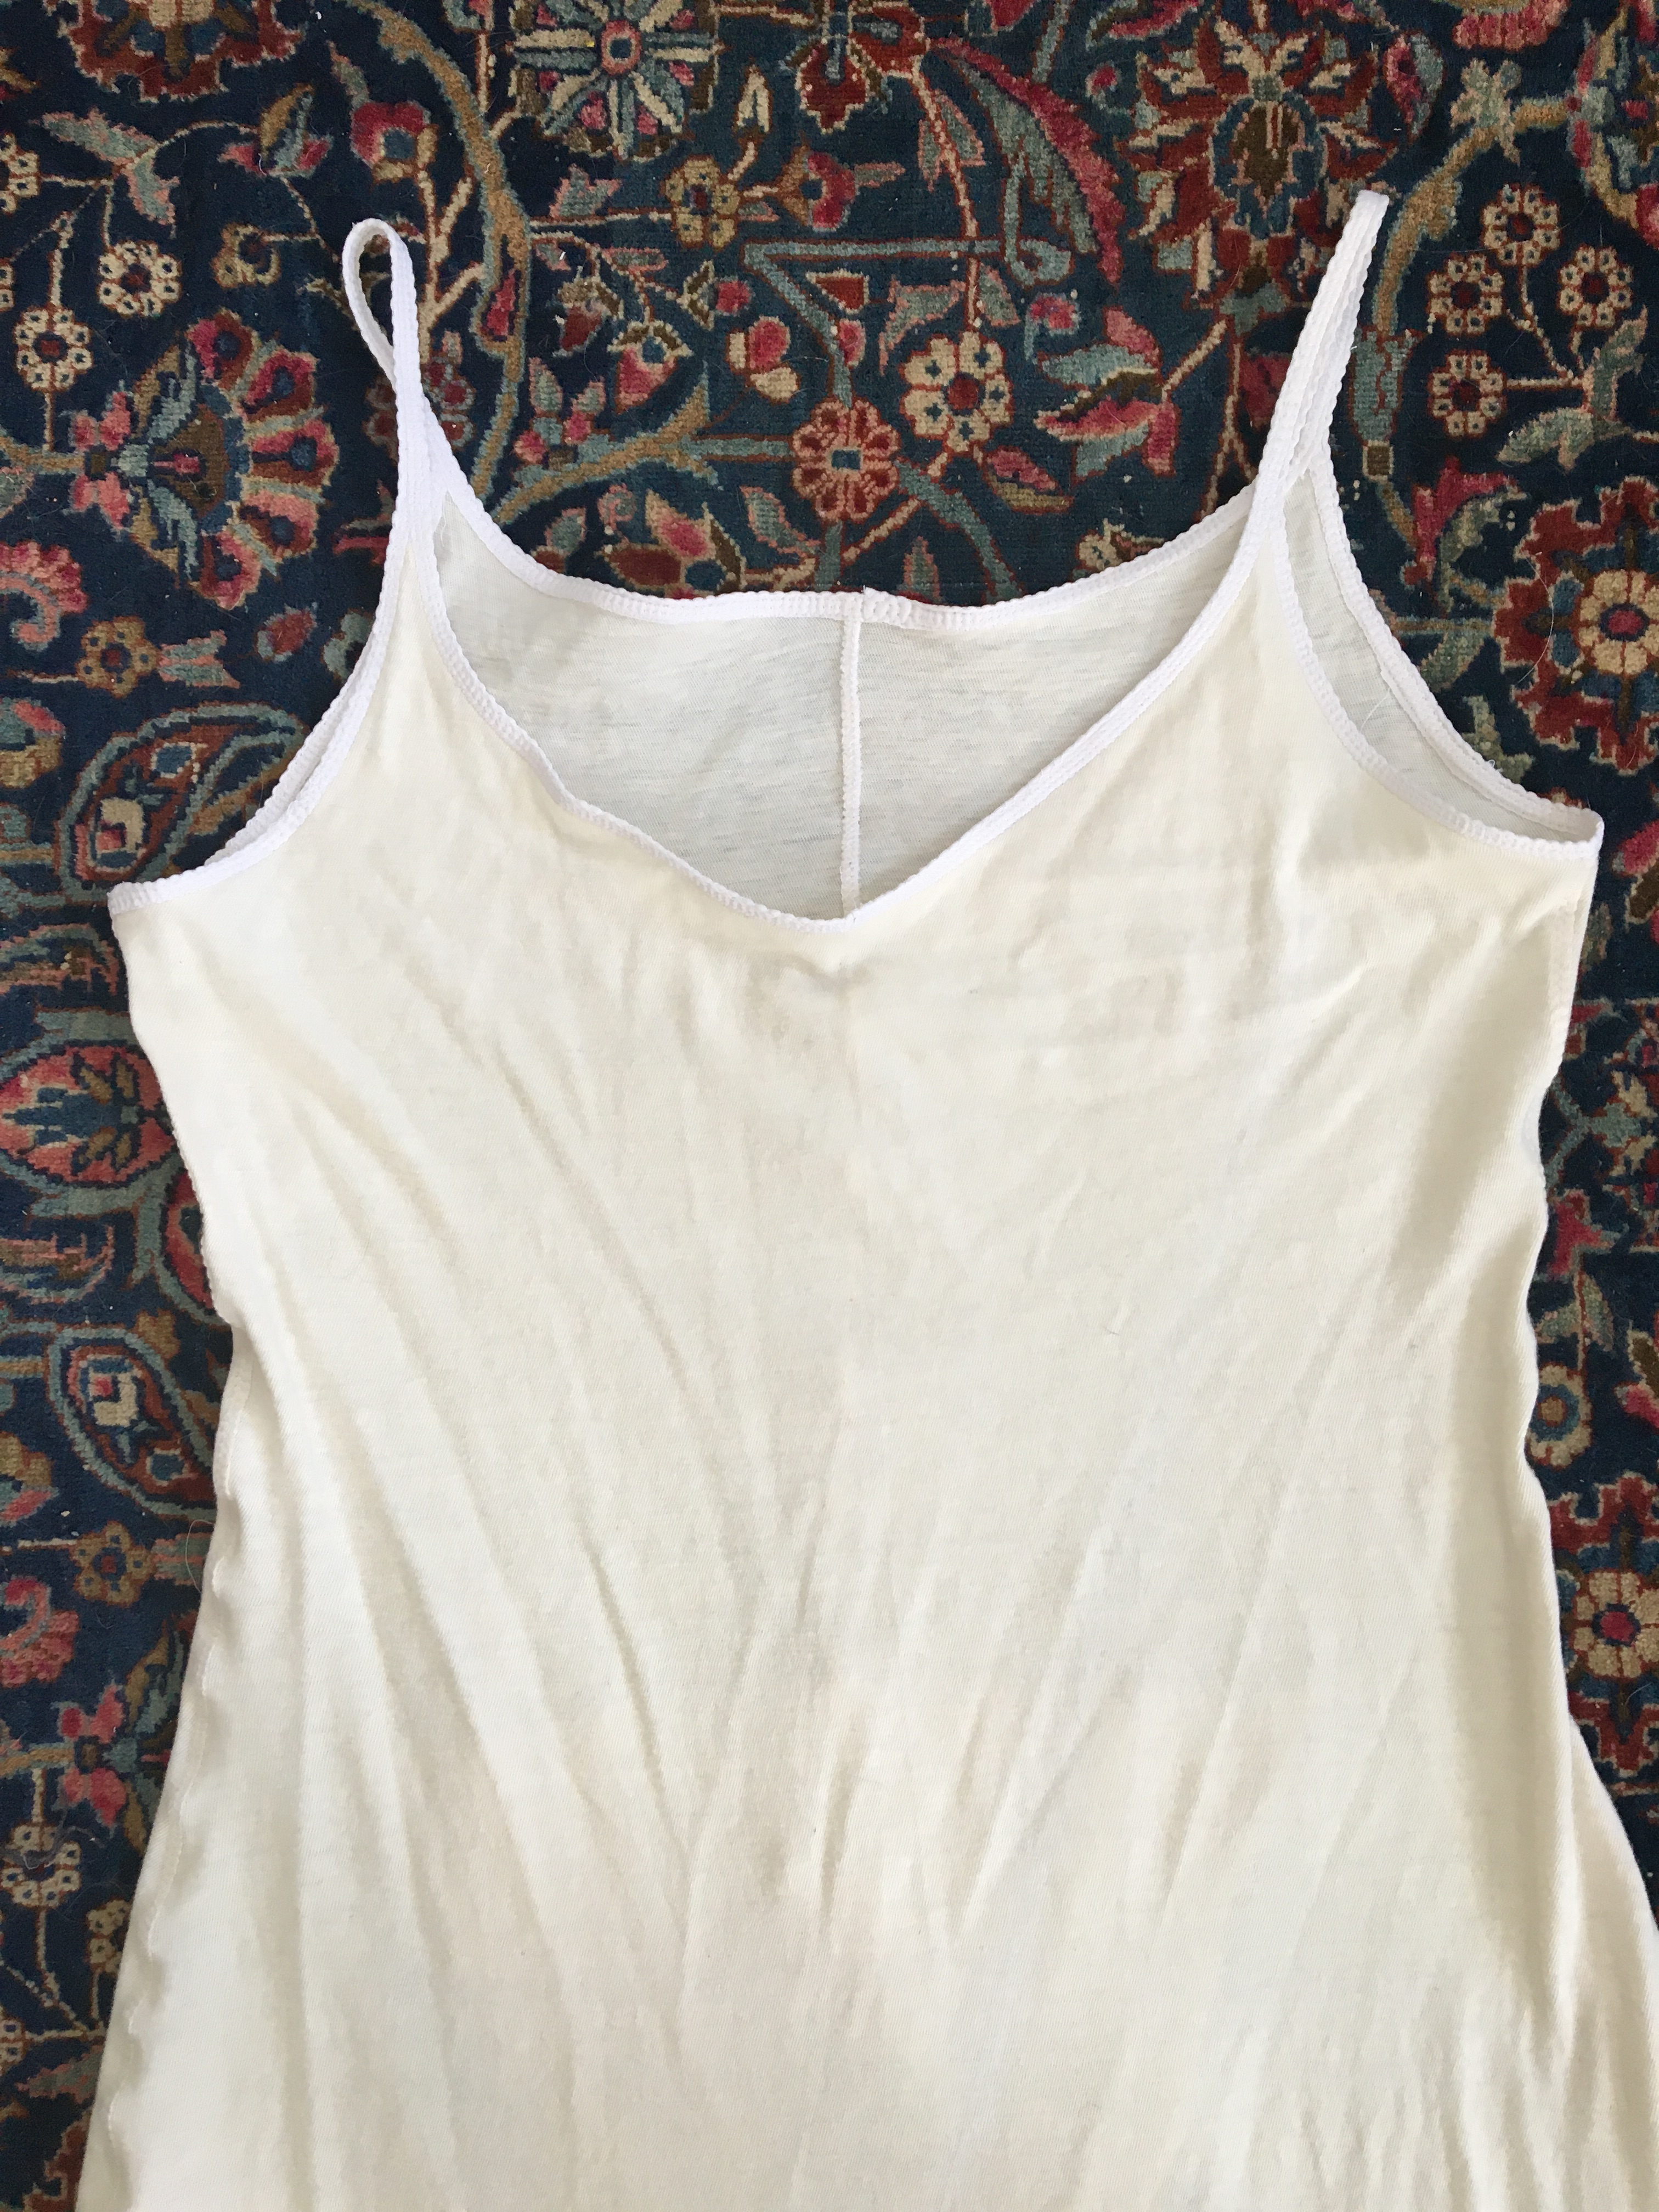
I based the neckline and leg length of my union suit on this one, for sale on Etsy and dated to the 1930s, but of a style clearly represented in ads in the 20s.
I was able to find examples of many different styles of union suit for sale by vintage clothing dealers, which proved to be an invaluable source for reference images. Because I wanted my suit to be as versatile as possible, I decided it would be sleeveless and would have legs that ended just below the knee.
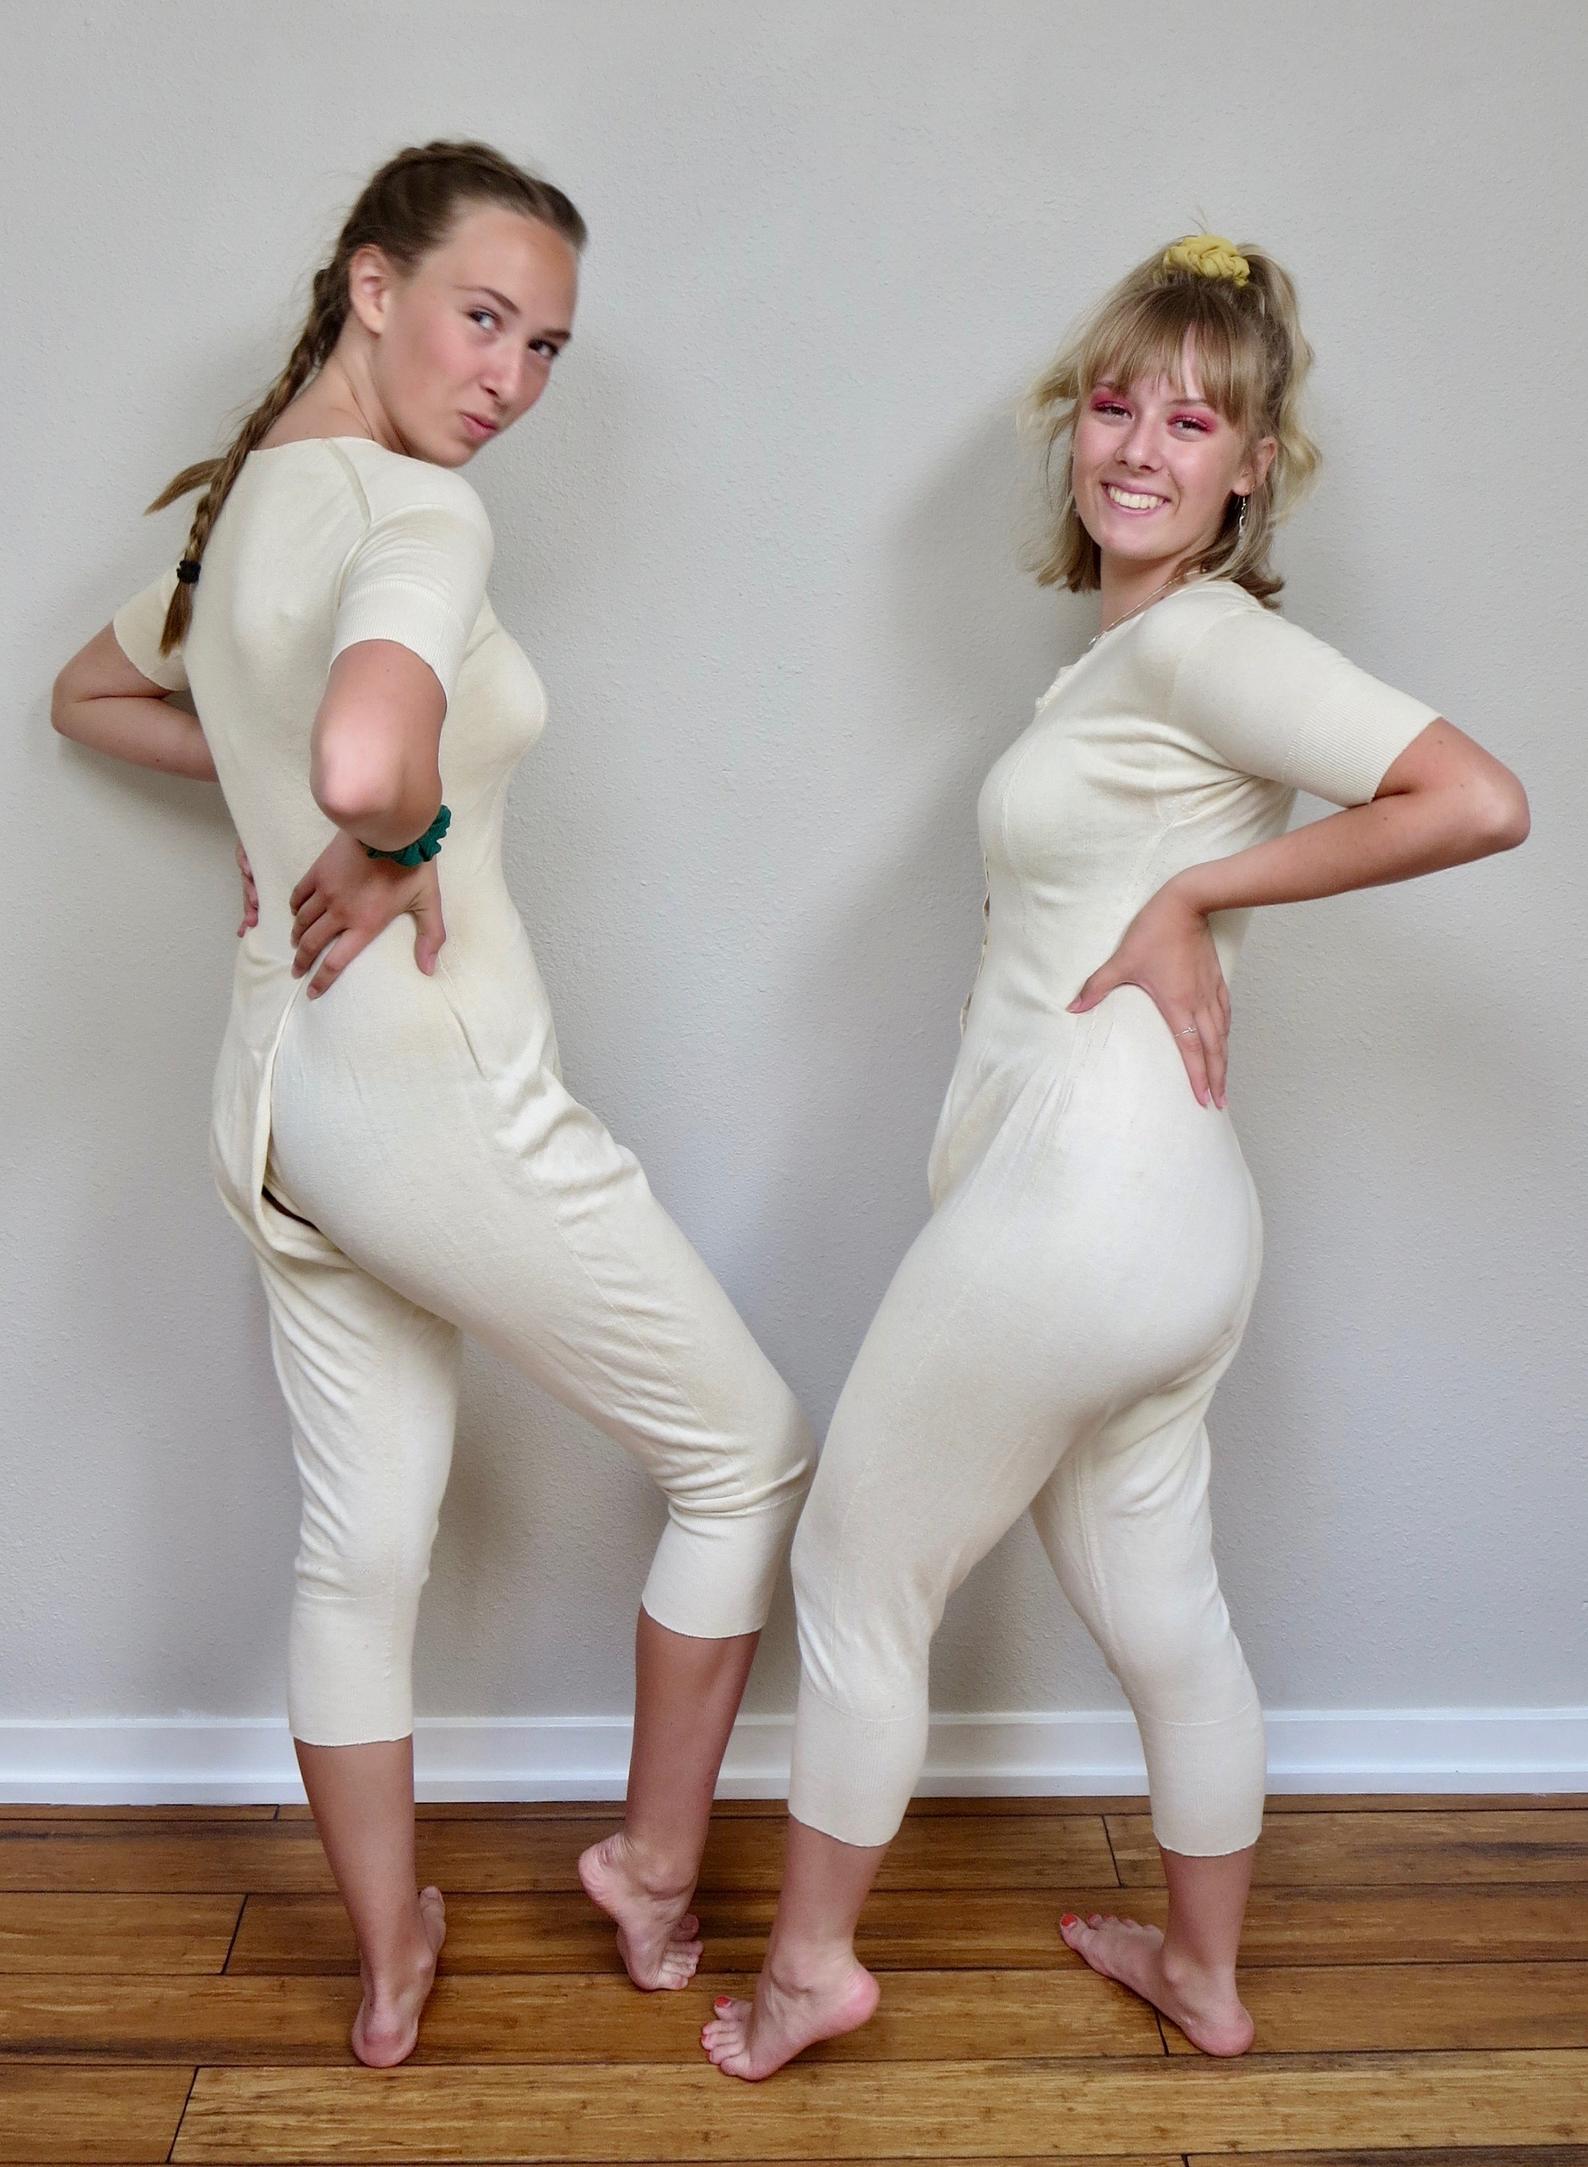
A pair of vintage short-sleeved wool union suits for sale on Etsy with knit-in shaping (click through for more photos)
Some of the extant suits I was able to find on Etsy and Instagram, like the two modeled above, were shaped as they were knit. These all seemed to be wool though, which was fine with me because I didn’t have the technology to make my suit like that. Instead, I would cut and sew mine from cotton jersey.
The cotton suits were still knit to shape in one way, however: they were made from cloth knit in the round, and they utilized the tubular nature of the cloth to eliminate side seems on the outsides of the legs. The material that I had was also tubular, but its circumference was too large for my needs, so I started by cutting it down to a 44” tube. I decided to position the seam at center-back, where it would be least noticeable.
Next, I fitted the body of the suit by cutting out crescent shaped pieces at either side of the torso and finished the neckline and armholes. I did all of this before working on the legs or crotch because I knew that was where the real engineering challenge would lie, and I wanted to be able to try on the suit as I fitted the legs.
I based the crotch of my union suit off of this example. (Click through for more images)
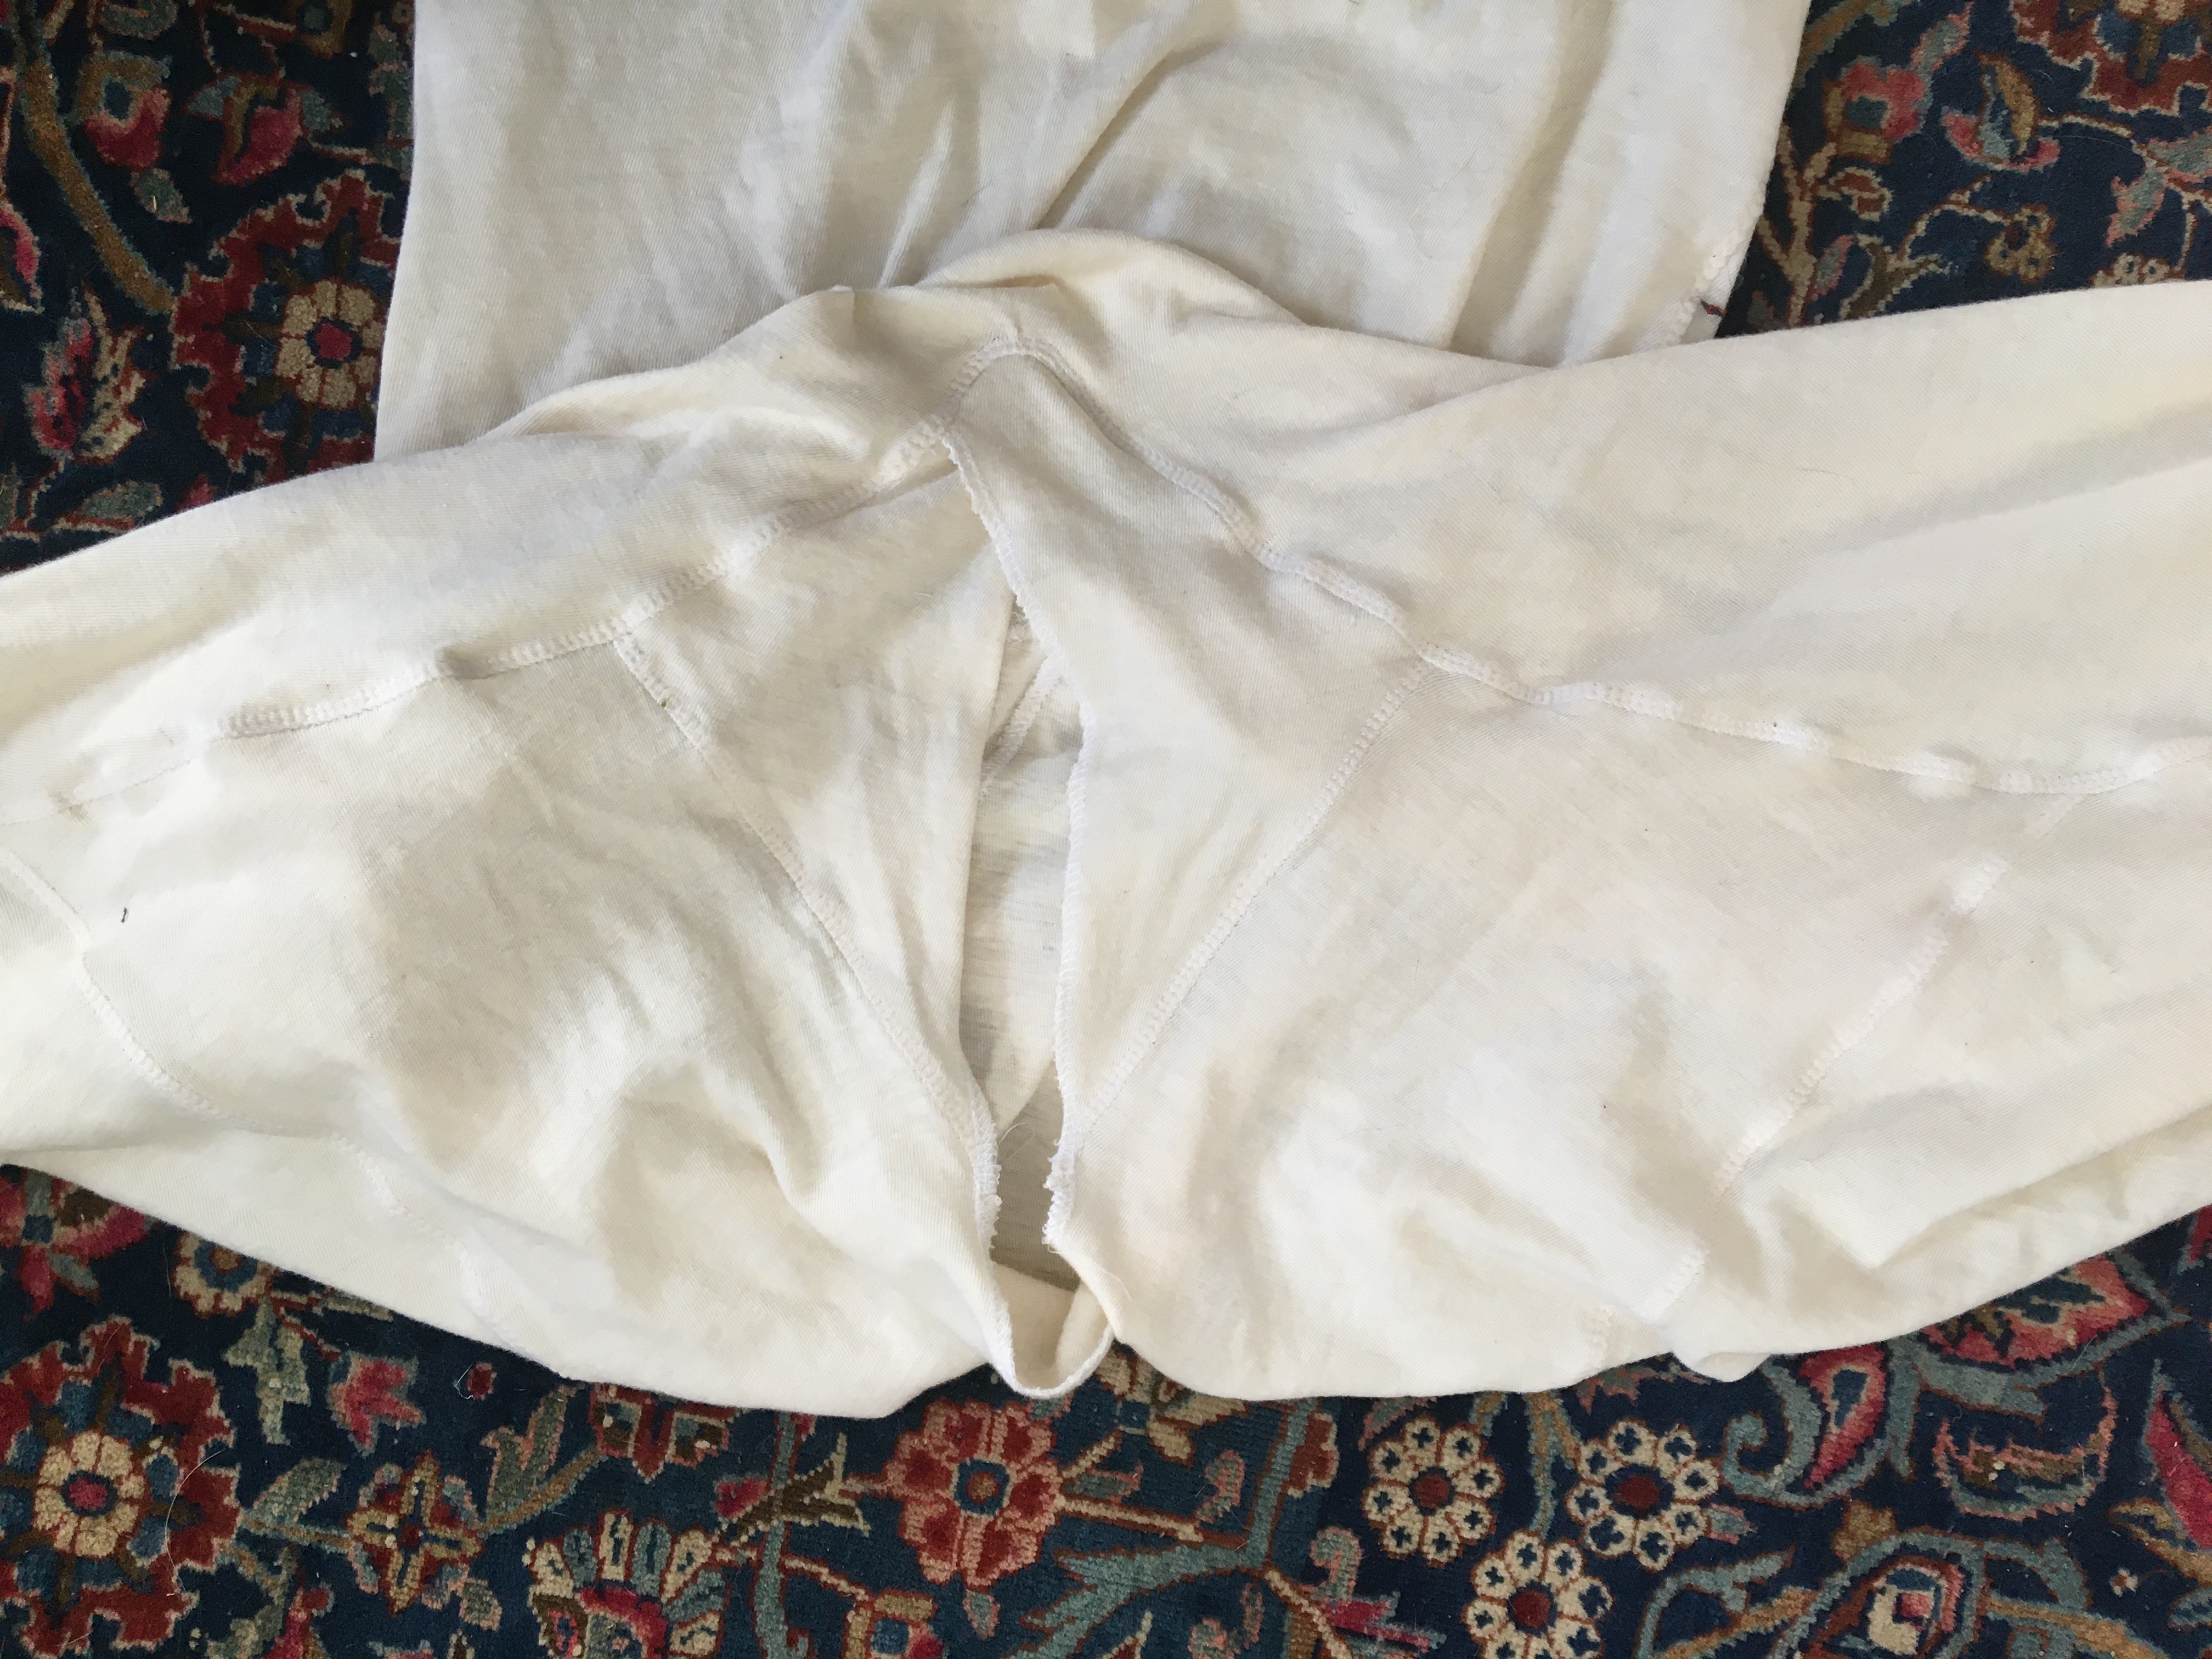
Because the body of the suit was made from a single tube of fabric, to make the crotch I had to add in additional material for a crotch gusset. But not only did the crotch area require extra material to go around the thighs and compensate for the seat, it also had to allow the wearer to go to the bathroom without getting fully undressed (a practical impossibility in one-piece underwear). This was facilitated by a split crotch, with two overlapping gusset panels which the wearer could pull apart to go to the bathroom.
The original garments I had found engineered this in a variety of ways (nearly every example I’ve shown here handles it differently – the one I chose to copy is shown at left). I chose to add two crotch gusset pieces on each side: one forming the rear part of the crotch (the “butt flap”) and also serving as a gusset to widen the leg for the upper thigh, and a second piece for the front portion of the crotch.
The finished crotch of my union suit (with the front pointing up and legs splayed) showing the piecing of the gussets and the crotch opening.
Front view of the finished suit
Back view of the finished suit
The finished garments is remarkable comfortable, as well as practical. It fits well underneath the corset I made for this outfit, and I can even go to the toilet in in, though I will admit to it being slightly complicated.


")

 I was hoping that at this time this spring I’d be taking my mill girl presentation to libraries around the state, but alas! Instead I am confined to the types of work I can do at home as we all wait out the coronavirus pandemic. However, this does mean that I have time for another project I’d been meaning to do: putting together a list of the online costuming resources I gathered while working on my working-class mill girl impression circa 1920.
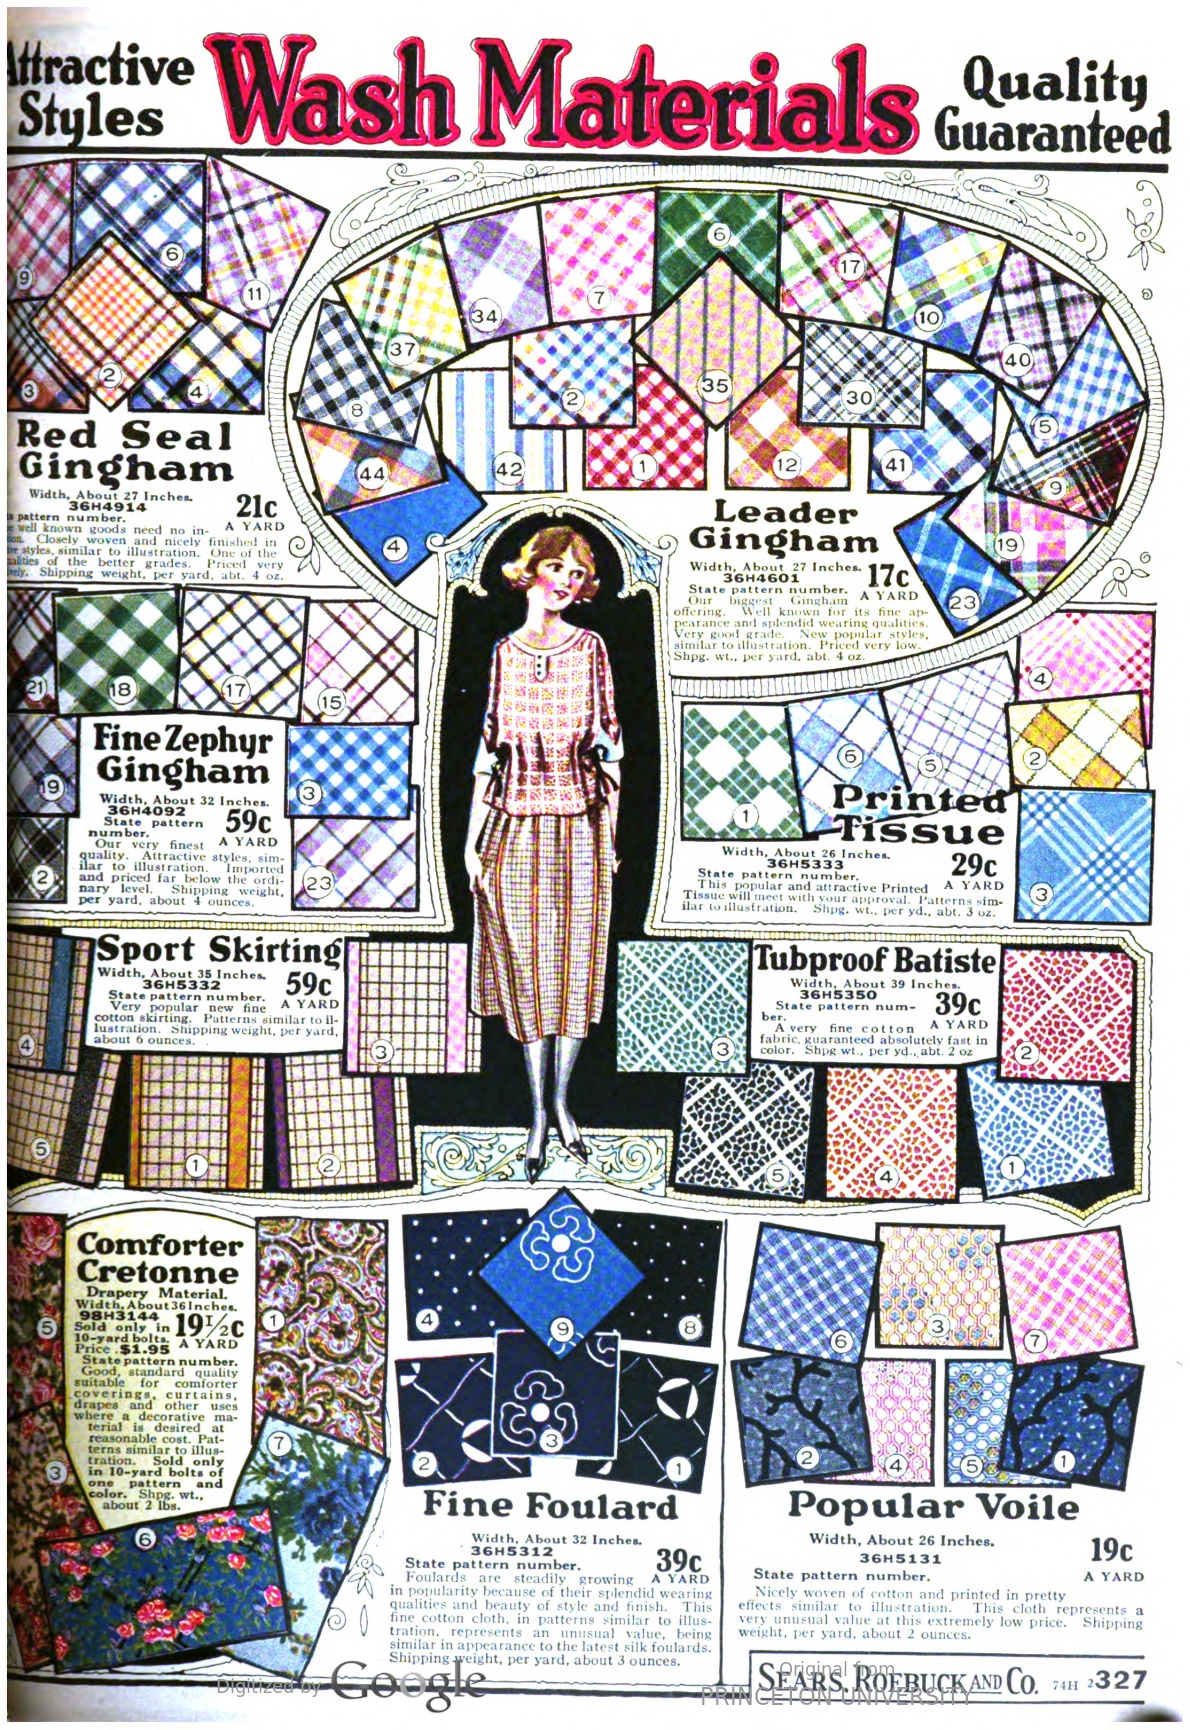


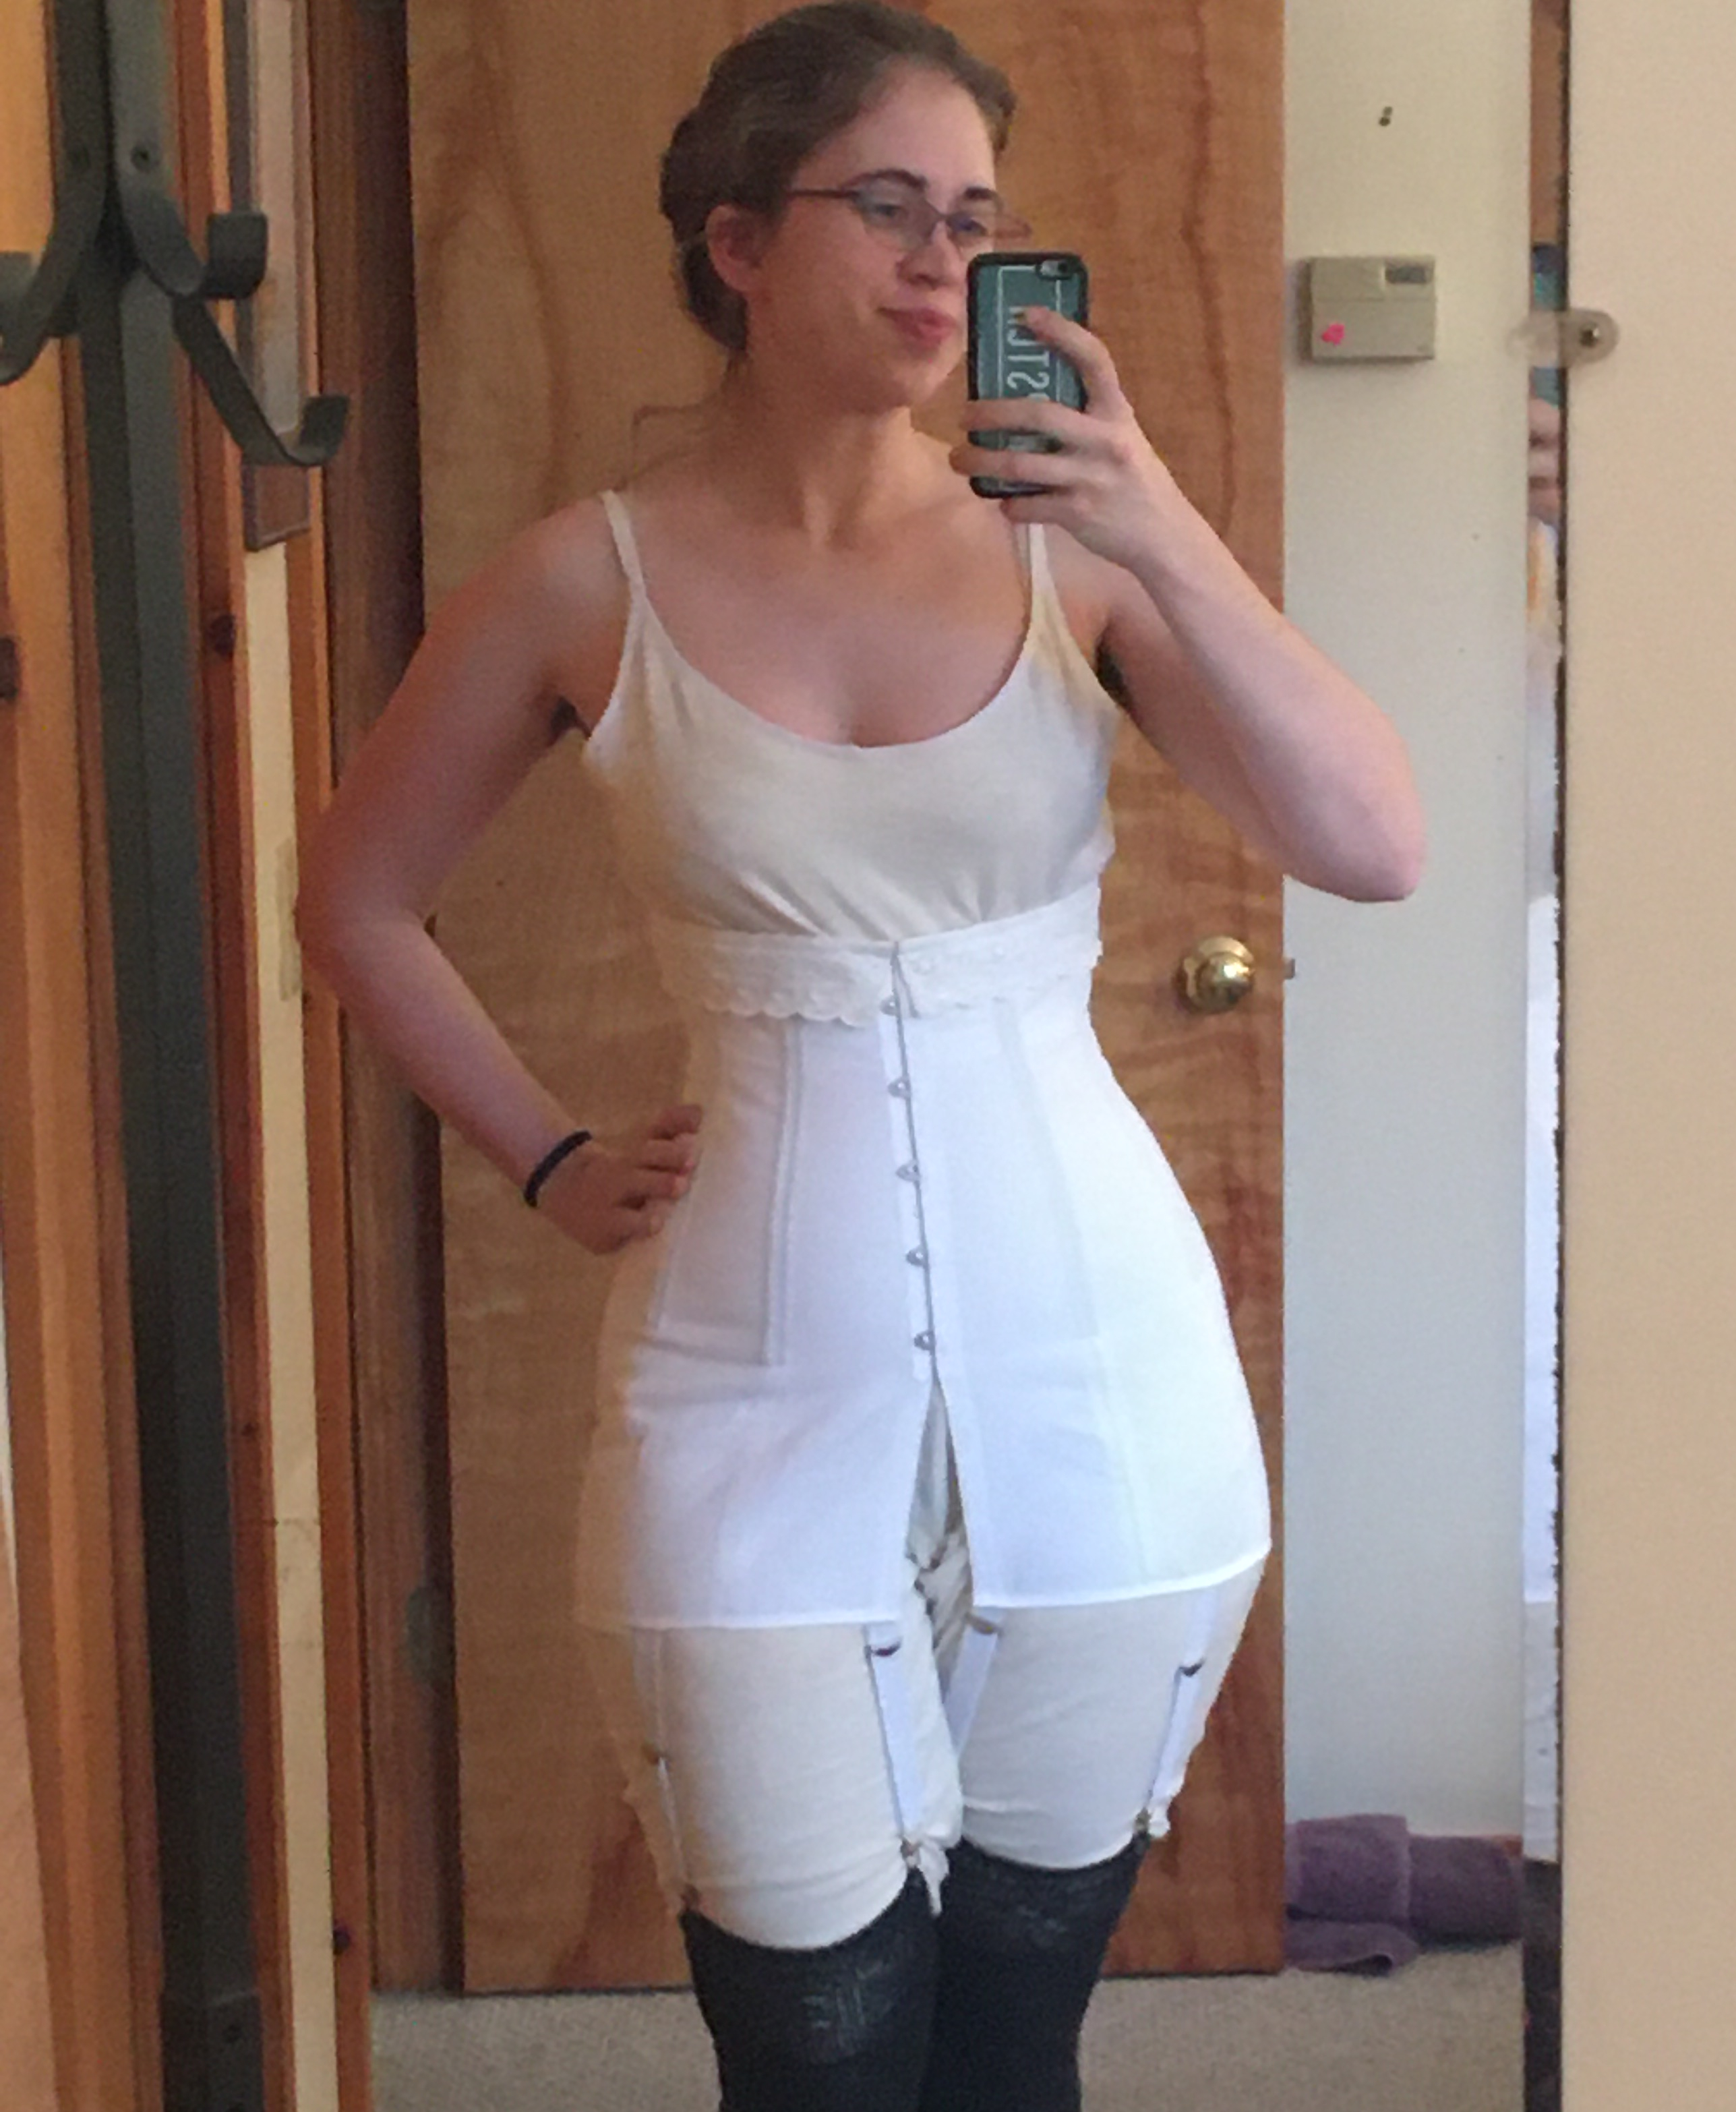


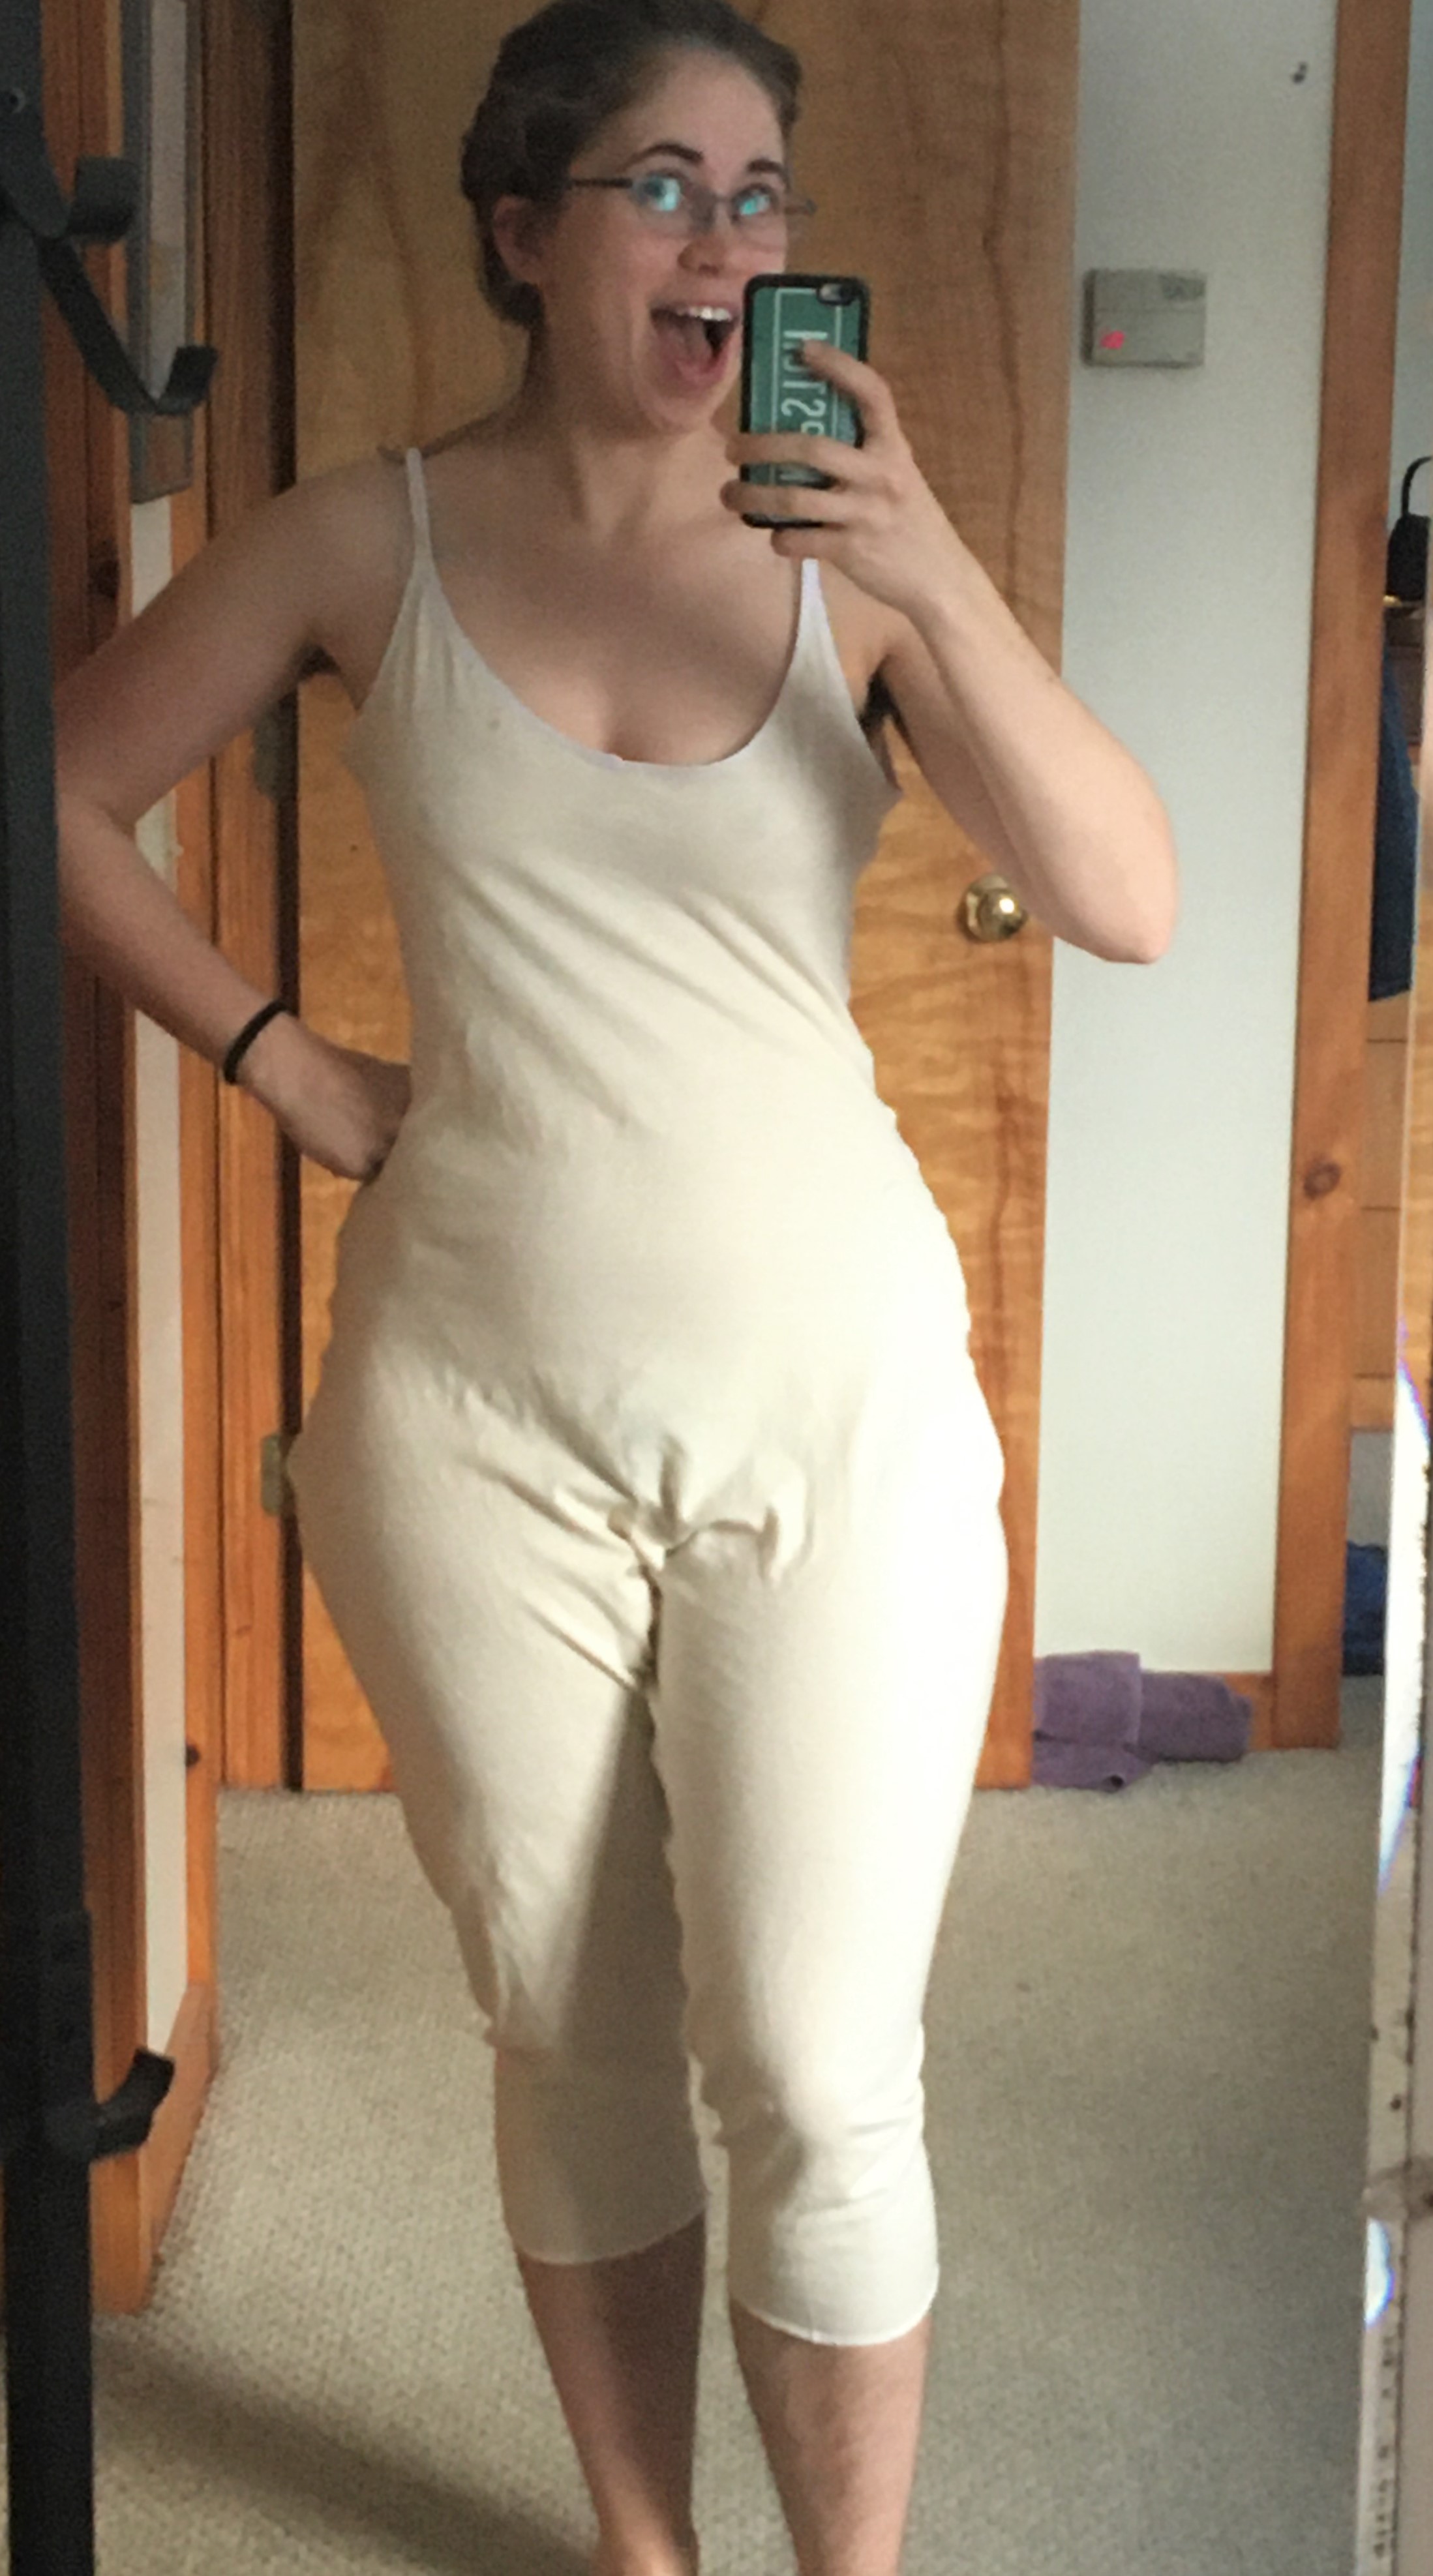 The finished garments is remarkable comfortable, as well as practical. It fits well underneath the corset I made for this outfit, and I can even go to the toilet in in, though I will admit to it being slightly complicated.